-
Terraform command 'init' failed with exit code '1'
I'm setting up a new GitHub repo to demonstrate using Terraform with Azure Pipelines via the CLI and I hit a weird error right at the start. I was using Jason Johnson's Azure Pipelines Terraform Tasks extension like this:
- task: TerraformCLI@2
  inputs:
    command: init
    workingDirectory: "$(System.DefaultWorkingDirectory)/v2"
    backendType: selfConfigured
    commandOptions: -no-color -input=false
    allowTelemetryCollection: false
and it kept failing with the error:
/opt/hostedtoolcache/terraform/1.6.4/x64/terraform version
Terraform v1.6.4
on linux_amd64
+ provider registry.terraform.io/hashicorp/azurerm v2.99.0
+ provider registry.terraform.io/hashicorp/random v3.5.1
/opt/hostedtoolcache/terraform/1.6.4/x64/terraform init --input=false --no-color
Usage: terraform [global options] init [options]
...
Terraform command 'init' failed with exit code '1'.
I tried all sorts of things. It looked identical to other pipelines I had working (and ones I'd seen online). Was there a weird invisible character being passed on the command line? Out of desperation I copied the
commandOptionsline from another pipeline (which looked identical except that the arguments were in a different order).But when I looked at the diff, not only were the arguments different, I realised that the dashes were different too! Terraform CLI arguments use a single dash, not a double dash. So the correct line is
commandOptions: -no-color -input=falseIn hindsight, I realised that this is the first pipeline I've written on GitHub using the Terraform CLI (e.g. not in a work context) and so I did it manually, rather than copy/pasting from an existing (working) pipeline. A pity Terraform doesn't support double dashes, but there you go.
-
DDD Adelaide 2023 done
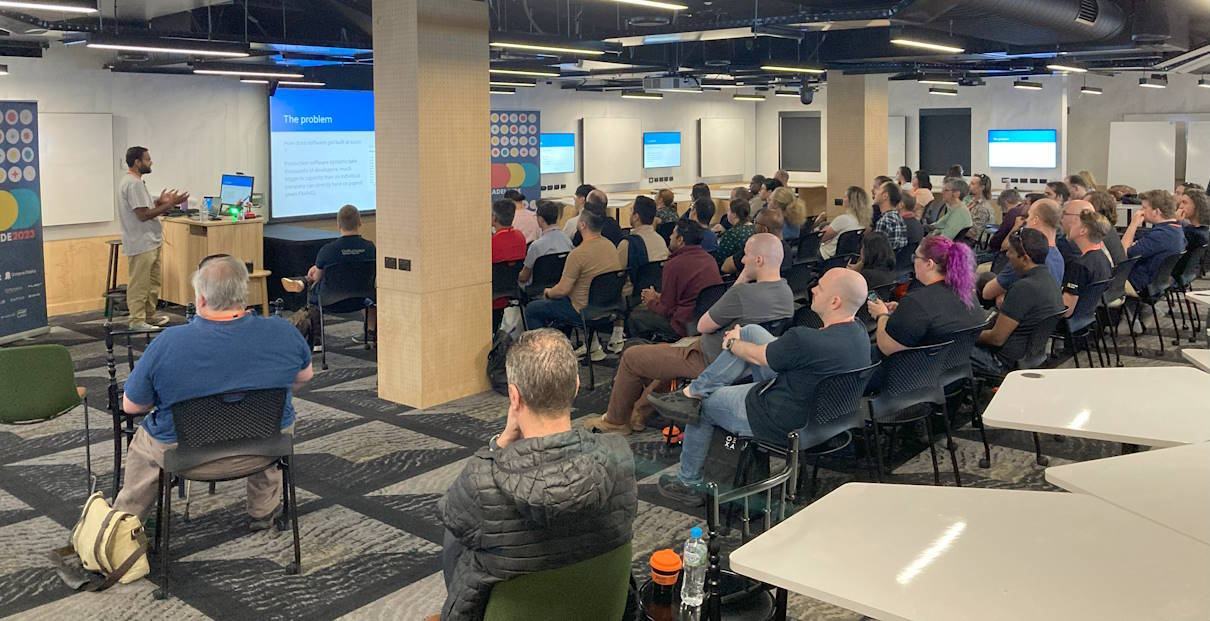
On Saturday we ran DDD Adelaide 2023 - a community-run conference for the software developer community. The preparations and planning for this had begun much earlier in the year, and now everyone could enjoy the fruits of all our work. It was a very early start (7am), arriving at the University of Adelaide to set up with my fellow organising team and volunteers (including my wife and my two daughters). Doors opened at 8am (and continued to be re-opened all day due to the uni's weekend security policy!) and people started rolling in.
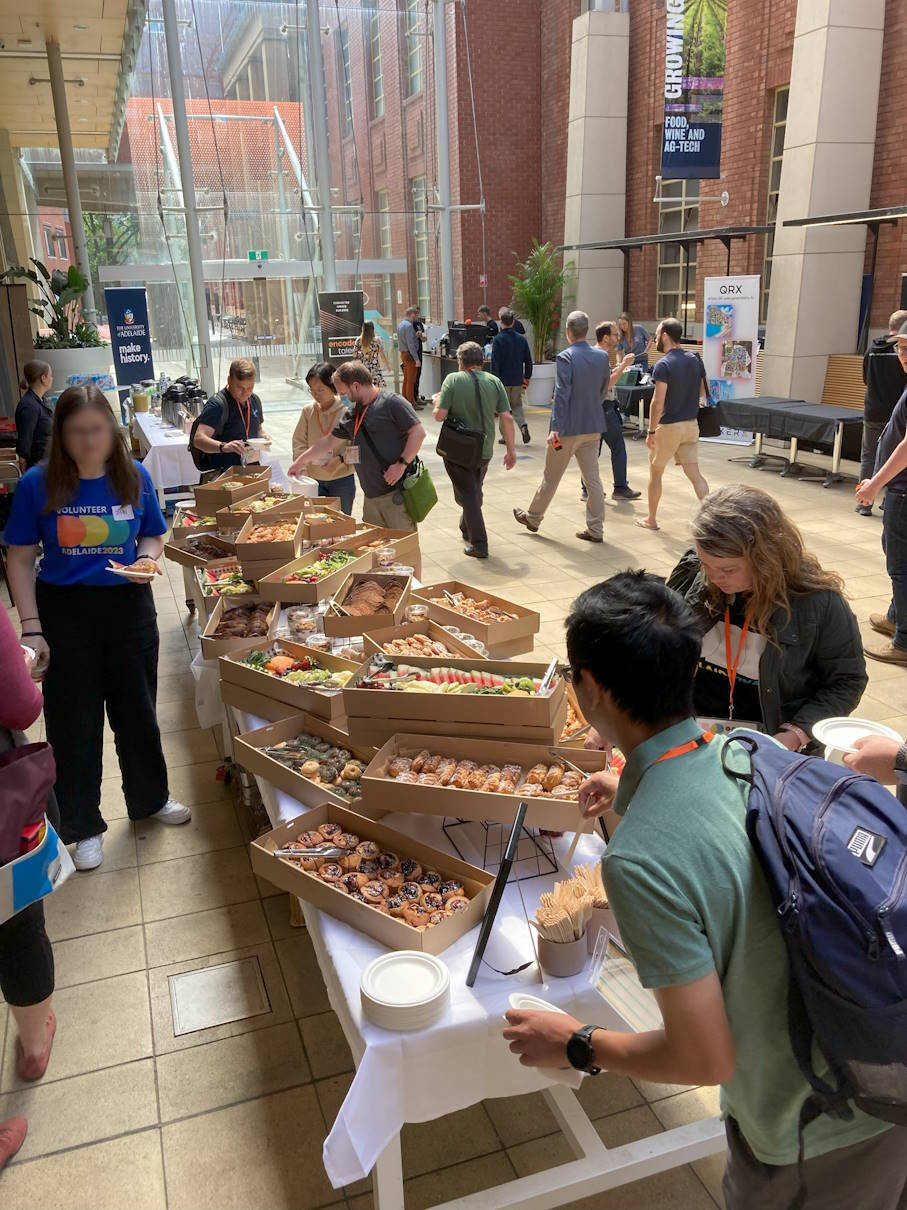
Cargo Catering and B3 Coffee did such a great job in 2019, so it was great to have them back again. One significant change was to move to a larger venue, so we could increase the number of tickets (about 100 more than 2019).

The vibe was really positive all throughout the day, and the weather didn't disappoint either. Aaron Powell's keynote of how getting involved with DDD conferences impacted his career kicked it all off. Then the 3 tracks of speakers ran for the rest of the day, with breaks for morning tea, lunch and afternoon tea.
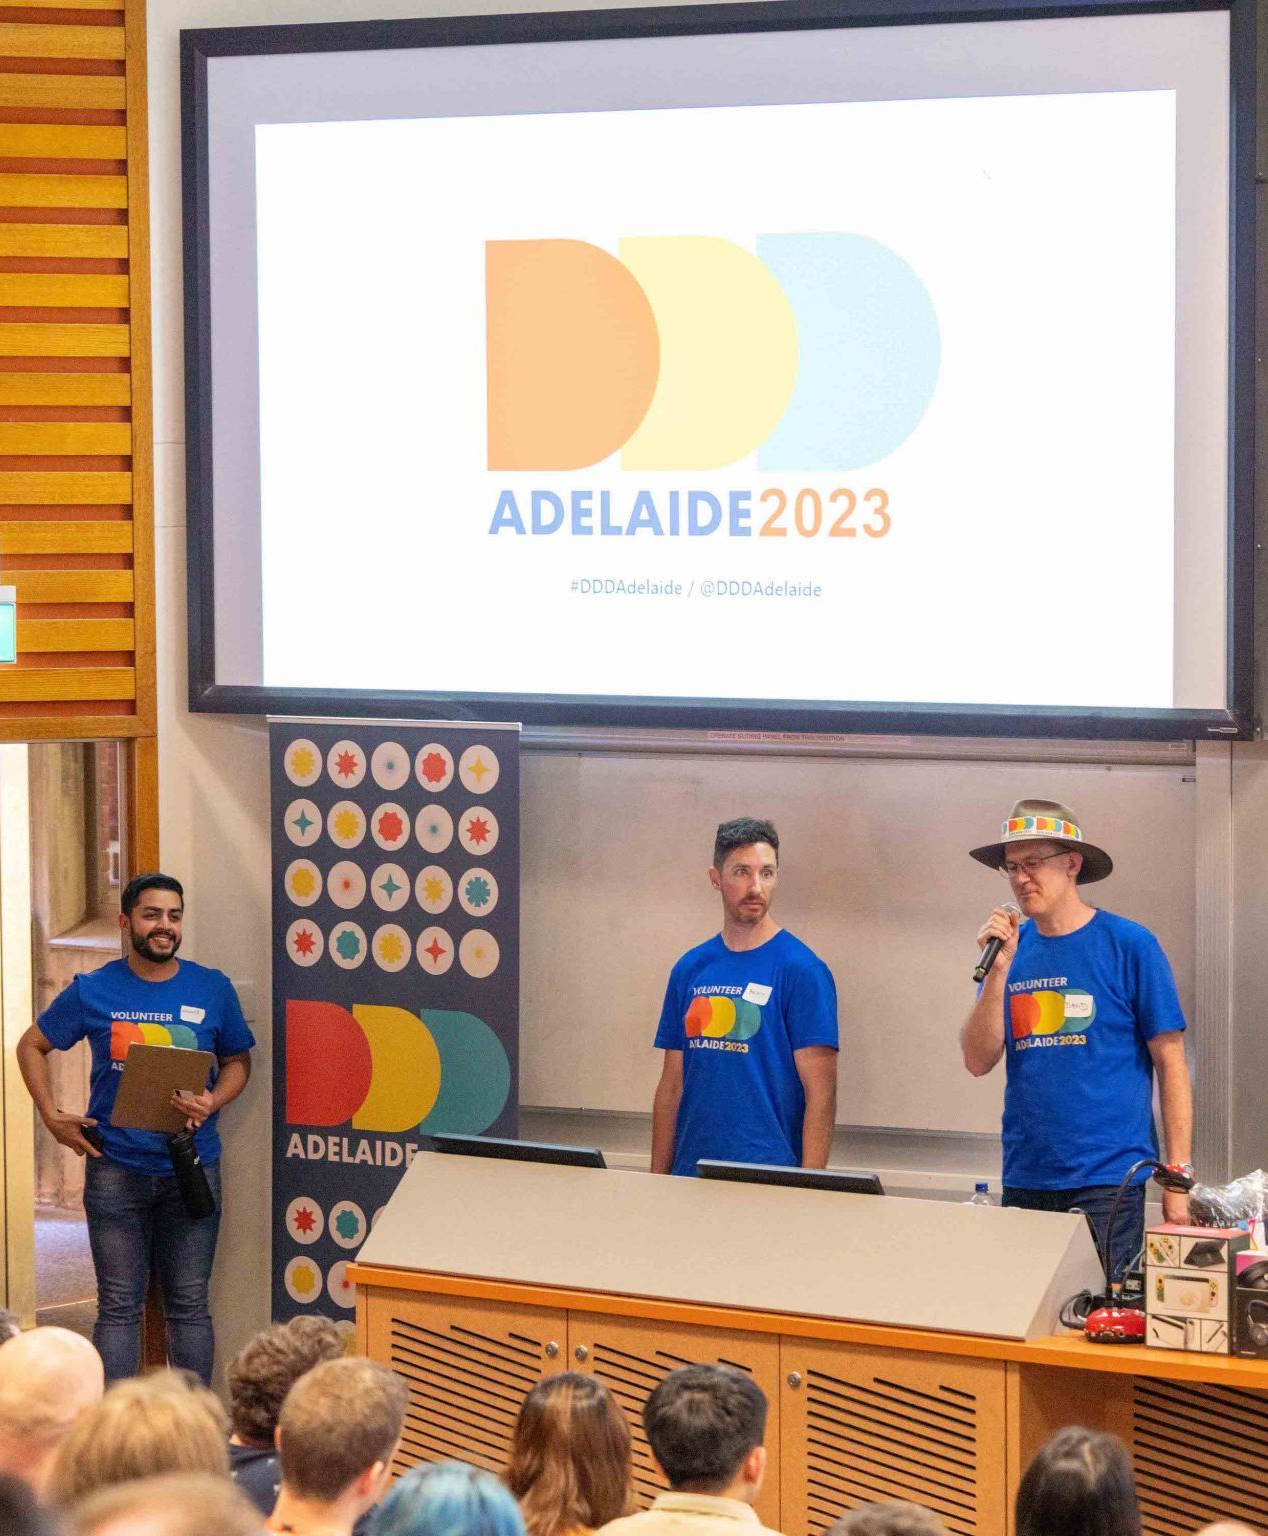
A short wrap up at the end of the day provided the perfect opportunity to thank everyone involved, draw prizes and then some attendees continued the conversations and socialising at a nearby pub.
Of course my Akubra hat made a return too, adorned with DDD stickers 😊.
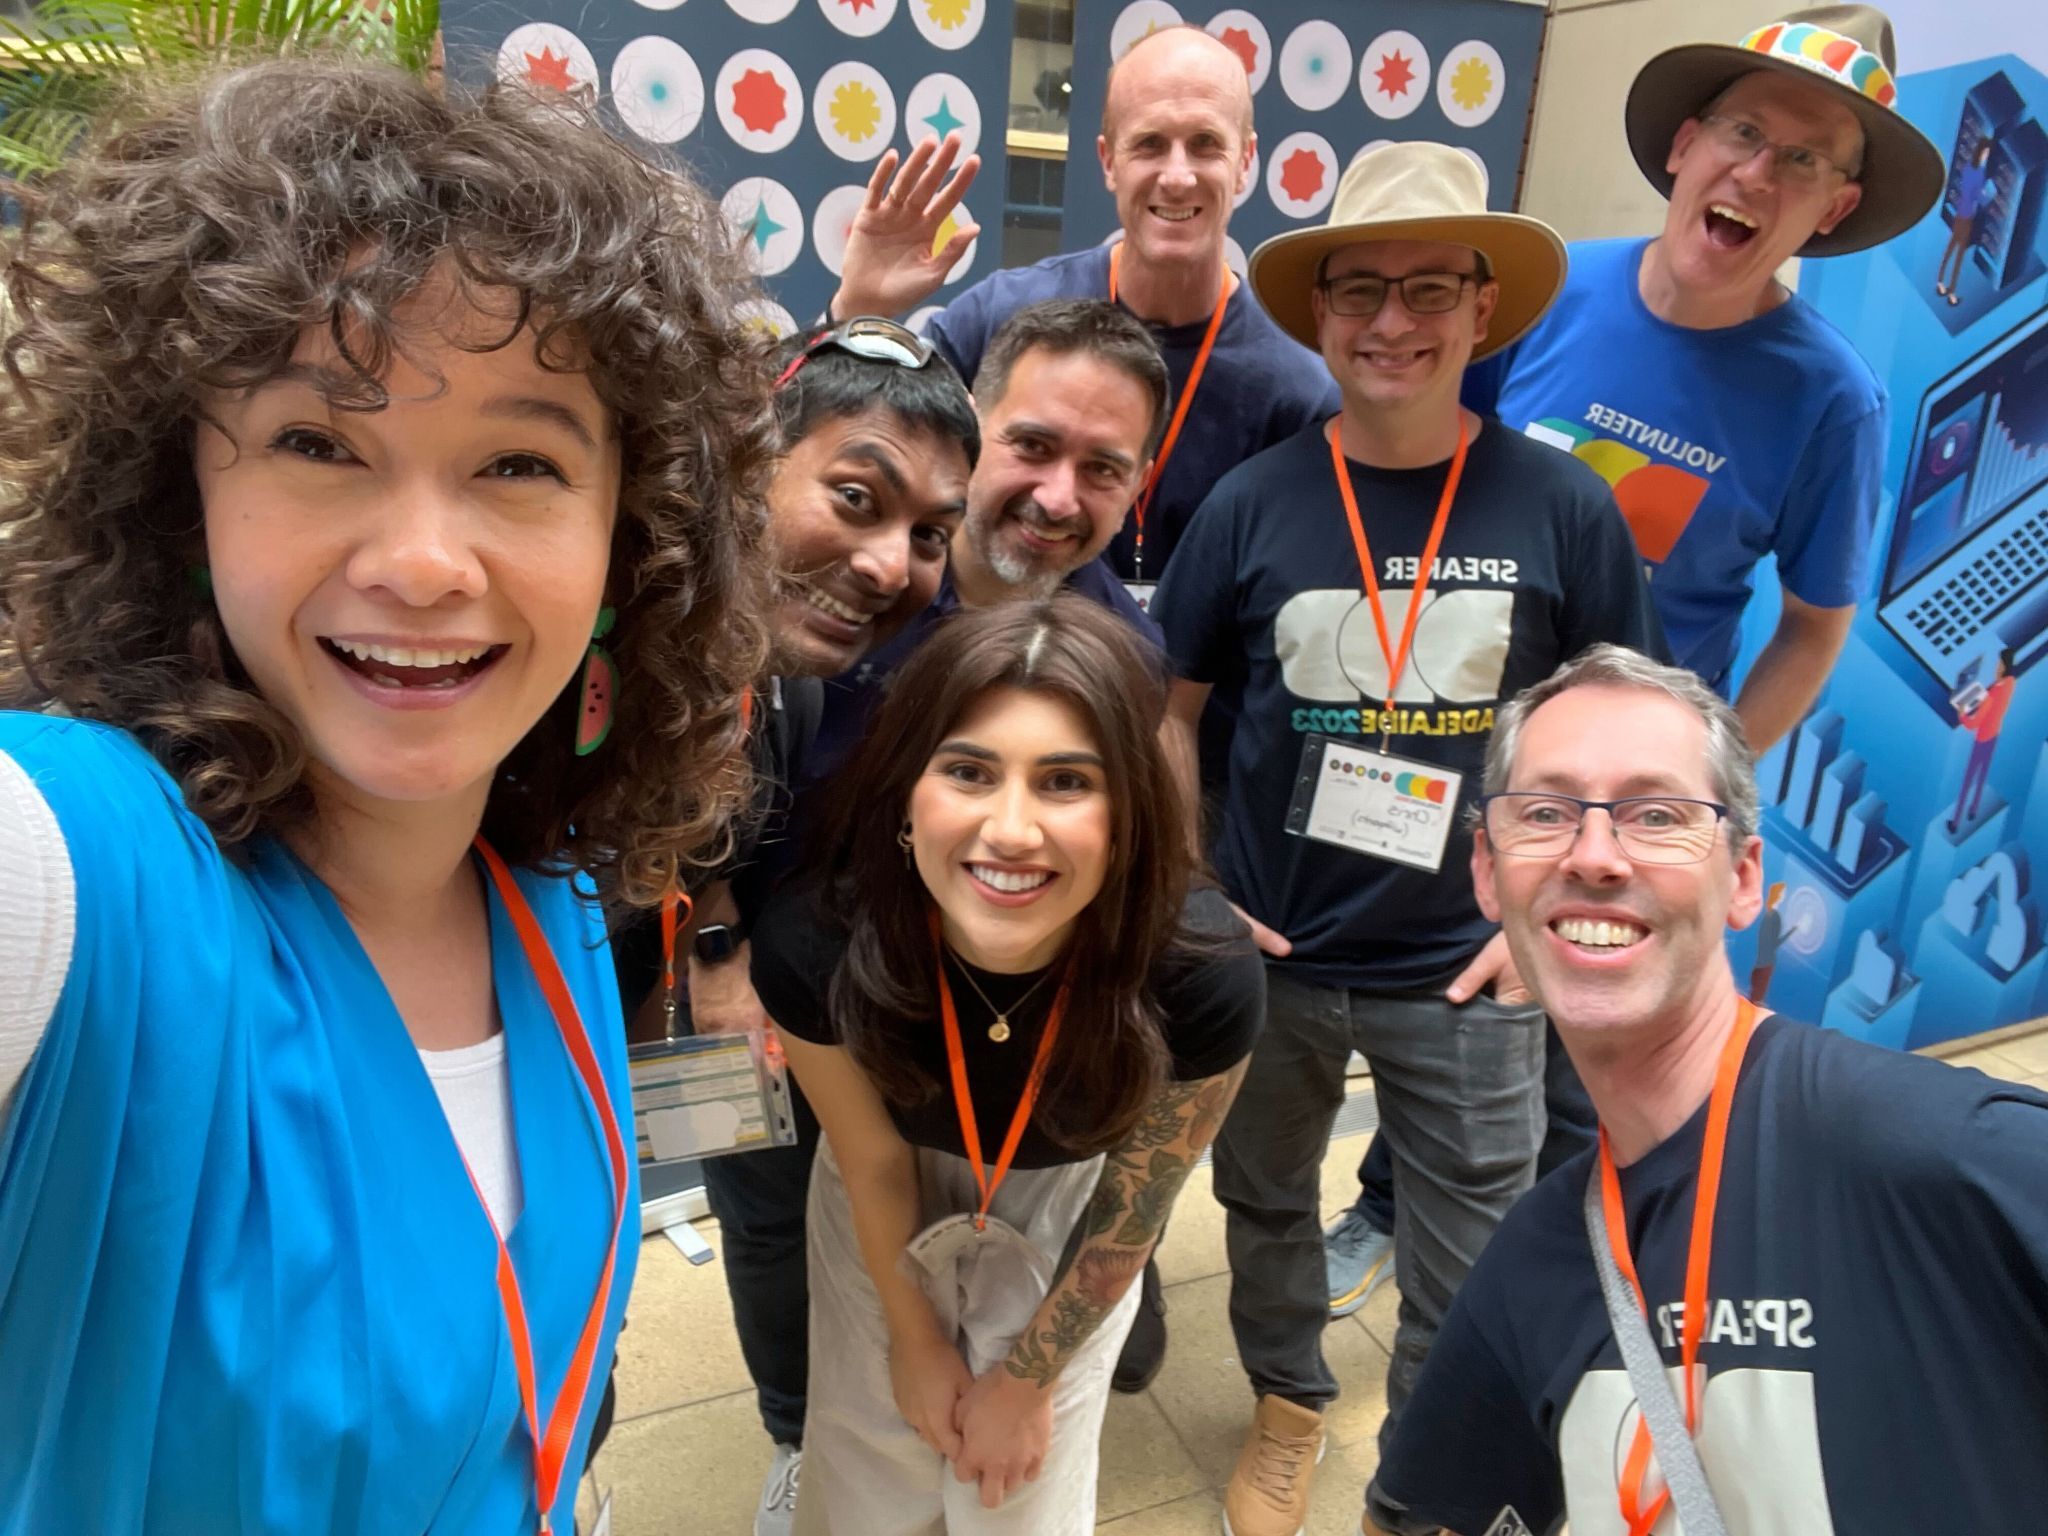
I'm particularly grateful for all the volunteers (and especially my family) for working tirelessly all day to make sure everything ran smoothly. Also, it was so nice to have some of my SixPivot colleagues (from Adelaide and interstate) attend and present.
It's a good chance for the organising team to take a short break before we start planning for next year. If you can't wait until then, do check out DDD Brisbane (coming up on 2nd December) and DDD Melbourne (16th March 2024).
-
Converting a Vagrant VirtualBox .box file to Hyper-V
I maintain quite a number of Chocolatey packages, and sometimes I need to test a new package out, or resolve an issue that has been reported with an updated version of a package. If it is for software that I use regularly, I'll likely do the testing directly on my own machine. But if otherwise a virtual machine makes much more sense, as I can dispose of it once I'm done.

Chocolatey even provides a semi-automated way to do this using the HashiCorp tool Vagrant. They have a pre-built Windows image that is identical to the one they use for their own package verification process. Have a look at the https://github.com/chocolatey-community/chocolatey-test-environment repo to find out more.
One issue I've encountered relates to the recent upgrading of the image to version 3.0.0, which is now is based on Windows Server 2019. The previous image version (2.0.0) was built using 2012R2. Unfortunately, for some reason while the older image was provided in both VirtualBox and Hyper-V formats, the 3.0.0 image currently only has VirtualBox support. Given the choice, I'd prefer to stick with Hyper-V (rather than having to install another hypervisor on my machine). The problem is if I follow the instructions and use the default Vagrantfile from the Chocolatey test environment repository, if I only have Hyper-V installed, it will download the older 2.0.0 image. How can I use the newer one? What follows are the steps I used to create a Hyper-V compatible box file from the VirtualBox one.
First off, download the 3.0.0 image that targets VirtualBox. I don't have VirtualBox installed, but you can still tell Vagrant to download that format by providing the
--providerparameter. e.g.vagrant box add chocolatey/test-environment --provider VirtualBoxYou'll see the following output (it may take a few minutes as like most Windows VM images, it is quite large)
==> box: Loading metadata for box 'chocolatey/test-environment'
    box: URL: https://vagrantcloud.com/chocolatey/test-environment
==> box: Adding box 'chocolatey/test-environment' (v3.0.0) for provider: VirtualBox
    box: Downloading: https://vagrantcloud.com/chocolatey/boxes/test-environment/versions/3.0.0/providers/VirtualBox/unknown/vagrant.box
    box:
    box: Calculating and comparing box checksum...
==> box: Successfully added box 'chocolatey/test-environment' (v3.0.0) for 'VirtualBox'!
The files for this image are saved under the
vagrant.ddirectory in your user profile. eg. for me they're inC:\Users\david\.vagrant.d\boxes\chocolatey-VAGRANTSLASH-test-environment\3.0.0\VirtualBoxIn this directory, you can see the following files:
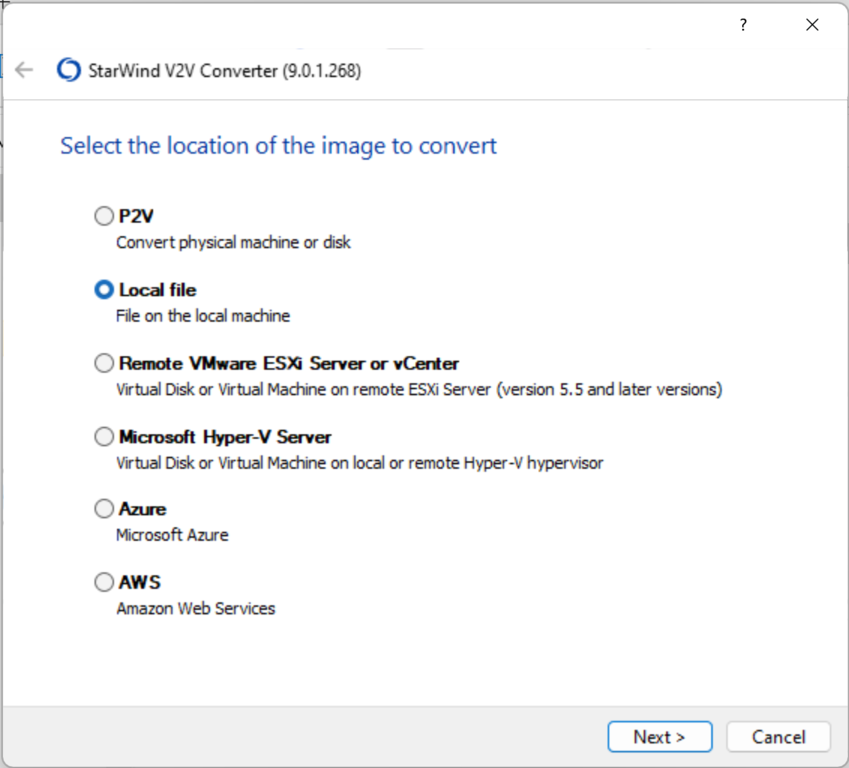
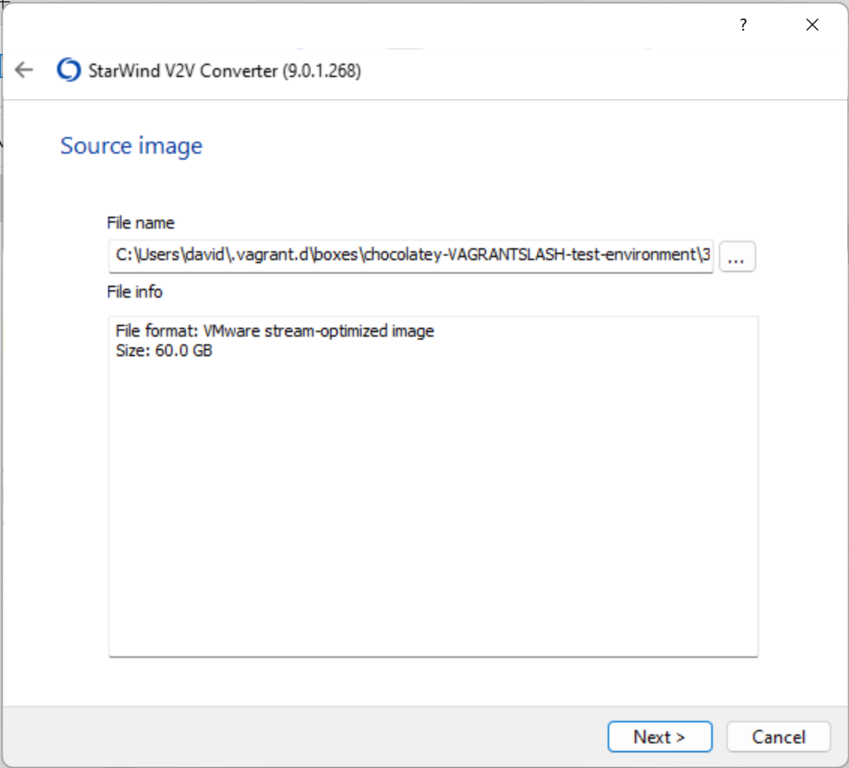
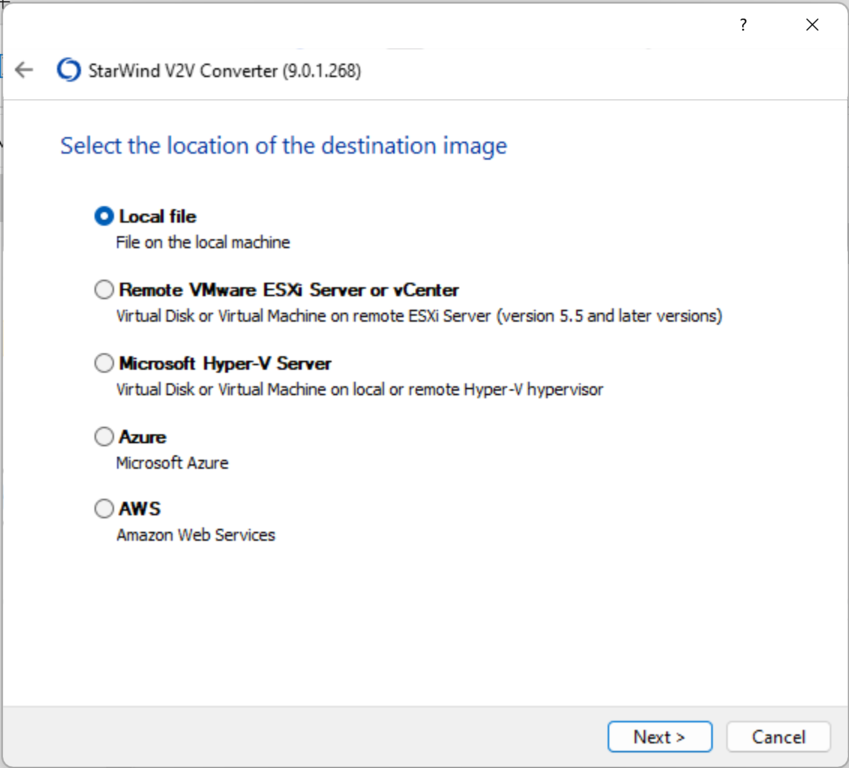
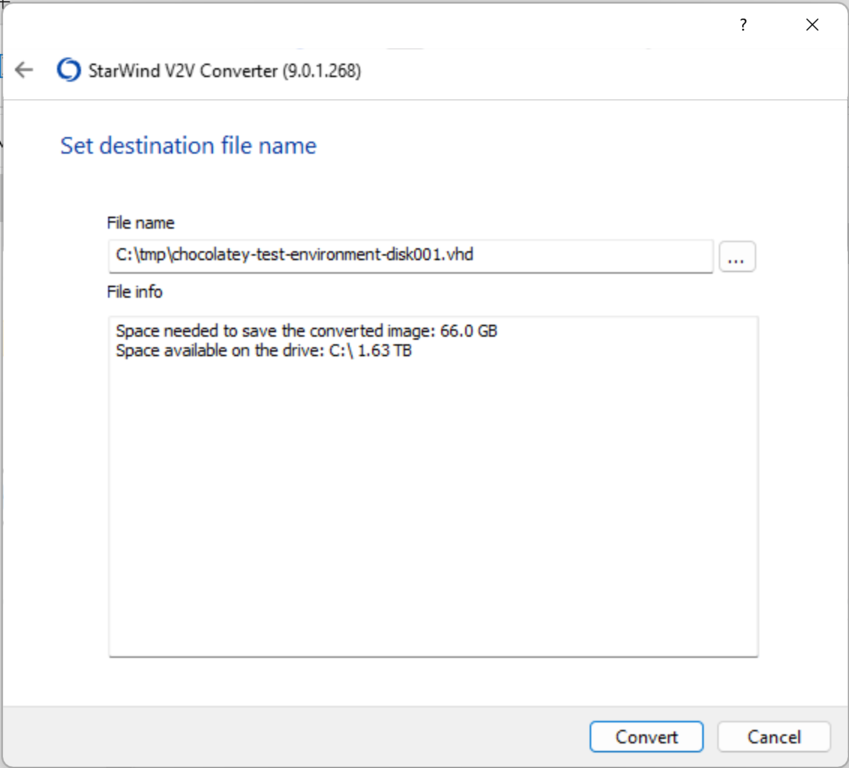
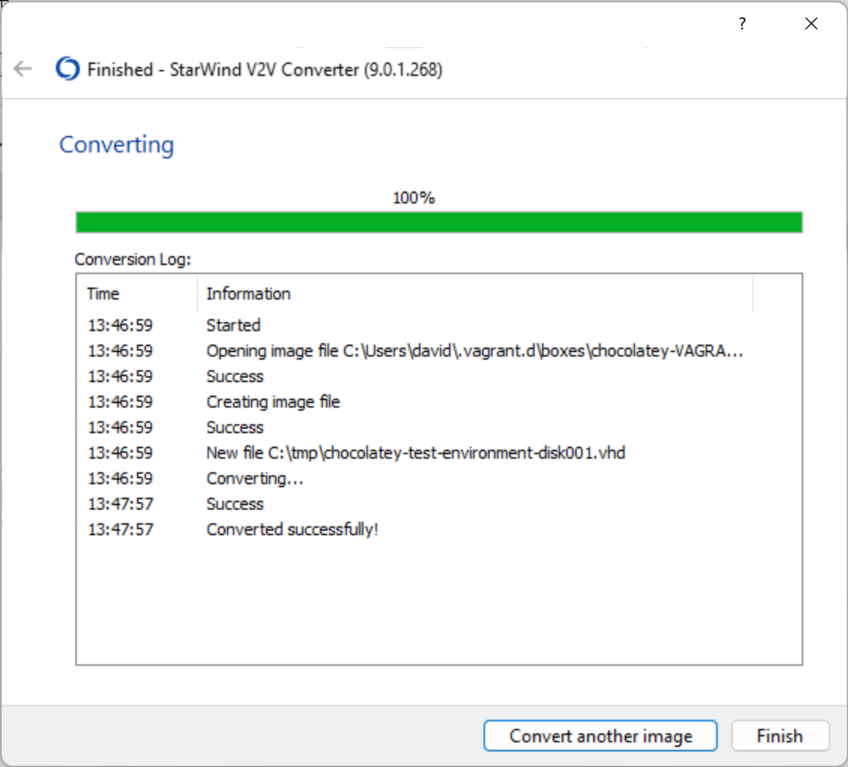
Mode LastWriteTime Length Name ---- ------------- ------ ---- -a--- 15/10/2023 12:38 PM 9047 box.ovf -a--- 15/10/2023 12:38 PM 7993072640 chocolatey-test-environment-disk001.vmdk -a--- 15/10/2023 12:38 PM 26 metadata.json -a--- 15/10/2023 12:38 PM 3700 VagrantfileAh haa. A .VMDK file! Now we need to convert this to a VHD. There's a few different ways to do this. The most reliable I've found is the StarWind V2V Converter tool
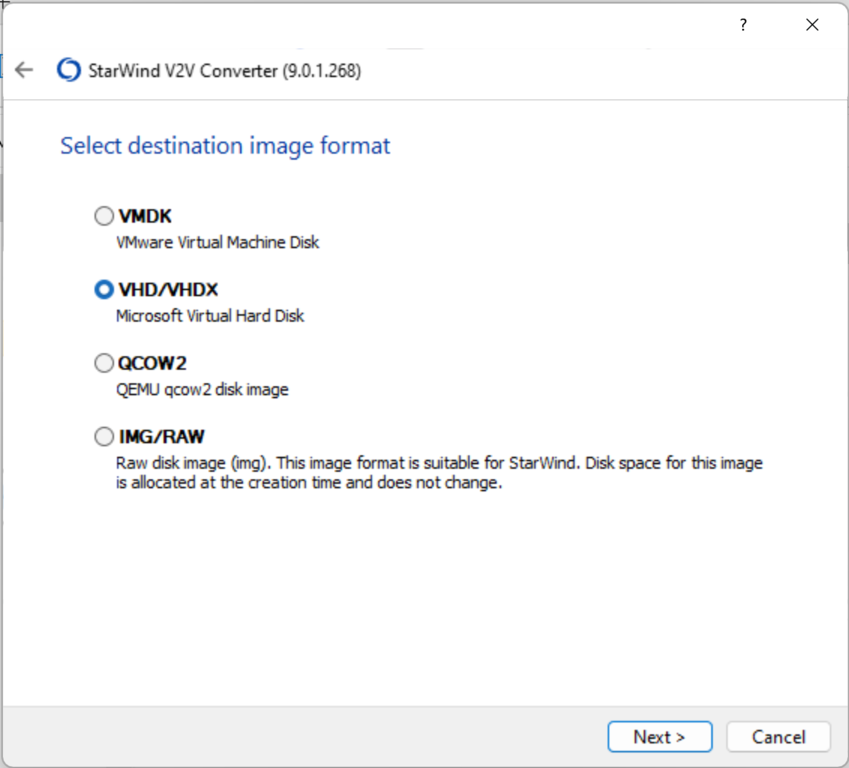
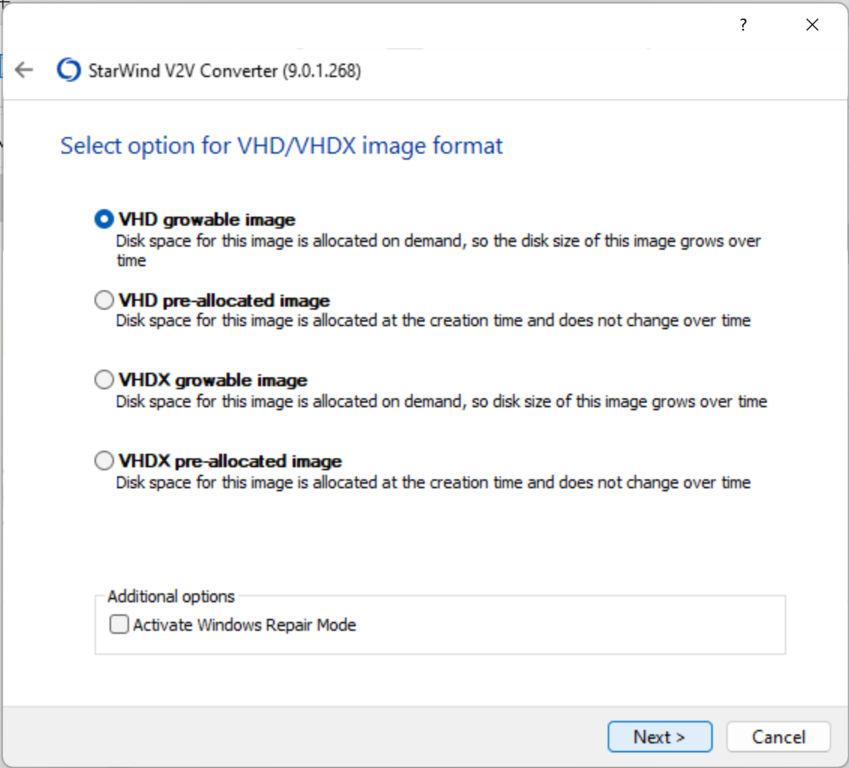
Now we can create a temporary virtual machine. Note that we stick with a Generation 1 VM (I tried Generation 2 and it didn't work). Also, to keep file sizes down, I stuck with a .vhd file (not a .vhdx). A .vhdx file will work but they
In an elevated prompt, run the following:
New-VM -name "test-environment2019" -VHDPath C:\tmp\chocolatey-test-environment-disk001.vhd -Generation 1and you should see this output:
Name                 State CPUUsage(%) MemoryAssigned(M) Uptime   Status             Version
----                 ----- ----------- ----------------- ------   ------             -------
test-environment2019 Off   0           0                 00:00:00 Operating normally 11.0
Set-VMProcessor -VMName test-environment2019 -Count 4 Set-VM -VMName test-environment2019 -AutomaticCheckpointsEnabled $false -CheckpointType Disabled -AutomaticStopAction ShutDownStart the VM and wait for it to boot. Then sign in (the password is 'vagrant')
Go to Settings, Apps and click on Oracle VM VirtualBox Guest Additions. Click Uninstall. Then click Yes to confirm. The VM will reboot.
Once it has rebooted, you can shut down the VM.
Run compress just for good measure
Optimize-VHD -Path C:\tmp\chocolatey-test-environment-disk001.vhd -Mode FullWe're now following the steps outlined in the Vagrant documentation for creating a Hyper-V base box.
Export the VM
Export-VM -VMName test-environment2019 -path c:\tmp\v3Go to
c:\tmp\v3and delete theSnapshotsfolder (it's probably empty anyway)Create a
metadata.jsonfileI took a look at the same file in the 2.0.0 box, and it turns out this is all it contains:
{
  "provider": "hyperv"
}
Add that to the
metadata.jsonfile.Now we need to create a
.tarfile (this may take a few minutes). Tar has been included with Windows since late 2017, but you could also use 7-Zip or similar.cd C:\tmp\v3\test-environment2019\ tar cvzf c:\tmp\test-environment2019.tar ./*Now we can add this to Vagrant using
vagrant box add C:\tmp\test-environment2019.tar --provider hyperv --name chocolatey/test-environmentYou'll see output similar to the following:
==> box: Box file was not detected as metadata. Adding it directly...
==> box: Adding box 'chocolatey/test-environment' (v0) for provider: hyperv
    box: Unpacking necessary files from: file:///C:/tmp/test-environment2019.tar
    box:
==> box: Successfully added box 'chocolatey/test-environment' (v0) for 'hyperv'!
The one issue with this is that you can see the version number of this box is v0. I'd much prefer to set the version 3.0.0. It turns out you can't set that directly via the command line, but there is a workaround.
Create another
metadata.jsonfile (inc:\tmp) and add the following content:{ "name": "chocolatey/test-environment", "versions": [ { "version": "3.0.0", "status": "active", "providers": [ { "name": "hyperv", "url": "file:///C:/tmp/test-environment2019.tar" } ] } ] }and add the new box to Vagrant using this file instead:
vagrant box add .\metadata.jsonAnd now we see this output
==> box: Loading metadata for box '.\metadata.json'
    box: URL: file://C:/tmp/metadata.json
==> box: Adding box 'chocolatey/test-environment' (v3.0.0) for provider: hyperv
    box: Unpacking necessary files from: file:///C:/tmp/test-environment2019.tar
    box:
==> box: Successfully added box 'chocolatey/test-environment' (v3.0.0) for 'hyperv'!
We can now list all the boxes Vagrant knows about:
vagrant box listchocolatey/test-environment (hyperv, 0) chocolatey/test-environment (hyperv, 2.0.0) chocolatey/test-environment (hyperv, 3.0.0) chocolatey/test-environment (VirtualBox, 3.0.0)I just want the 'hyperv 3.0.0' box, so I'll remove the others
vagrant box remove chocolatey/test-environment --box-version 0 --provider hyperv
vagrant box remove chocolatey/test-environment --box-version 2.0.0 --provider hyperv
vagrant box remove chocolatey/test-environment --box-version 3.0.0 --provider VirtualBox
And now you should be fine to run
vagrant upto provision a new VM using the Hyper-V provider, and it will use Windows Server 2019!Here's an example of doing this with the chocolatey-test-environment (run from an elevated prompt):
vagrant upWhich gives the following output (including signing in with your local username and password):
Bringing machine 'default' up with 'hyperv' provider...
==> default: Verifying Hyper-V is enabled...
==> default: Verifying Hyper-V is accessible...
    default: Configuring the VM...
    default: Setting VM Integration Services
==> default: guest_service_interface is enabled
==> default: heartbeat is enabled
==> default: key_value_pair_exchange is enabled
==> default: shutdown is enabled
==> default: time_synchronization is enabled
==> default: vss is enabled
    default: Setting VM Enhanced session transport type to disabled/default (VMBus)

Vagrant requires administrator access for pruning SMB shares and
may request access to complete removal of stale shares.
==> default: Starting the machine...
==> default: Waiting for the machine to report its IP address...
    default: Timeout: 130 seconds
    default: IP: 172.20.15.213
==> default: Waiting for machine to boot. This may take a few minutes...
    default: WinRM address: 172.20.15.213:5985
    default: WinRM username: vagrant
    default: WinRM execution_time_limit: PT2H
    default: WinRM transport: negotiate
==> default: Machine booted and ready!
==> default: Preparing SMB shared folders...
    default: You will be asked for the username and password to use for the SMB
    default: folders shortly. Please use the proper username/password of your
    default: account.
    default:
    default: Username (user[@domain]): david
    default: Password (will be hidden):

Vagrant requires administrator access to create SMB shares and
may request access to complete setup of configured shares.
==> default: Mounting SMB shared folders...
    default: C:/dev/git/chocolatey-test-environment/packages => /packages
    default: C:/dev/git/chocolatey-test-environment => /vagrant
==> default: Machine already provisioned. Run `vagrant provision` or use the `--provision`
==> default: flag to force provisioning. Provisioners marked to run always will still run.
Windows Hyper-V Manager will show the new VM running:
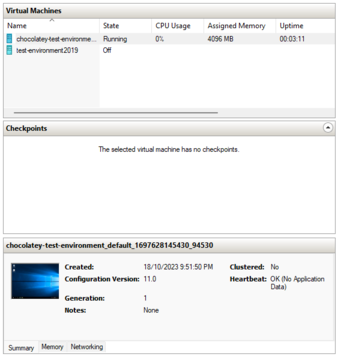
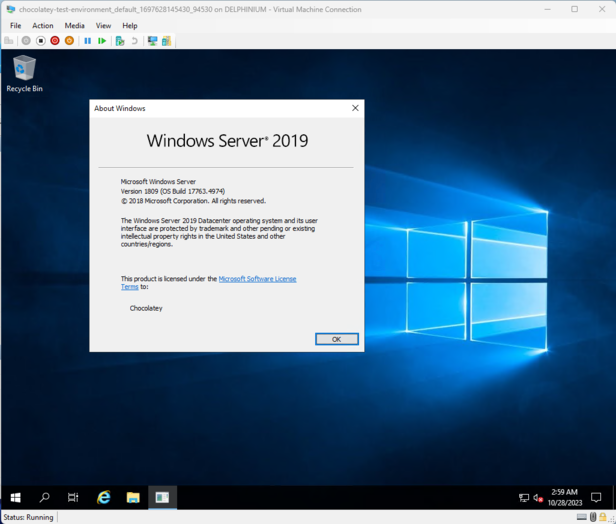
You can also connect to the VM and sign in to confirm it is running Windows Server 2019 and working as expected:
Vagrant error
When you run
vagrant up, it fails with the following error (observed with Vagrant 2.3.7):An error occurred executing a remote WinRM command. Shell: Cmd Command: hostname Message: Digest initialization failed: initialization errorApparently this problem is solved with Vagrant version 2.3.8. Ensure you're you're using Vagrant 2.3.8 or newer.

A blog of software development, .NET and other interesting things