-
Hello Mastadon, not quite goodbye Twitter
Twitter has been going through a great upheaval over the last few weeks, with a new owner and now 50% less staff. Hopefully, it can survive this difficult time, but just to put an egg in another basket, I've created an account over at Mastodon.

My account is https://mastodon.online/@DavidRGardiner, which can also be represented as
@[email protected]Mastodon is kind of like Twitter, but kind of isn't. The most obvious difference is that it is distributed. In fact, in many ways thinking about it like email (where there are lots of email hosts that all talk to each other) rather than a single centralized, commercial social media company like Twitter, can be helpful. The account names even have an 'email address' look about them.
I could go into more detail, but there's already a great introduction over at https://github.com/joyeusenoelle/GuideToMastodon/#an-increasingly-less-brief-guide-to-mastodon
I'm not sure if I'll stay on the
mastodon.onlineserver. I've noticed quite a few Australian folks are choosingaus.social, though probably because of that, the server is struggling a bit under load. The nice thing is that it is possible to move your account between servers and I believe it redirects everything to your new location.If you're thinking of signing up, you might like to use instances.social to help you choose the best server for you. I only found out about this today, otherwise I might have used it myself! Having said that, I don't see
aus.socialon it, so I'm not sure how comprehensive it is.Verified
There's no 'blue tick' in Mastodon, but you can verify that a website you've added to your account profile is actually owned by you by adding a
rel=melink. I've done this to my blog in a couple of ways:- In the
<head>section I've added<link rel="me" href="https://mastodon.online/@DavidRGardiner" /> - In the footer, the links to my social profiles now include Mastodon, and links to
<a rel="me" href="https://mastodon.online/@DavidRGardiner" title="DavidRGardiner">
Mastodon recognises the
rel=meand shows a tick when you view my profile: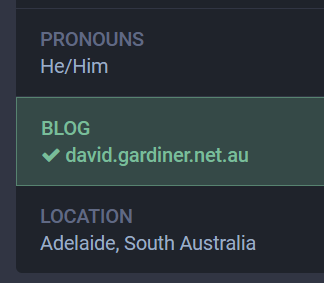
I was never verified on Twitter (I'm not that important, so wasn't really bothered!), and am unlikely to pay for the privilege, given it sounds like Twitter will be charging for that going forward.
Finding my Twitter friends
Finding people on Mastodon is complicated by the fact that if they're not on the same server as you, there's no built-in way to figure out where they are. The best you can do is by looking at the profiles of people you do know, and see who they are following, but that only gets you so far.
There are a couple of free services that I've utilised that can help with this:
Moa
Head over to Twitodon and sign in with your Twitter and Mastodon accounts. Moa keeps a record of other users who have already done this and then lets you download a CSV of any Mastodon users it knows about that are in your list of Twitter following.
You can go back later to see if any new folks have signed in to Twitodon that you know.
Fedifinder
Fedifinder will search all your Twitter following and looks for specific text in their profiles that is likely to be a Mastodon account. To make this work so that others can find me, I added my Mastodon account to my Twitter profile.

Cross-posting
I really hope Twitter hangs in there. You can keep a foot in each camp with a 'bridge' like Moa. I've set it up so anything I post to Twitter will be also posted to Mastodon. I've chosen not to enable the reverse.

Conclusion
So as long as Twitter remains useful I'll stick with it, but I'm now also on Mastodon and I'm curious to see how this alternate social media site pans out. Maybe I'll see you there!
- In the
-
Adding a disk to a Synology with DSM 7.1
I recently added another Western Digital hard disk to my Synology DS1621xs+ NAS (as it was warning me that my free disk space was getting low).
I went with another WD Red Plus WD40EFZX 4GB drive. I was pleasantly surprised that the prices had dropped a bit since my last purchase - from $AU163 (July 2021) down to $AU125 (the price does vary from day to day). I did consider buying an 8GB drive, but the extra price was a bit much. Maybe next time!
I could be wrong, but installing the drive felt like an easier process this time. Here's what I did:
- First off, insert the new disk into a free drive caddy in your Synology.
-
Now connect to your Synology via your web browser and open Storage Manager. If you select the HDD/SSD tab, you should see your new disk with a status of "Not Initialized".
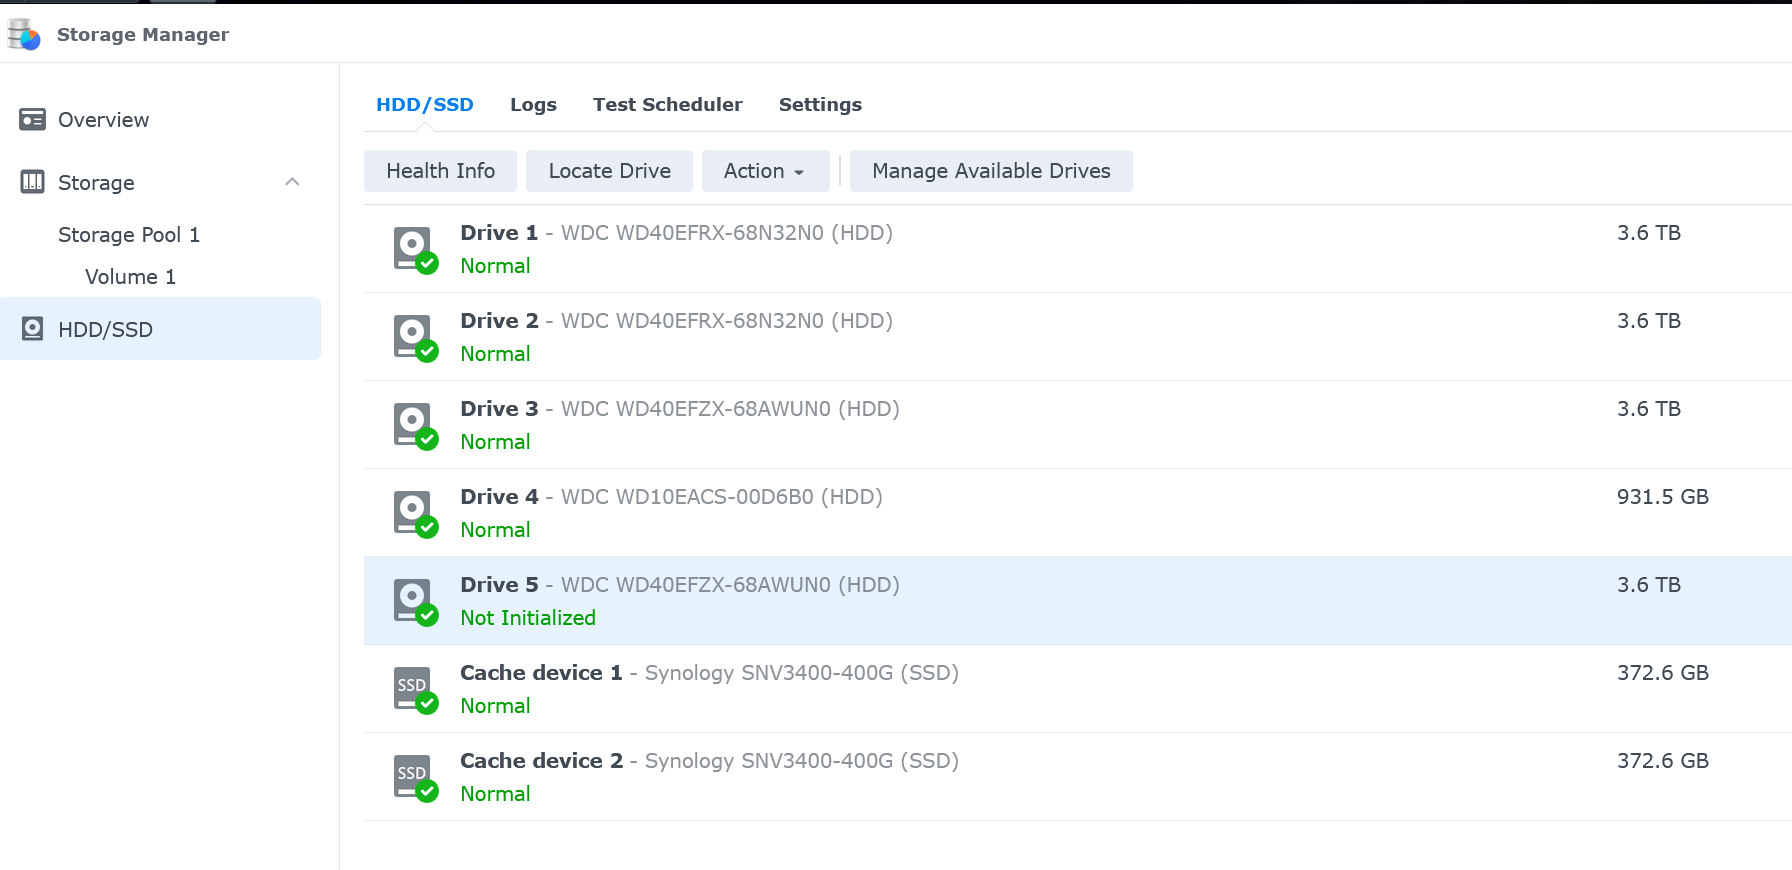
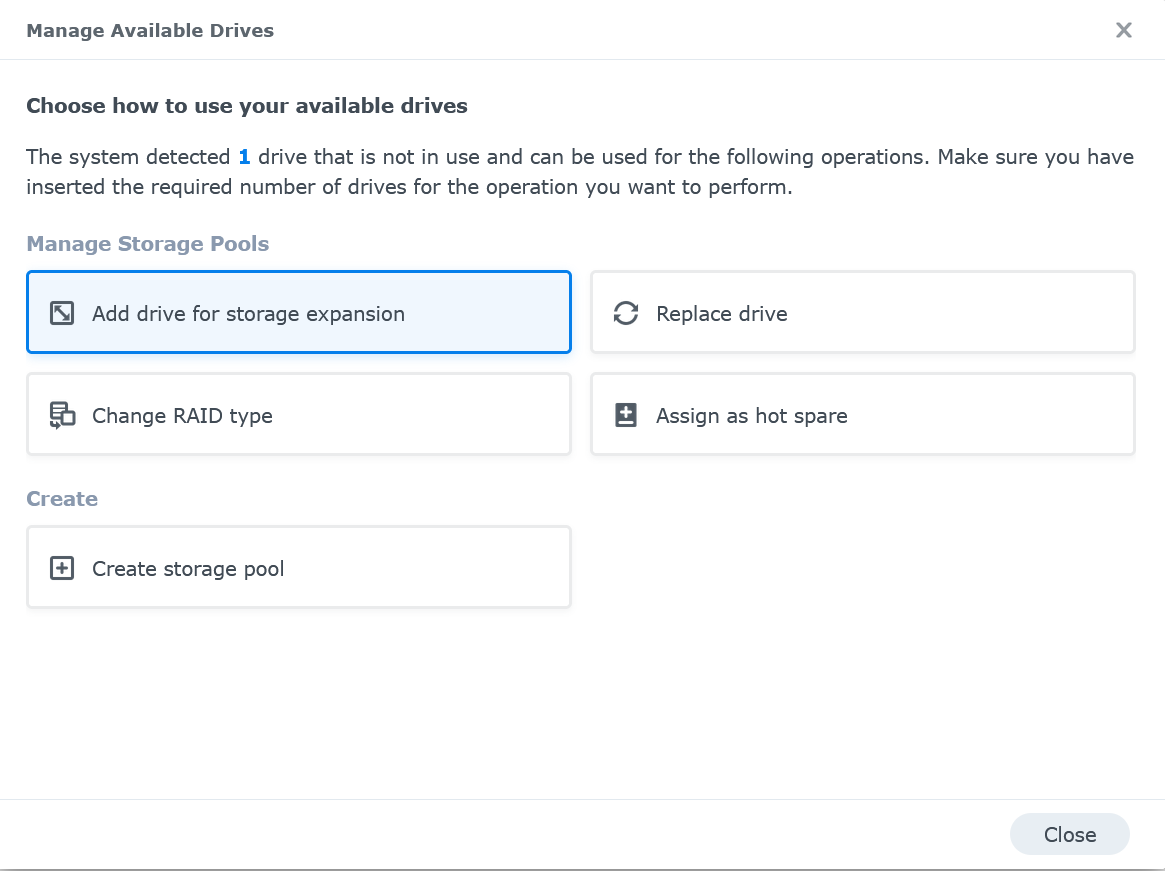
- Select the new drive, then click on Manage available drives to launch the Manage Available Drives dialog.
-
Click on Add drive for storage expansion
-
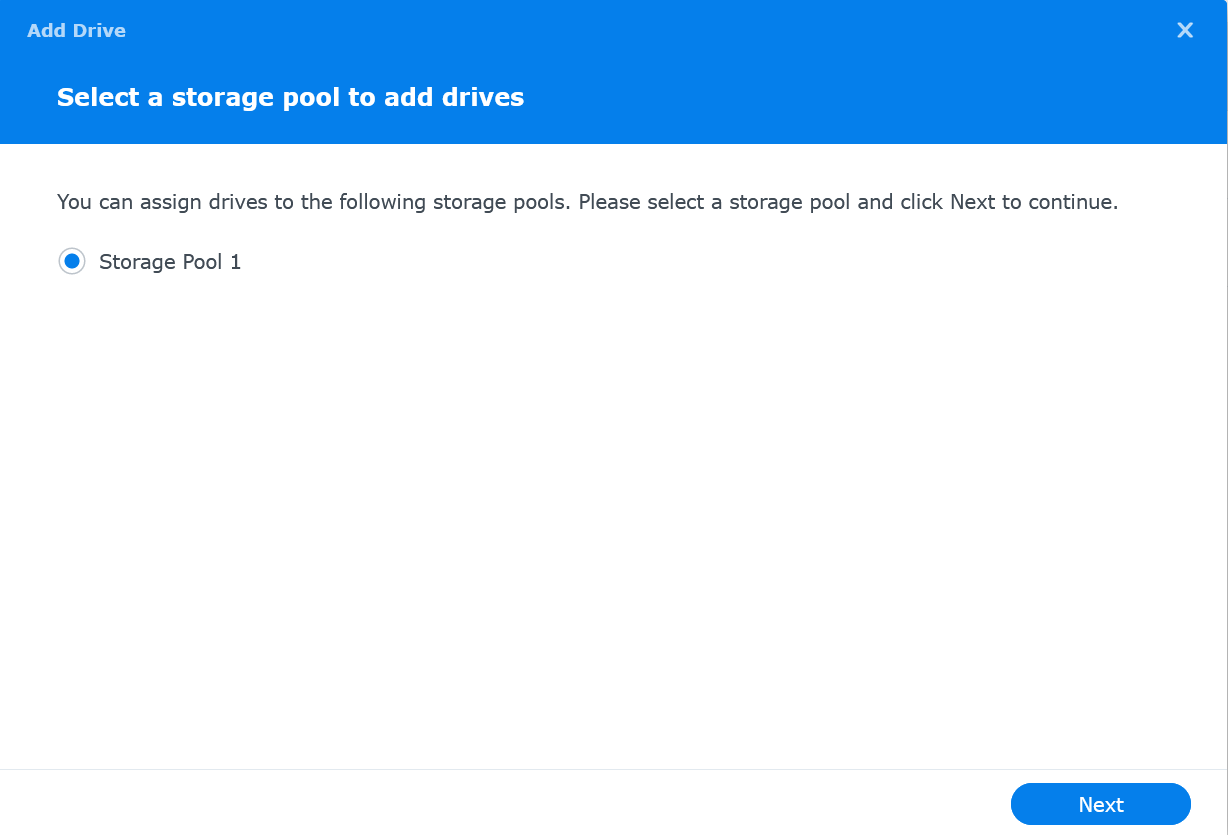
Select "Storage Pool 1" and click on Next
-
Select the drive(s) and click Next

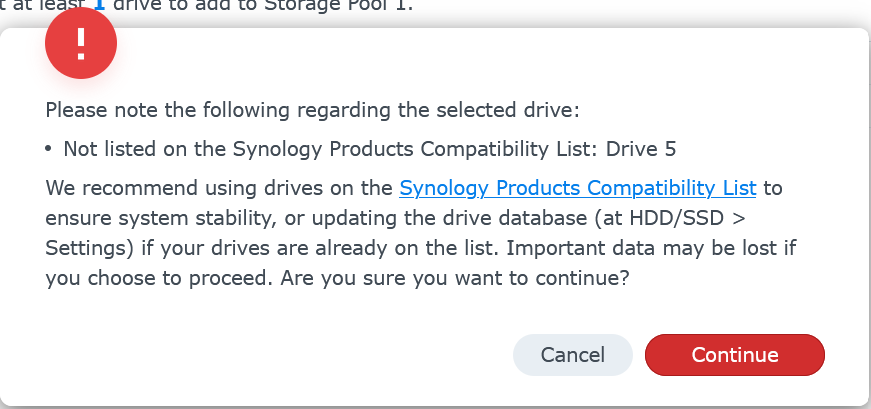
-
Review any warning about drive compatibility
-
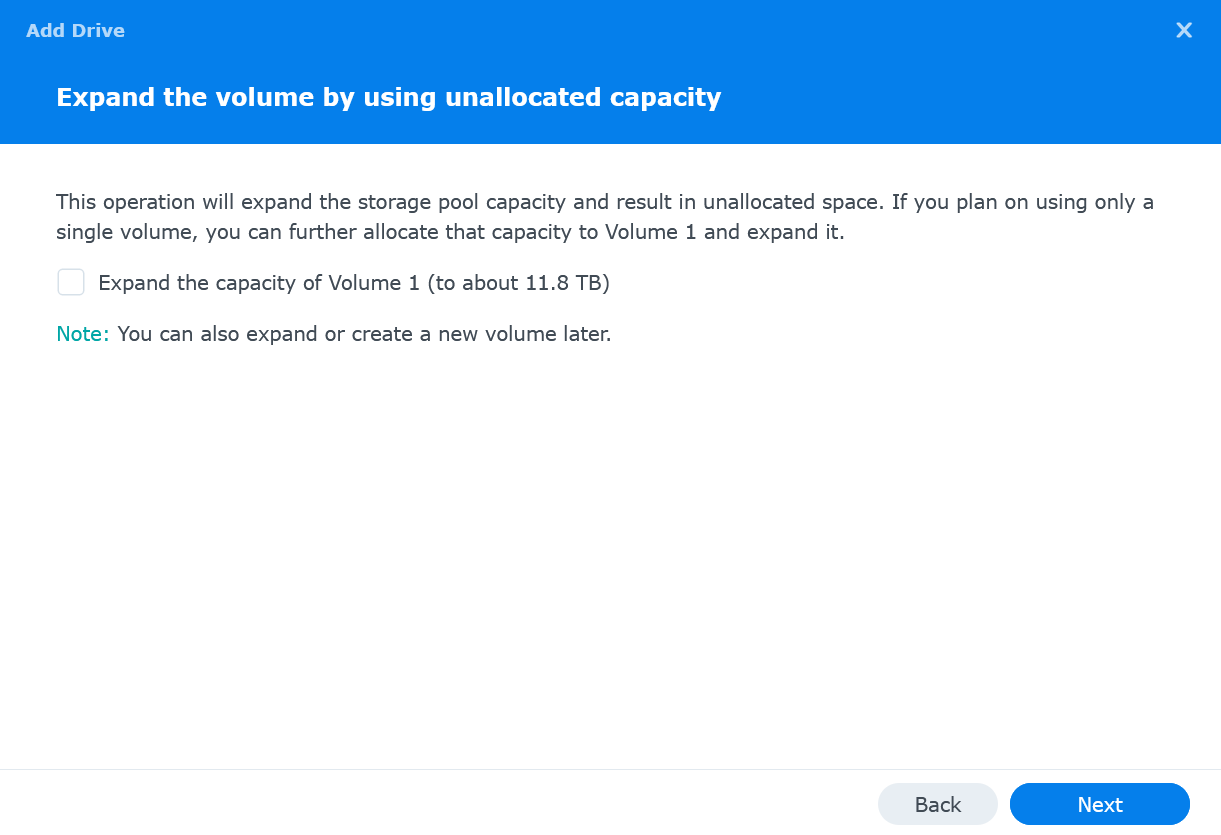
Optionally choose to expand the volume with these disks. Select Expand the capacity of Volume 1 and click Next
-
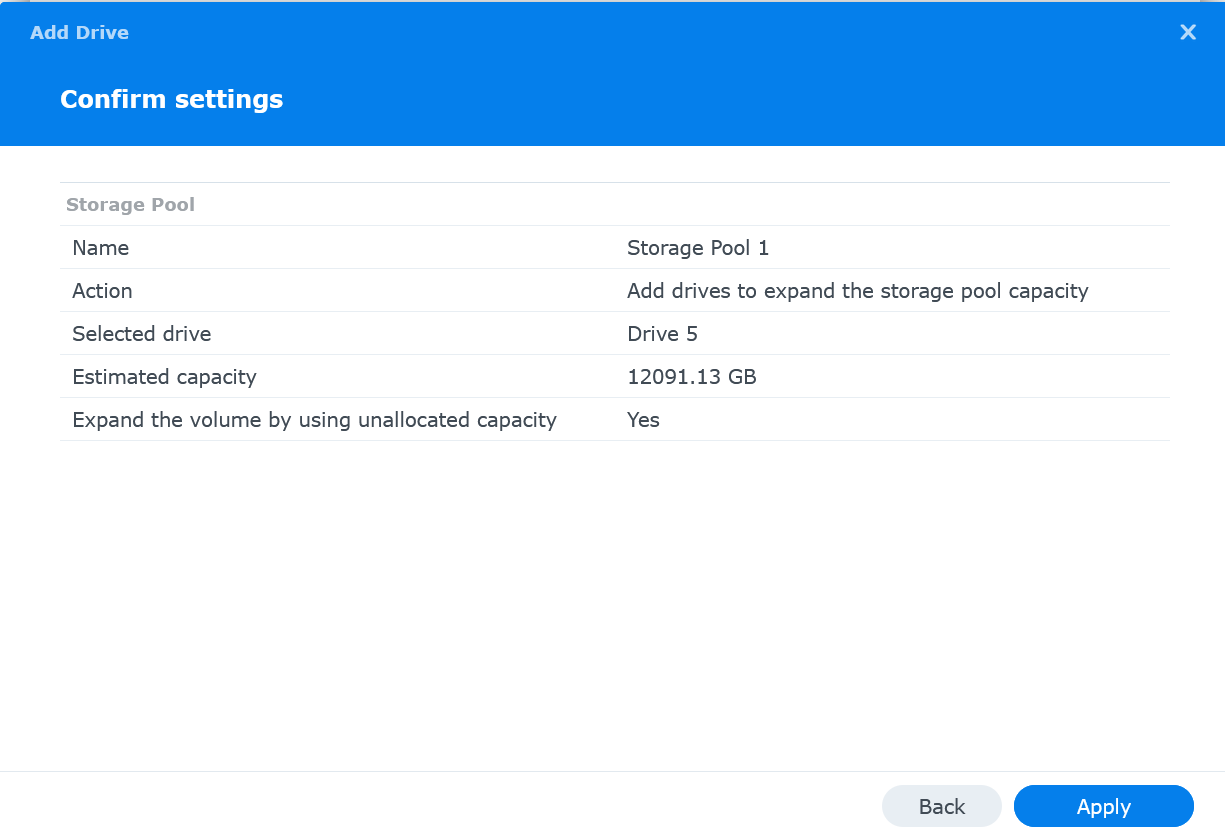
Review settings and then click Apply
-
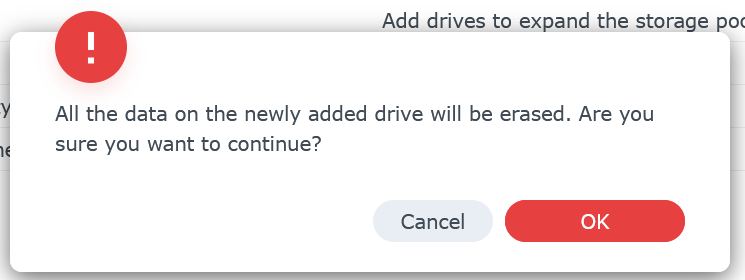
Confirm you are ok to erase the new drive then click OK
Now you'll need to wait a while. Depending on the pool's RAID configuration, it may be a day or longer before the disk is fully added. You can monitor the progress of drive adding by going to the storage pool.
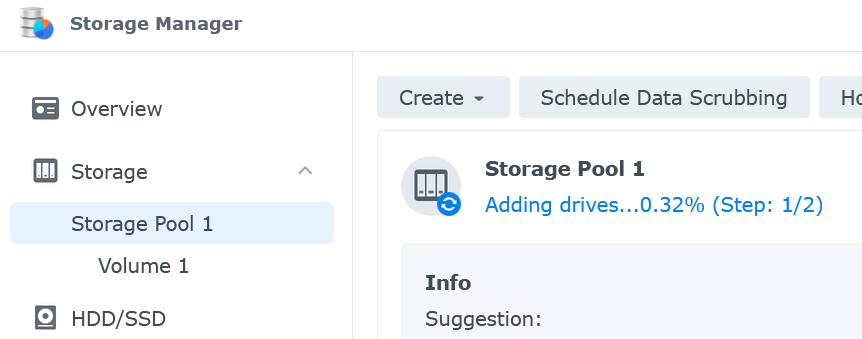
Once the drive has finished being added you'll see the pool status back to 'Healthy' and the capacity will have increased.

Links to Amazon are affiliate links
-
Azure Pipelines Service Containers and ports
Azure Pipelines provides support for containers in several ways. You can build, run or publish Docker images with the Docker task. Container Jobs allow you to use containers to run all the tasks of a pipeline job, isolated from the host agent by the container. Finally, Service Containers provide a way to run additional containers alongside the pipeline job.
You can see some examples of using Service Containers in the documentation, but one thing that confused me was the port mapping options - particularly with, and without Container Jobs. I ended up creating a pipeline with a number of jobs to determine the correct way to address a service container.
You can see the full pipeline at https://github.com/flcdrg/azure-pipelines-service-containers/blob/main/azure-pipelines.yml
I created two container resources. The first maps the container port 1443 to port 1443 on the host, whereas the second assigns a random mapped port on the host.
resources:
  containers:
    - container: mssql
      image: mcr.microsoft.com/mssql/server:2019-latest
      ports:
        - 1433:1433
      env:
        ACCEPT_EULA: Y
        SA_PASSWORD: yourStrong(!)Password

    - container: mssql2
      image: mcr.microsoft.com/mssql/server:2019-latest
      ports:
        - 1433
      env:
        ACCEPT_EULA: Y
        SA_PASSWORD: yourStrong(!)Password
These are mapped as service containers in each job by one of the following:
  services:
    mssqlsvc: mssql
which maps the container to port 1443 on the host, or
  services:
    mssqlsvc: mssql2
which maps to a random port on the host.
I then figured out what was the correct way to connect to the container. In my case (using a SQL Server image) I'm using the
sqlcmdcommand line utility.Here are the results of my experiment:
Regular job, local process
A regular (non-container) Azure pipelines job, relying on
sqlcmdbeing preinstalled on the host.sqlcmd -S localhostRegular job, inline Docker container
We're running a separate Docker container in a script task. To allow this container to be able to connect to our service container, we ensure they're both running on the same network.
network=$(docker network list --filter name=vsts_network -q)
docker run --rm --network $network mcr.microsoft.com/mssql-tools /opt/mssql-tools/bin/sqlcmd -S mssqlsvc
Regular job, local process, random port
The host-mapped port has been randomly selected, so we need to use a special variable to obtain the actual port number. The variable name takes the form
agent.services.<serviceName>.ports.<port>.In our case, the
<serviceName>corresponds to the left-hand name under theservices:section and the<port>corresponds to the port number back up in the- ports:section of the resource container declaration.sqlcmd -S tcp:localhost,$(agent.services.mssqlsvc.ports.1433)Regular job, inline Docker container, random port
The random port can be ignored, as we connect directly to the SQL container, not via the host-mapped port.
network=$(docker network list --filter name=vsts_network -q)
docker run --rm --network $network mcr.microsoft.com/mssql-tools /opt/mssql-tools/bin/sqlcmd -S mssqlsvc
Container job, local process
A Container job means we're already running inside a Docker container. (The image used for the container job has
sqlcmdinstalled in/opt/mssql-tools18/bin)./opt/mssql-tools18/bin/sqlcmd -S mssqlsvcContainer job, inline Docker container
So long as the Docker container created in the script task is on the same network, it's similar
network=$(docker network list --filter name=vsts_network -q)
docker run --rm --network $network mcr.microsoft.com/mssql-tools /opt/mssql-tools/bin/sqlcmd -S mssqlsvc
Container job, local process, random port
Because we're in the container job, we ignore the random port
/opt/mssql-tools18/bin/sqlcmd -S mssqlsvcContainer job, inline Docker container, random port
And the same for an 'inline' container
network=$(docker network list --filter name=vsts_network -q)
docker run --rm --network $network mcr.microsoft.com/mssql-tools /opt/mssql-tools/bin/sqlcmd -S mssqlsvc

A blog of software development, .NET and other interesting things