In theory, I'd like to reinstall my laptop regularly - say every couple of months? In practise, it's easy to keep putting it off. One of the detractions was not just the time to re-install Windows, but also to then install all the various device drivers. So time goes by and next you realise it's been a year or longer.
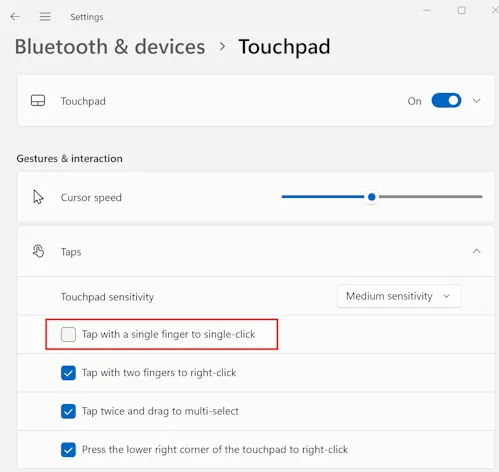
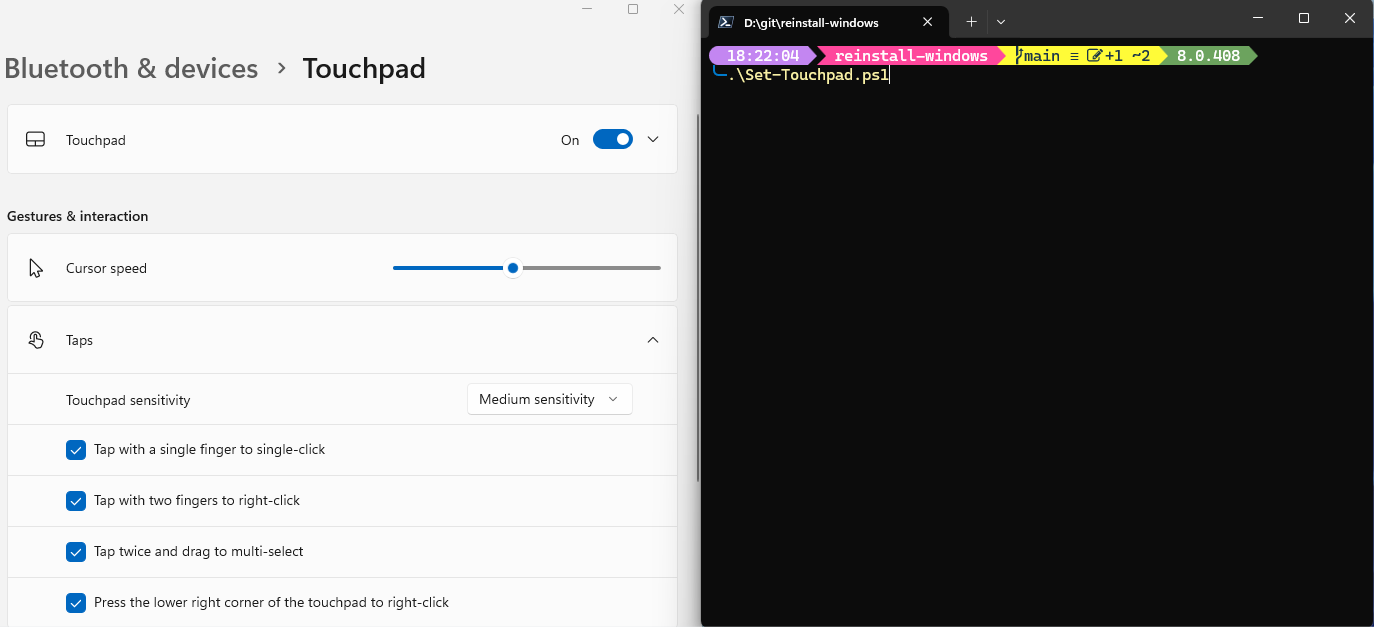
If you use the built in Windows Reset feature, then it's been my observation that this seems to preserve not only any OEM drivers, but also any OEM bloatware too. I was interested in the idea of installing a 'vanilla' Windows OS, with just the OEM drivers, but no bloat. And while I'm at it, can I automate a few of the other installation steps?
Step 0. Partition your disk
If you want to make this whole process easier, having a separate partition (or second physical drive) for all your data/documents/files will mean you can completely blow away your C: drive where Windows is installed, and all those files in the other partition will be untouched.
In my case, I partitioned my SSD to have D: as my Dev Drive (which uses the newer ReFS file system).
Having a full system backup is another great idea. Knowing that if something goes wrong and you have a way to restore your system back to how it was before you started it process is reassuring. I take advantage of Synology Active Backup for Business to take full backups of my machines, as well as taking using OneDrive for storing other important files and documents.
Step 1. Create a bootable Windows USB drive
Head over to https://www.microsoft.com/en-au/software-download/windows11 and follow the steps to download the Windows 11 ISO image.
Next, get Rufus and use that to create a bootable USB drive. You probably want to select NTFS for the format, as you will likely need to store more data than can fit in FAT32.
Why do this instead of using Microsoft's Media Creator Tool? The results are similar, but the tool creates a sources\install.esd file. If you create a bootable USB from the ISO, then the file created is sources\install.wim. Yes, it is possible to convert an .esd to .wim, but this way you don't need to bother, and your USB is formatted in a way it can fit larger files.
Step 2. Create a working directory
mkdir c:\MachineImaging
cd c:\MachineImaging
Step 3. Mount the .WIM file
The Windows Image .WIM file is a special file format that can contain one or more Windows images. There's a tool built in to Windows - DISM.EXE that is used for working with .WIM files. Conveniently, there's also a Dism PowerShell module with equivalent cmdlets. I find these a bit friendlier to use, as you get parameter completion etc.
We're going to copy the .WIM file from the ISO (or bootable USB we just created), but I'm also going to extract out just the particular image index I plan to use. This will make things simpler later on.
We can list all the images included in a .WIM file like this:
Get-WindowsImage -ImagePath d:\sources\install.wim
ImageIndex       : 1
ImageName        : Windows 11 Home
ImageDescription : Windows 11 Home
ImageSize        : 18,727,965,088 bytes

ImageIndex       : 2
ImageName        : Windows 11 Home N
ImageDescription : Windows 11 Home N
ImageSize        : 18,190,503,625 bytes

ImageIndex       : 3
ImageName        : Windows 11 Home Single Language
ImageDescription : Windows 11 Home Single Language
ImageSize        : 18,725,453,549 bytes

ImageIndex       : 4
ImageName        : Windows 11 Education
ImageDescription : Windows 11 Education
ImageSize        : 19,230,378,207 bytes

ImageIndex       : 5
ImageName        : Windows 11 Education N
ImageDescription : Windows 11 Education N
ImageSize        : 18,698,289,981 bytes

ImageIndex       : 6
ImageName        : Windows 11 Pro
ImageDescription : Windows 11 Pro
ImageSize        : 19,250,929,144 bytes

ImageIndex       : 7
ImageName        : Windows 11 Pro N
ImageDescription : Windows 11 Pro N
ImageSize        : 18,700,496,532 bytes

ImageIndex       : 8
ImageName        : Windows 11 Pro Education
ImageDescription : Windows 11 Pro Education
ImageSize        : 19,230,428,845 bytes

ImageIndex       : 9
ImageName        : Windows 11 Pro Education N
ImageDescription : Windows 11 Pro Education N
ImageSize        : 18,698,315,750 bytes

ImageIndex       : 10
ImageName        : Windows 11 Pro for Workstations
ImageDescription : Windows 11 Pro for Workstations
ImageSize        : 19,230,479,483 bytes

ImageIndex       : 11
ImageName        : Windows 11 Pro N for Workstations
ImageDescription : Windows 11 Pro N for Workstations
ImageSize        : 18,698,341,519 bytes
"Windows 11 Pro" has ImageIndex 6. That's the one I'm interested in.
Now we can export just that image:
Export-WindowsImage -SourceImagePath d:\sources\install.wim -SourceIndex 6 -DestinationImagePath install.wim -CompressionType max
For good measure, we'll keep a 'known good version' copy, so that if we discover our install has problems, we can roll back to the previous known good.
Copy-Item install.wim knowngood.wim
Step 4. Add drivers
I should point out that I originally was following the instructions outlined in this post. Those instructions cover how to capture the currently installed drivers on a machine, exporting them out, and then adding them to an install image. I tried this but my install hung. I'm not really sure why - probably one of the drivers wasn't happy tring to install at OS install time? I'm not sure - it should work in theory.
So instead I remembered that most OEM manufacturers not only make the latest device drivers available for their hardware, but often they also provide a 'bundle' download with all the current drivers in one .zip, intended for just this scenario.
My current laptop is a Dell XPS 9530, and their Windows 11 Driver Pack is listed here with a download link. It 2.8GB!
Unzip that into a subdirectory (c:\MachineImaging\DeployDriverPack)
Now we can add all the drivers in one go using this command
Add-WindowsDriver -Recurse -Path mount -Driver .\DeployDriverPack
If you're more conservative, you could add a single driver (by removing the -Recurse parameter and changing the path) or just the audio drivers, and test out the image before adding more.
Step 5. Enable or disable Windows optional features
You also have the ability to select which Windows features are enabled or disabled by default.
You can query what features are available and their current status using:
Get-WindowsOptionalFeature -Path mount | Sort-Object -Property FeatureName
To enable a feature, do this:
Enable-WindowsOptionalFeature -Path mount -FeatureName VirtualMachinePlatform
(The VirtualMachinePlatform feature is used by WSL, so by ensuring it is enabled that should mean that WSL installs quicker later on)
I also enabled Telnet and NetFx4Extended-ASPNET45
Likewise you can disable features that you don't anticipate needing using Disable-WindowsOptionalFeature
Step 6. Copy the updated WIM back to your USB
First we need to unmount the image:
Dismount-WindowsImage -Path mount -Save
This will take a few minutes to complete. When it does, the C:\MachineImaging\install.wim file will have grown quite a bit.
Now copy this file back to the USB (assuming your bootable Windows USB drive is E:)
Copy-Item install.wim E:\sources
Step 7. Extra automation with an autounattend.xml file
The image we've got is a good start, but we're still going to be asked lots of questions during the install. Wouldn't it be nice to have most of those pre-answered? The way to do this is to create an autounattend.xml file. There are Microsoft-provided tools to do this, which are included as part of the Windows ADK, but that's really intended for folks running large Windows networks.
An easier alternative is this very nifty autounattend.xml generator website.
I set the following settings:
Language - English (Australian)
Home location - Australia
Computer name
Time zone - Adelaide
Use custom diskpart to configure Windows partition. In my case I know that partition 3 of disk 0 is where I want Windows to be installed, and I also want to do a clean format of the partition
SELECT DISK=0
SELECT PARTITION=3
FORMAT QUICK FS=NTFS LABEL="Windows"
Use generic product key and install 'Pro'
Always show file extensions
Show End task command in the taskbar
Configure icons in the taskbar to just show Windows Explorer and Windows Terminal (Ideally I'd pin a few other applications but they aren't installed until after the OS install so you can't use this for that)
<LayoutModificationTemplate xmlns="http://schemas.microsoft.com/Start/2014/LayoutModification" xmlns:defaultlayout="http://schemas.microsoft.com/Start/2014/FullDefaultLayout" xmlns:start="http://schemas.microsoft.com/Start/2014/StartLayout" xmlns:taskbar="http://schemas.microsoft.com/Start/2014/TaskbarLayout" Version="1">
<CustomTaskbarLayoutCollection PinListPlacement="Replace">
    <defaultlayout:TaskbarLayout>
    <taskbar:TaskbarPinList>
        <taskbar:DesktopApp DesktopApplicationID="Microsoft.Windows.Explorer" />
        <taskbar:UWA AppUserModelID="Microsoft.WindowsTerminal_8wekyb3d8bbwe!App" />
    </taskbar:TaskbarPinList>
    </defaultlayout:TaskbarLayout>
</CustomTaskbarLayoutCollection>
</LayoutModificationTemplate>
Disable widgets
Don't show Bing results
Remove all pins in the start menu
Enable long paths
Allow execution of PowerShell scripts
Hide Edge first run experience
Delete empty c:\Windows.old folder
Remove bloatware
- 3D Viewer
- Bing search
- Clock
- Cortana
- Family
- Get Help
- Handwriting
- Mail and Calendar
- Maps
- Math input
- Mixed reality
- Movies and TV
- News
- Office 365
- Paint
- Paint 3D
- People
- Photos
- Power Automate
- PowerShell ISE
- Quick Assist
- Skype
- Solitaire
- Speech
- Sticky notes
- Teams
- Tips
- To do
- Voice recorder
- Wallet
- Weather
- Windows Fax and Scan
- Windows media player
- Wordpad
- XBox apps
- Your Phone
Scripts to run when first user logs in after Windows has been installed (I'm installing Chocolatey, as I'll be using that almost immediately once I sign in the first time).
Set-ExecutionPolicy Bypass -Scope Process -Force; [System.Net.ServicePointManager]::SecurityProtocol = [System.Net.ServicePointManager]::SecurityProtocol -bor 3072; iex ((New-Object System.Net.WebClient).DownloadString('https://community.chocolatey.org/install.ps1'))
choco feature enable -n=allowGlobalConfirmation
choco feature enable -n=useRememberedArgumentsForUpgrades
And then download the file and save it in the root of your bootable USB
Step 8. Try it out
You will need to restart your target machine and get it to boot off the USB drive. For my laptop, the easiest way to do that is to hit F12 when the Dell logo appears while powering up. You may also have to go into your BIOS/UEFI settings to disable secure boot mode and enable booting from USB. The Rufus instructions suggest that it may work without disabling secure boot mode, but I did it anyway.
If all goes well, you'll see a few different Windows installation screens, but won't get prompted where to install, which keyboard or location to use.
You will still get some UI prompts that can't be avoided (like entering your Microsoft Account details), but at the end after a few reboots you should be greeted by a clean install of Windows, and if you check the Windows Device Manager, there should not be any unknown devices. Likewise, looking in Settings | Apps, should show either no or the bare minimum of applications. No bloatware to be seen!
You'll still need to allow the latest Windows cumulative updates to install (adding that to the WIM file is a task for another day), and there may still be some driver updates that Windows discovers that are newer, but not too many.
I timed it and the entire OS install process (including unavoidable manual steps) took only 15 minutes!
After that you're ready to install and run Boxstarter to install all your tools and other applications. You can see my Boxstarter scripts in this GitHub Gist.
Future plans
It's worth thinking about what else could be include in the custom Windows image or the autounattend.xml file, to further streamline the installation process. For example, the latest cumulative updates?
The other part that would be great to automate is all the numerous tasks you need to perform to finish setting up application software, signing into things, setting up your web browser, have Git configured correctly, OneDrive(s) and the list goes on. Some of these (especially the signing in/authenticating) ones may always require manual intervention, but the others may be able to be scripted, if not totally then at least partially.
]]>