-
Azure DevOps - Default permissions for force push on a branch
This error caught me by surprise today:
C:\dev\git\project [feature ↓1 ↑2 +1 ~0 -0 !]> git push --force-with-lease
Enumerating objects: 22, done.
Counting objects: 100% (22/22), done.
Delta compression using up to 8 threads
Compressing objects: 100% (5/5), done.
Writing objects: 100% (12/12), 1.61 KiB | 824.00 KiB/s, done.
Total 12 (delta 6), reused 8 (delta 4)
remote: Analyzing objects... (12/12) (8 ms)
remote: Storing packfile... done (115 ms)
remote: Storing index... done (81 ms)
To https://mytenancy.visualstudio.com/repo/_git/project
 ! [remote rejected]       feature -> feature (TF401027: You need the Git 'ForcePush' permission to perform this action. Details: identity '93086622-abb9-4886-b994-502e7f2afc21\[email protected]', scope 'branch'.)
error: failed to push some refs to 'https://mytenancy.visualstudio.com/repo/_git/project'
I was trying to push a change to a Git branch in Azure DevOps Repos. I'd just done an interactive rebase to update history on the branch and was trying to force push my changes - something I've done countless times before.
Reviewing the permissions for this repository, the Force push (rewrite history, delete branches and tags) permission was Not Set (eg. neither explicitly allowed nor denied). Checking other projects and repositories, this was also the case, so what's different?
Well one thing that's different is that I didn't create this branch - it was created by another developer. Force pushing to a shared branch is generally frowned upon (as if it isn't coordinated it can cause all kinds of problems), and so it seems DevOps helps guard against this problem by defaulting to granting the Force Push permission just to the branch creator (and also to users who are the Project administrator - as set in the Project details page of Project Settings).

Because I didn't create the original branch and I was not a project administrator in this particular project, no push for me!
Check out the descriptions of the different permissions for Git repositories and the default Git repository and branch permissions.
-
In the garden - Winter 2019
It's been a while since my last garden update. Things are cooling down in Adelaide. Not to the extent of other places that get regular snow and ice, but still chilly enough.

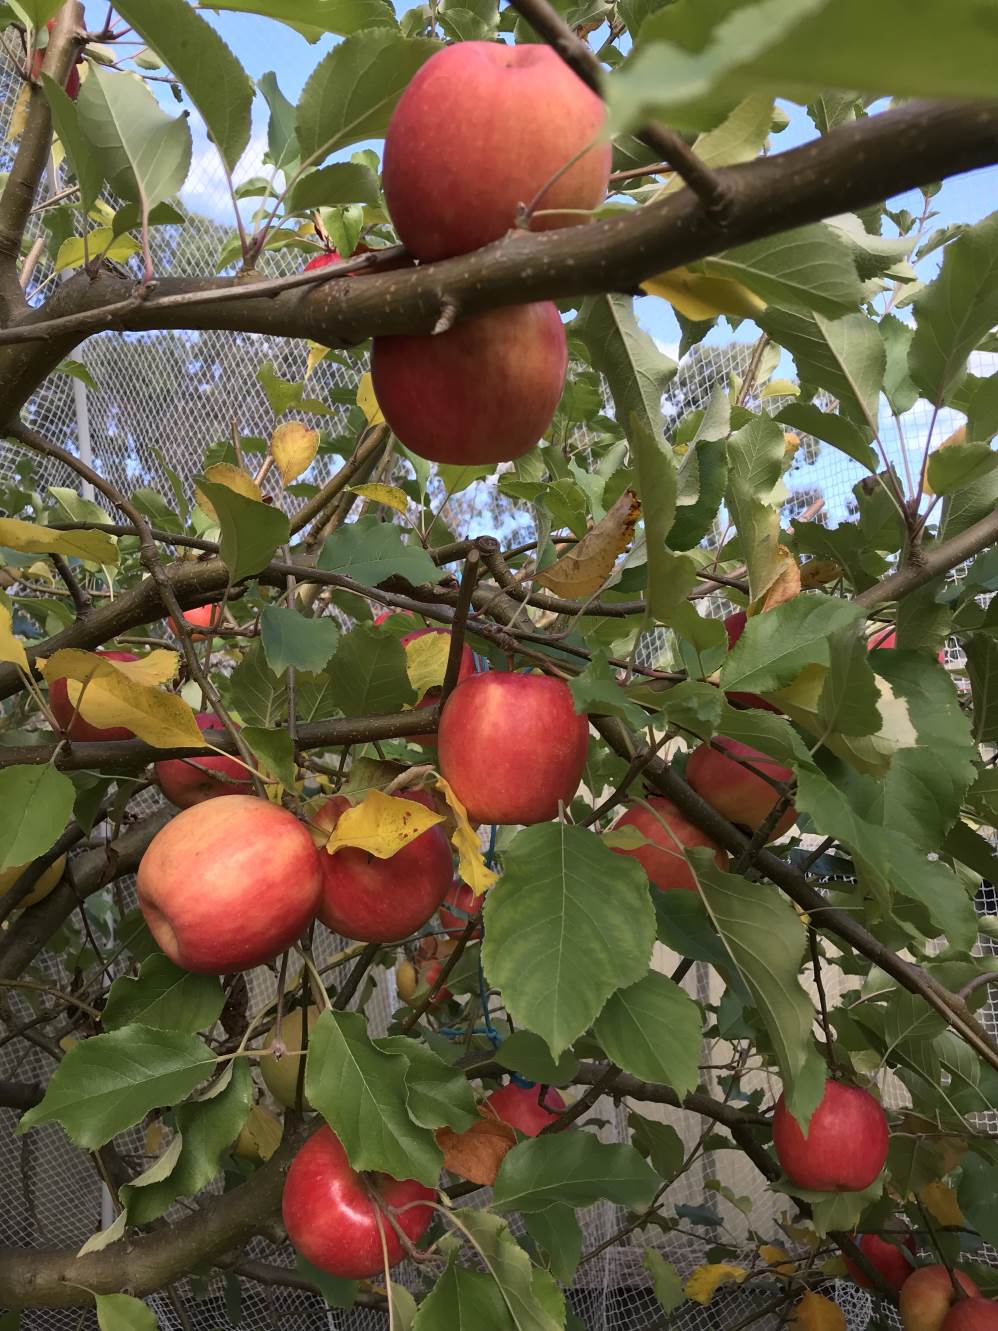
Our apple trees are starting to mature now and we've had good crops from both trees this year. The Pink Lady still has fruit hanging on the tree, and they've coloured up really nicely and the family are enjoying eating them.
The mandarin is doing a great job. The fruit are so much tastier than the ones you buy in the shop. So far this year I have had no problems with possums/rodents eating the fruit, so I haven't worried about netting the tree. The fruit might be a little smaller than previous years, possibly due to an incredibly dry January/February. Some late rains came just in time.

The lemonade just keeps powering on. Such a productive tree. I've had to give it a few haircuts as it's really growing tall.

Narelle did a great job planting out some potted colour a few weeks ago, and we're continuing to enjoy the results.
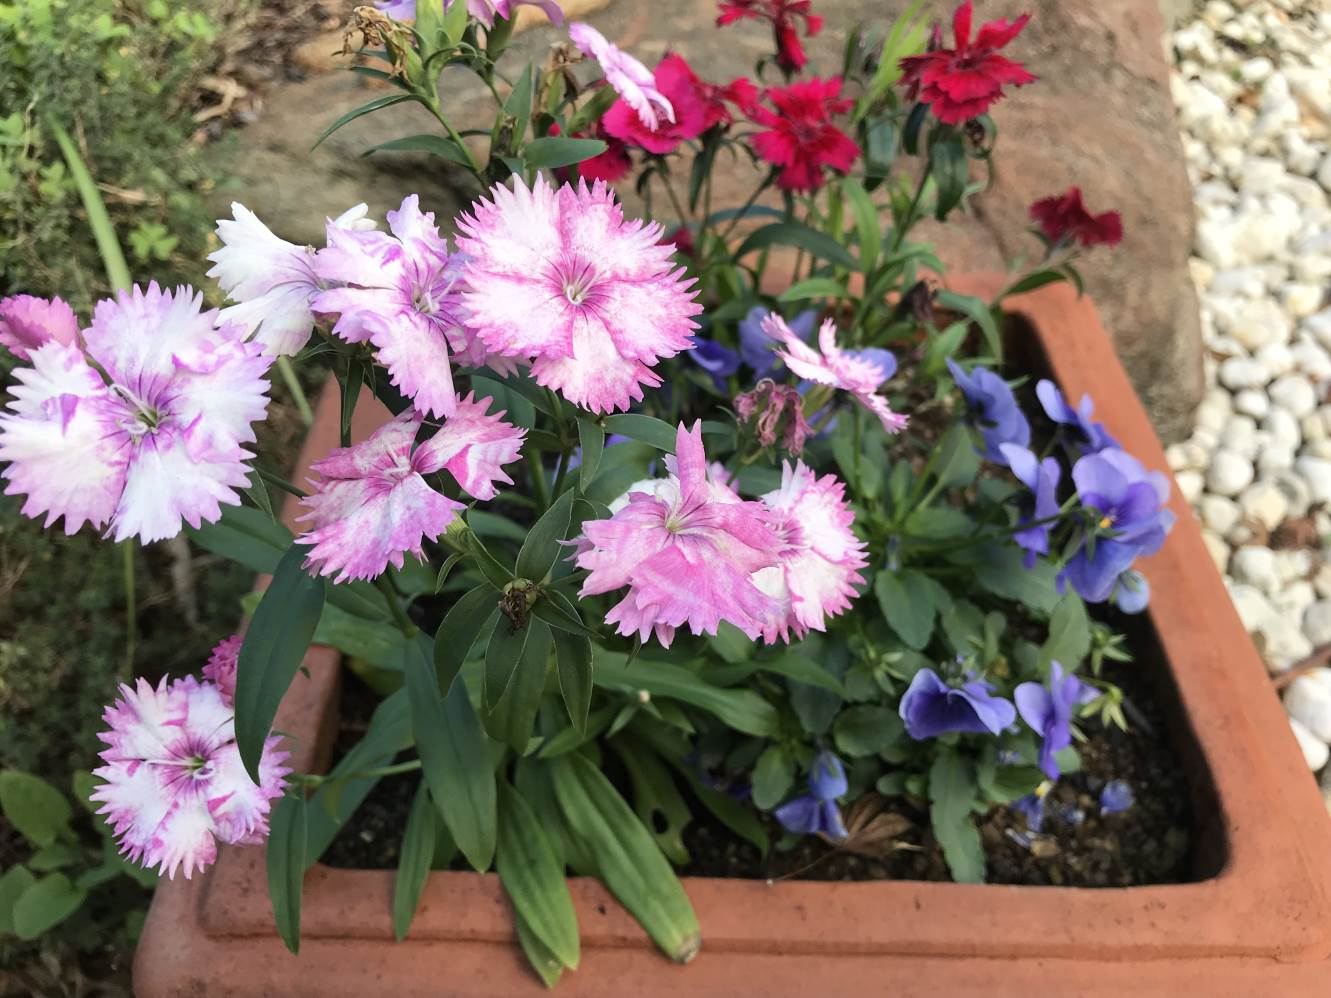
And we got to enjoy some late flowers from this rose. Very pretty.

Time to get back in the garden and do some weeding!
-
Congratulations 2019-2020 Microsoft MVP!
I received a really nice email last night:
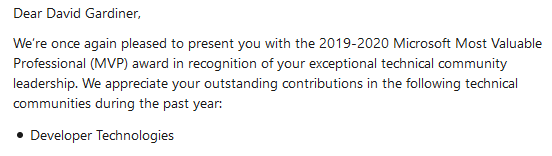
Great to be a Microsoft MVP for another year!
I first received the Microsoft MVP award in October 2015 (which happens to be about 14 months after I took over organising the Adelaide .NET User Group). Each year since then, I wonder if I'll be renewed. So far, so good.
It's a nice way for Microsoft to show their appreciation for the various things I do for the developer community - running the user group, speaking, and lots of open source contributions. It's also been a great avenue for meeting new people, visiting new places and also providing feedback direct to Microsoft's product teams.
It's also something I'd love more people being recognised for (especially in Adelaide). If you are doing things in the development or IT community (or know someone who is), then let me know in the comments - I'd love to nominate them.


A blog of software development, .NET and other interesting things