GitHub Releases
I want to make creating a release as simple as possible.
I want to make creating a release as simple as possible. Some projects might adopt a continuous delivery approach where every commit to the main branch generates a new release. In this case I want to allow commits to accrue until I decide that a new release should be created.
My requirements for creating a new release include the following:
- Only run on the main branch
- Provide a useful set of release notes, outlining all changes since the last release
- Attach vsix binaries from the automated build
- Publish vsix to the Visual Studio Marketplace so it becomes available for users to install/upgrade
Workflows
The main.yml file in the Show Missing project is split into two jobs - build and update_release_draft. The latter job only runs when we’re building the main branch.
The second workflow is publish.yml, which is run after a non-draft release is created.
Update release draft job
This job has an if: clause that means it only runs when we’re building master branch.
  update_release_draft:
    name: Update release draft
    runs-on: ubuntu-latest
    needs: [build]

    if: github.ref == 'refs/heads/master'
    steps:
Release notes
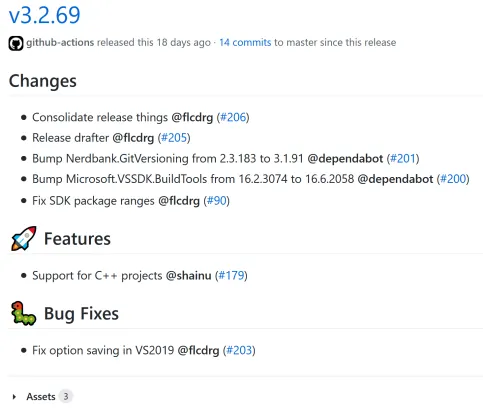
Browsing GitHub Actions, there’s a few that help with release notes. I chose Release Drafter. It creates a draft release (automatically generating the release name based on the version) and each time it runs, it reviews the list of commits since the last release and generates formatted release notes. It is smart enough to update the draft release on subsequent runs.
Release Drafter calls GitHub APIs so we set GITHUB_TOKEN.
I use Nerdbank.GitVersioning to manage version numbers. I use the full notation to access the calculated version number from the previous build job.
      - uses: release-drafter/release-drafter@v5
        id: create_release
        env:
          GITHUB_TOKEN: ${{ secrets.GITHUB_TOKEN }}
        with:
          version: ${{ needs.build.outputs.GitBuildVersionSimple }}
Here’s the release notes (edited for this blog post) to show the kind for formatting that Release Drafter provides. It can use labels to group the issues under the different headings.
You configure Release Drafter by adding a file named .github/release-drafter.yml. Mine contains the following:
name-template: 'v$RESOLVED_VERSION'
tag-template: 'v$RESOLVED_VERSION'
categories:
  - title: '🚀 Features'
    labels:
      - 'feature'
      - 'enhancement'
  - title: '🐛 Bug Fixes'
    labels:
      - 'fix'
      - 'bugfix'
      - 'bug'
  - title: '🧰 Maintenance'
    label: 'chore'
change-template: '- $TITLE @$AUTHOR (#$NUMBER)'
version-resolver:
  major:
    labels:
      - 'major'
  minor:
    labels:
      - 'minor'
  patch:
    labels:
      - 'patch'
  default: patch
template: |
  ## Changes

  $CHANGES
Release assets
The Upload a Release Asset action is used to append the vsix from the build to the draft release.
      - name: Upload Release Asset
        id: upload-release-asset
        uses: actions/upload-release-asset@v1
        env:
          GITHUB_TOKEN: ${{ secrets.GITHUB_TOKEN }}
        with:
          upload_url: ${{ steps.create_release.outputs.upload_url }} # This pulls from the CREATE RELEASE step above, referencing it's ID to get its outputs object, which include a `upload_url`. See this blog post for more info: https://jasonet.co/posts/new-features-of-github-actions/#passing-data-to-future-steps
          asset_path: ./bin/Release/Gardiner.VsShowMissing.VS2019.vsix
          asset_name: Gardiner.VsShowMissing.VS2019.vsix
          asset_content_type: application/octet-stream
Publishing to the marketplace
The publish.yml workflow triggers after the draft release is published (changes to non-draft).
It firstly grabs a copy of vsix file that was attached to the release that has triggered this workflow.
      - name: Download Assets
        uses: i3h/download-release-asset@v1.2.0
        with:
          owner: ${{ github.event.repository.owner.login }}
          repo: ${{ github.event.repository.name }}
          tag: ${{ github.event.release.tag_name }}
          file: Gardiner.VsShowMissing.VS2019.vsix
          token: ${{ secrets.GITHUB_TOKEN }}
And then locates VsixPublisher.exe, then runs that to publish the vsix up to the marketplace.
      - name: Script
        run: |
          # Find VsixPublisher
          $Installation = & "${env:ProgramFiles(x86)}\Microsoft Visual Studio\Installer\vswhere.exe" -latest -format json | ConvertFrom-Json
          $Path = $Installation.installationPath

          Write-Host $Path
          $VsixPublisher = Join-Path -Path $Path -ChildPath "VSSDK\VisualStudioIntegration\Tools\Bin\VsixPublisher.exe" -Resolve

          & $VsixPublisher publish -payload ".\Gardiner.VsShowMissing.VS2019.vsix" -publishManifest ".\build\extension-manifest.json" -personalAccessToken $env:PersonalAccessToken -ignoreWarnings "VSIXValidatorWarning01,VSIXValidatorWarning02,VSIXValidatorWarning08"
        env:
          PersonalAccessToken: ${{ secrets.PersonalAccessToken }}
Creating a new release
After enough changes have been made, it’s time to publish a new release!
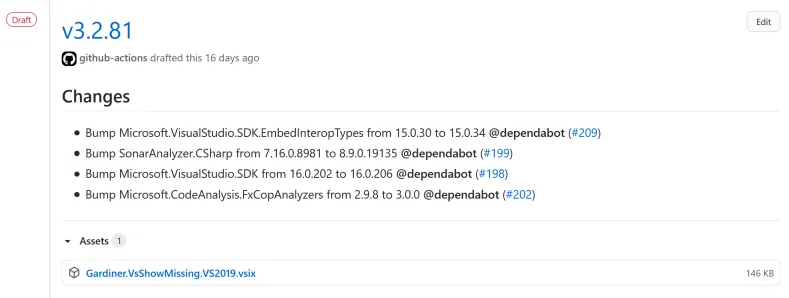
- Browse to the Releases page.
- A draft release is shown.
 Click on the Edit button
 - Review (and optionally edit) the release notes.
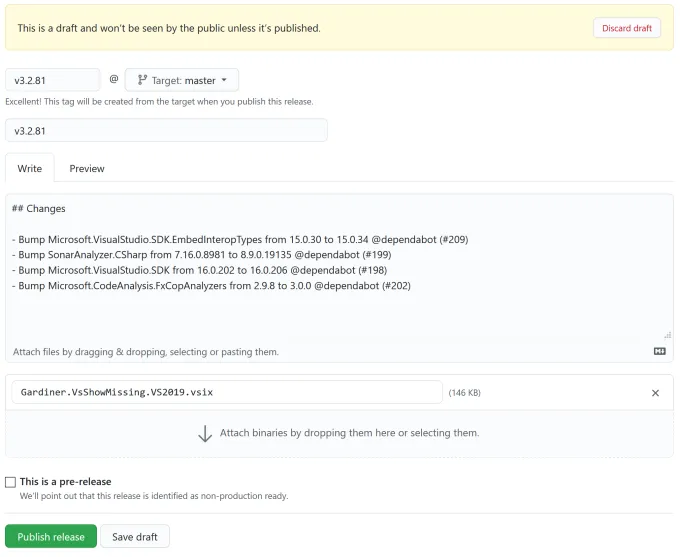
- If you’re happy to proceed, click on Publish release
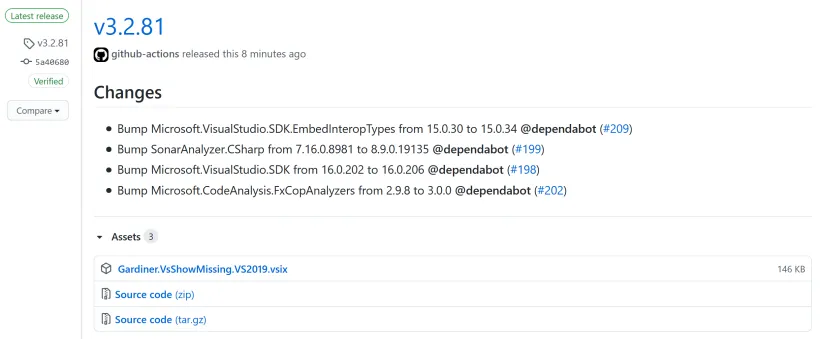
- The
publishworkflow is automatically triggered
The release is now public (no longer in draft) and GitHub has attached additional files to it
Reviewing the Visual Studio Marketplace, you can see that the new vsix has been submitted and is being processed before being made available to the general public.
Nice!