UniFi Controller on a Synology
I've been using Ubiquiti's UniFi wireless access points for a few years around home.
I’ve been using Ubiquiti’s UniFi wireless access points for a few years around home. Until now I’ve only used the UniFi Controller application on an as-need basis (when setting the configuration or installing updates). But having the Synology DS1621xs on hand gives me an opportunity to try out its Docker support and in particular being able to run UniFi Controller continuously in a Docker container on the Synology.
I say ‘UniFi Controller’ but I gather that as of version 6.2 they’ve renamed it to ‘UniFi Network Application’. Same software, just an updated name.
Installing Docker on the Synology
-
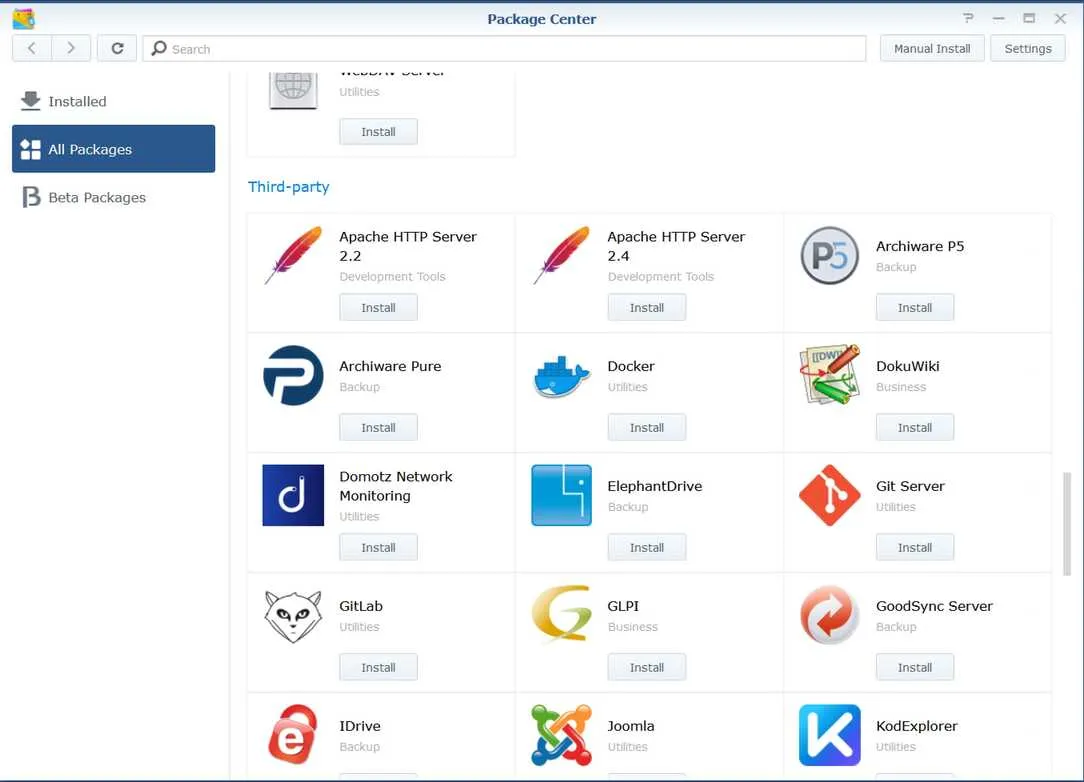
Open the Package Center
-
Select All Packages and scroll down to the Third-party section
-
In the ‘Docker’ package click Install
-
When installation has completed, the button changes to Open. Click on it to open the Docker UI.
-
The first time you open Docker a welcome screen message is displayed. Select Don’t show this again and close the message.
-
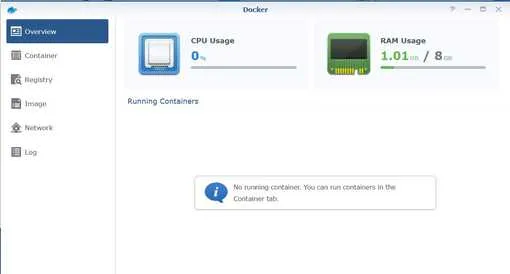
Docker is now running on your Synology
Installing UniFi Controller
-
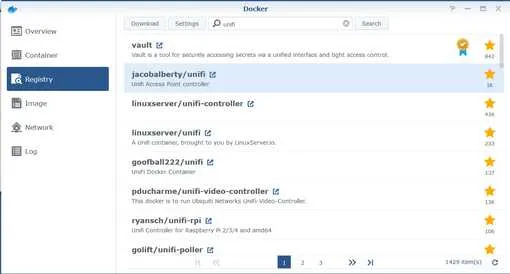
Select the Registry page.
-
In the search bar enter
unifiand click Search. -
Double-click on the jacobalberty/unifi image.

-
You now need to select a tag. Review the options to understand what the different tag values mean. (Choose latest to go with the latest stable version).
-
The image is now being downloaded.
-
Go to the Image page.
-
When the download has completed, the Launch button will be enabled. Click on Launch.
-
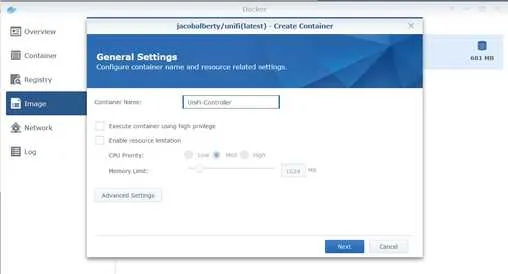
If desired, you can customise the Container Name.
-
Select Enable resource limitation.
-
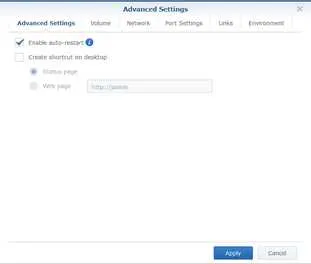
Click on Advanced Settings.
-
Select Enable auto-restart.
-
Select Volume tab and click Add Folder.
-
Select the docker folder and then click on Create Folder.
-
Enter
unifiand click OK. -
Click Select.
-
In the Mount path column, enter
/unifi. (See Volumes for volumes used by this image).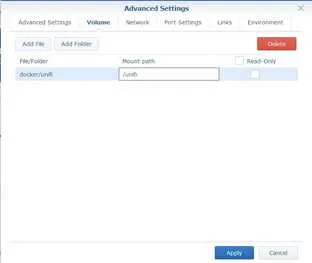
-
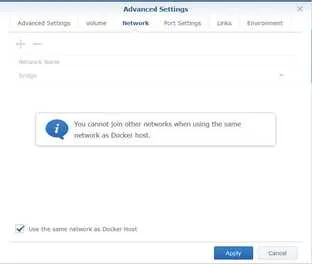
Select Network tab and select use the same network as Docker Host.
-
It is recommended to not run this image as root. Go to the Environment tab.
-
Change the value of RUNAS_UID0 to
false. -
As we will be binding to a port > 1024, we can also set the value of BIND_PRIV to
false.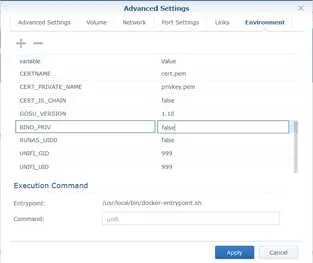
-
Click Apply.
-
Click Next.
-
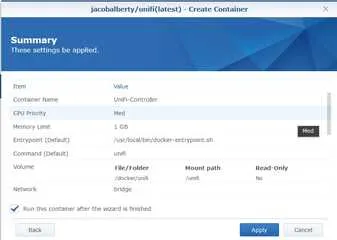
Review the Summary details, then if they look correct click Apply.
-
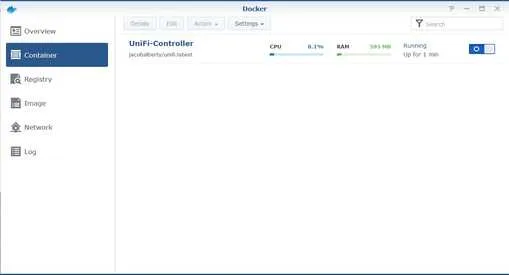
Select the Container page.
-
You can see the UniFi image is now running in a container.
If you have the Synology Firewall enabled, you will need to allow access to the application, the port needs to be opened in the Synology Firewall. In my case because I hadn’t exposed the Synology directly to the Internet, the firewall was disabled. I figured it was probably a good idea to enable the firewall.
From the Ports documentation there are a number of TCP and UDP ports to select.
-
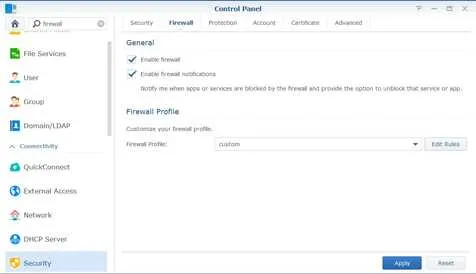
Go to the Synology main menu and select Control Panel.
-
Select Advanced Mode and click on Security.
-
In the Firewall tab, select the custom profile and click Edit Rules.
-
Click Create and under Ports select Custom and then click on Custom.
-
Ensure Protocol is set to TCP.
-
In the Ports field enter
8080,8443,8843,8880,6789.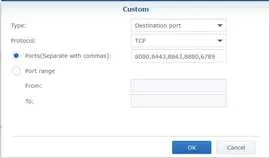
-
Click OK, and OK
-
Click Create and under Ports select Custom and then click on Custom.
-
In Protocol select UDP.
-
In the Ports field enter
3478.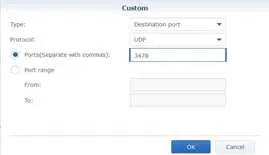
-
Click OK, and OK
-
Click OK to save the firewall profile changes.
-
If it is highlighted, click Apply to save firewall changes.
Accessing UniFi Controller
- Navigate to https://your-synology-box:8443/ (replacing
your-synology-boxwith the DNS name of your Synology). - As the UniFi Controller comes with a self-signed TLS certificate you’ll need to tell your browser to trust the certificate.
- After this you should see the UniFi start-up wizard. If this is the first time you’ve used the software, proceed through the wizard following the steps. Alternatively (like me) if you’re migrating from another installation you can click the or restore setup from backup to upload a back from the old system.
And with that you should be good to go!
Final thoughts
The ability to run Docker containers on a Synology is a great advantage. The UI is easy to use but flexible enough to allow you to run useful Docker images. Do check out my review of the DS1621xs, and check it out on amazon.com or amazon.com.au
Acknowledgements
- There are quite a few different Docker images for running UniFi. Thanks to Simon Waight for the suggestion of https://github.com/jacobalberty/unifi-docker.
- Ruud’s instructions which formed the basis of the steps I followed here.