Provision an Azure Virtual Machine with Terraform Cloud
Walk through creating an Azure VM with Terraform Cloud, including workspace setup, Azure credentials, and cleanup.
![]()
Sometimes I need to spin up a virtual machine to quickly test something out on a ‘vanilla’ machine, for example, to test out a Chocolatey package that I maintain.
Most of the time I log in to the Azure Portal and click around to create a VM. The addition of the choice to use the Azure Virtual Machine with preset configuration does make it a bit easier, but it’s still lots of clicking. Maybe I should try automating this!
There are a few choices for automating, but seeing as I’ve been using Terraform lately I thought I’d try that out, together with Terraform Cloud. As I’ll be putting the Terraform files in a public repository on GitHub, I can use the free tier for Terraform Cloud.
You can find the source for the Terraform files at https://github.com/flcdrg/terraform-azure-vm/.
You’ll also need to have both the Azure CLI and Terraform CLI installed. You can do this easily via Chocolatey:
choco install terraform
choco install azure-cli
Setting up Terraform Cloud Workspace with GitHub
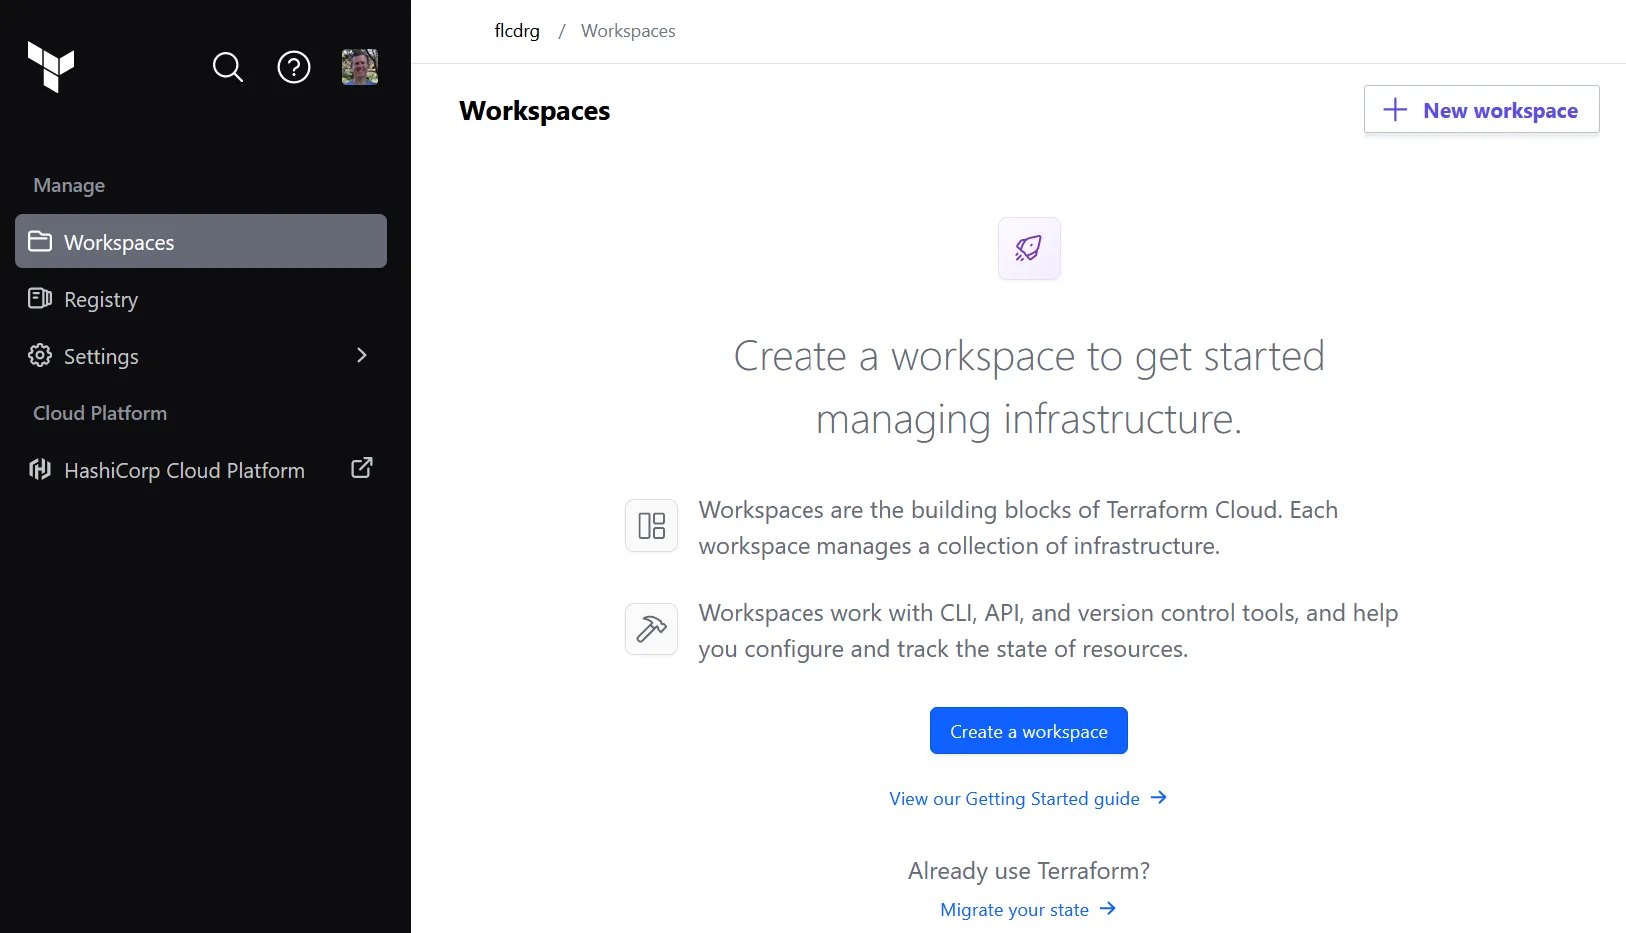
- Log in (or sign up) to Terraform Cloud at https://app.terraform.io, select (or create) your organisation, then go to Workspaces and click on Create a workspace
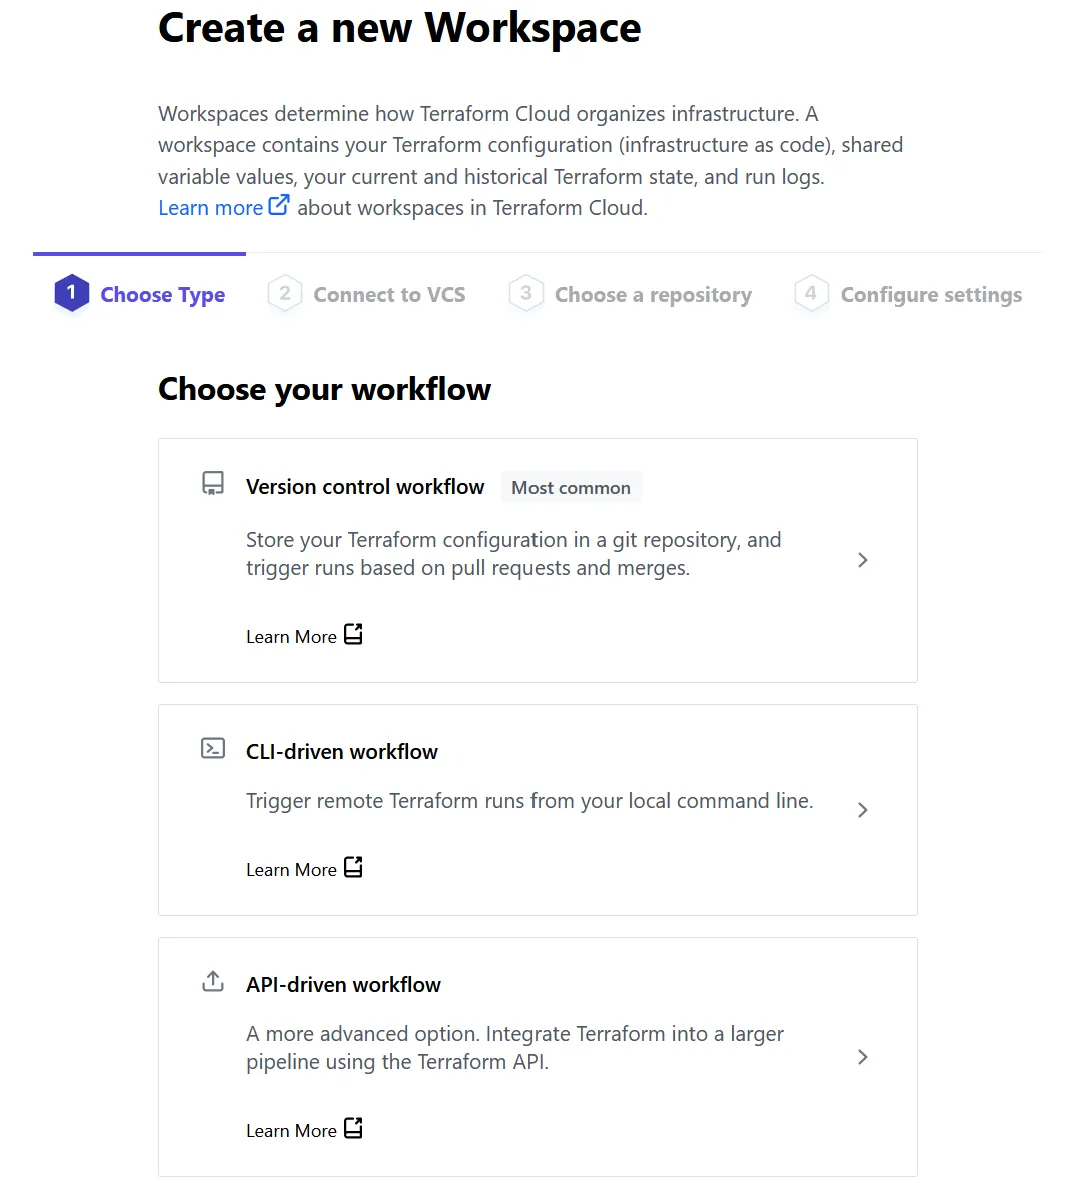
- Select how you’d like to trigger a workflow. To keep things simple, I chose Version control workflow
- Select the version control provider - Github.com.
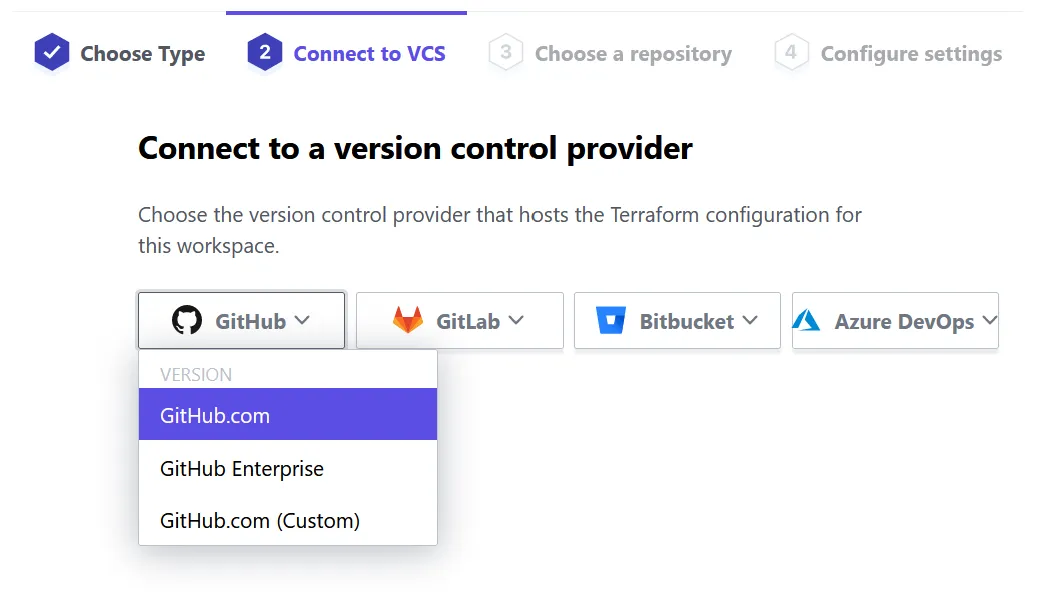
- You will now need to authenticate with GitHub.
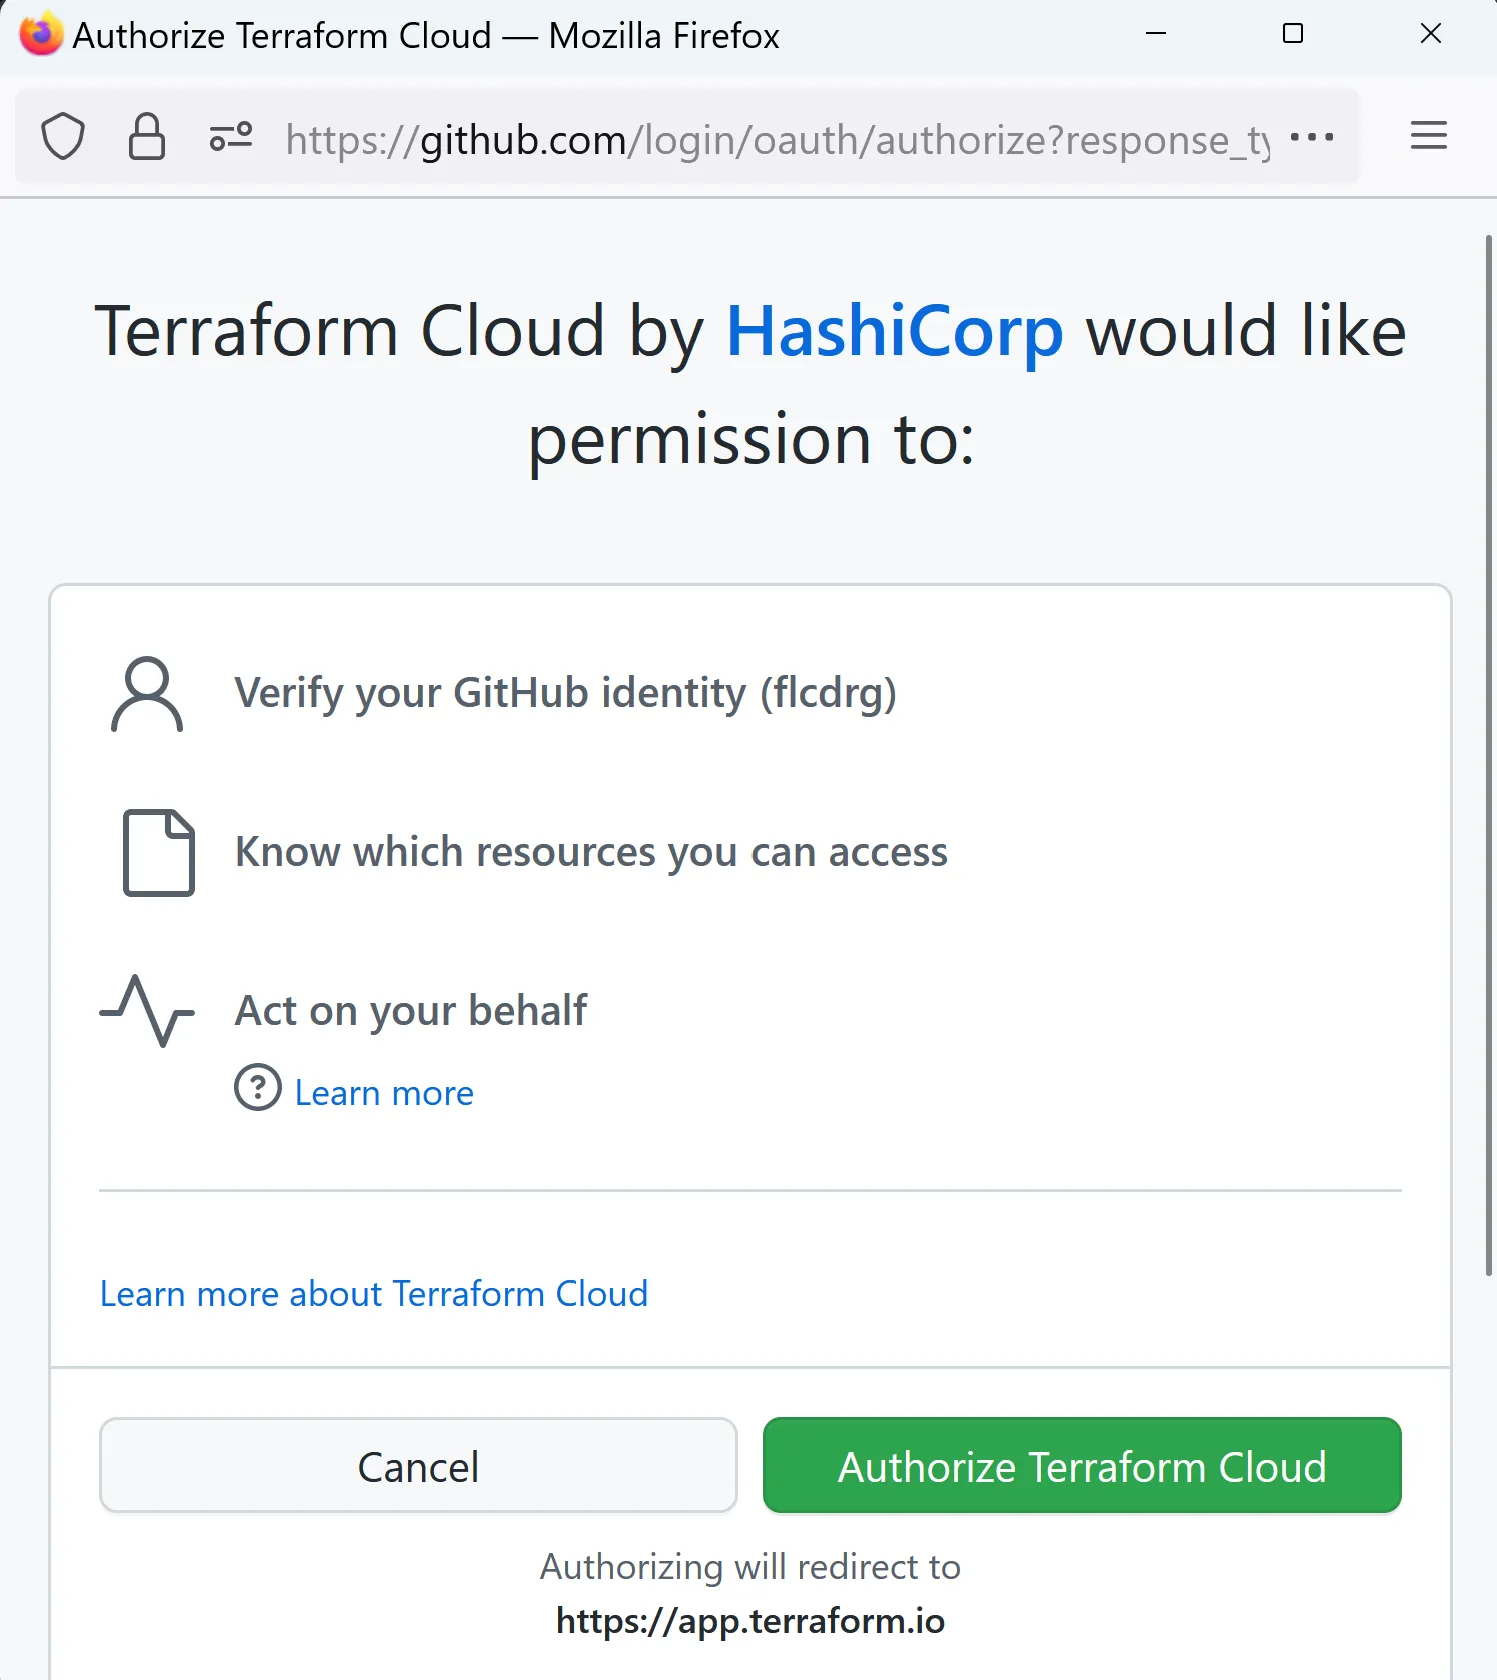
- Watch out if you get a notification about a pop-up blocker.
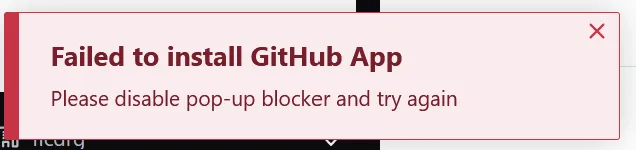 If you do, then enable pop-ups for this domain

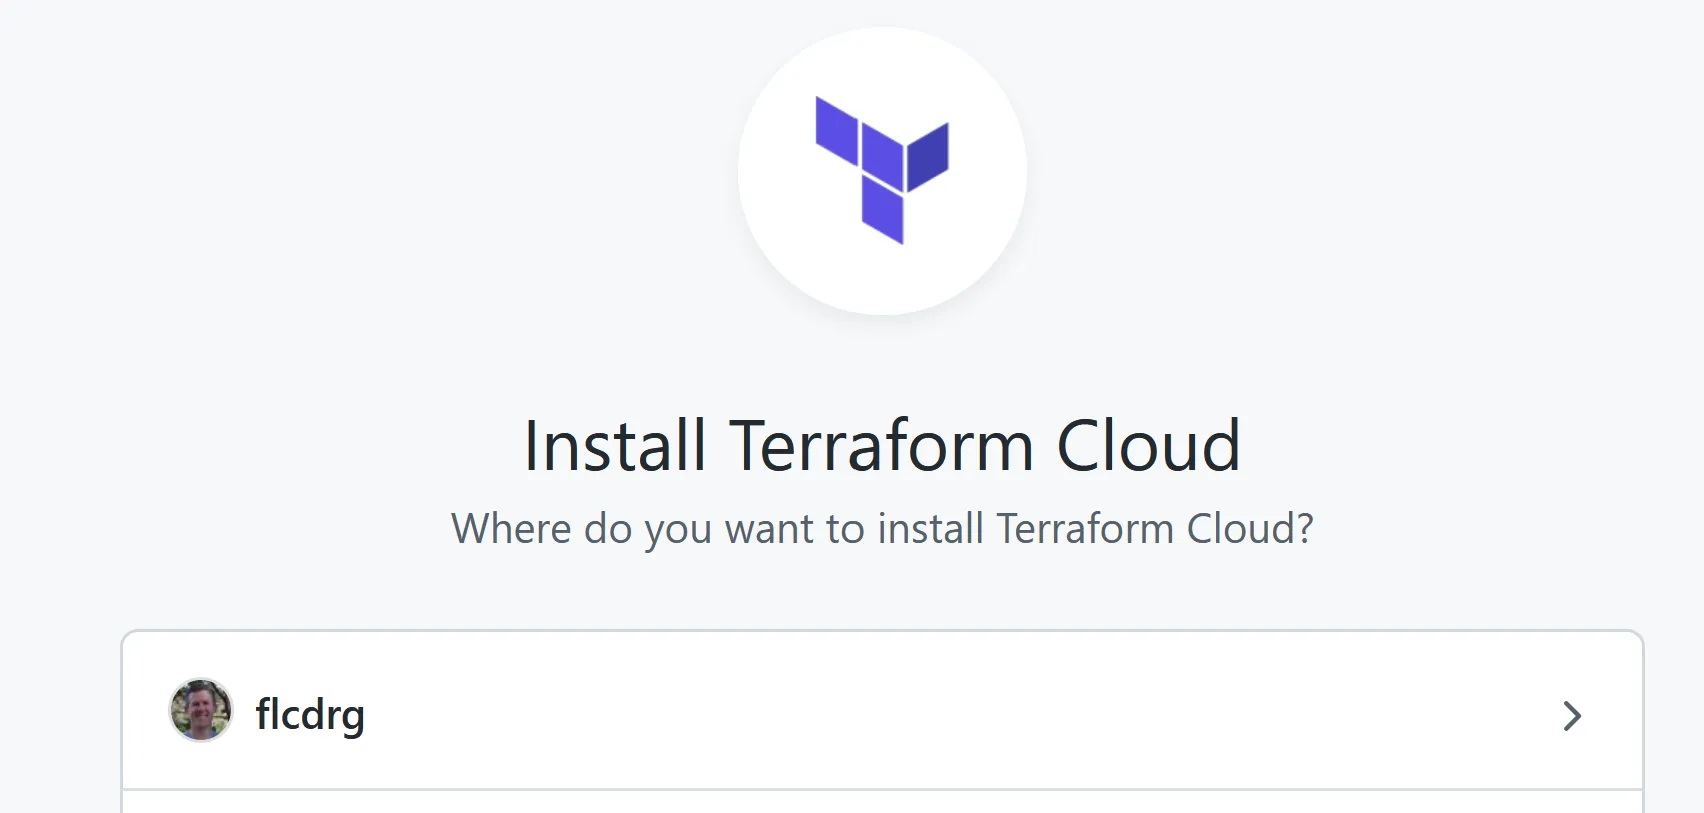
- Choose which GitHub account or organisation to use:
- Select which repositories should be linked to Terraform Cloud.
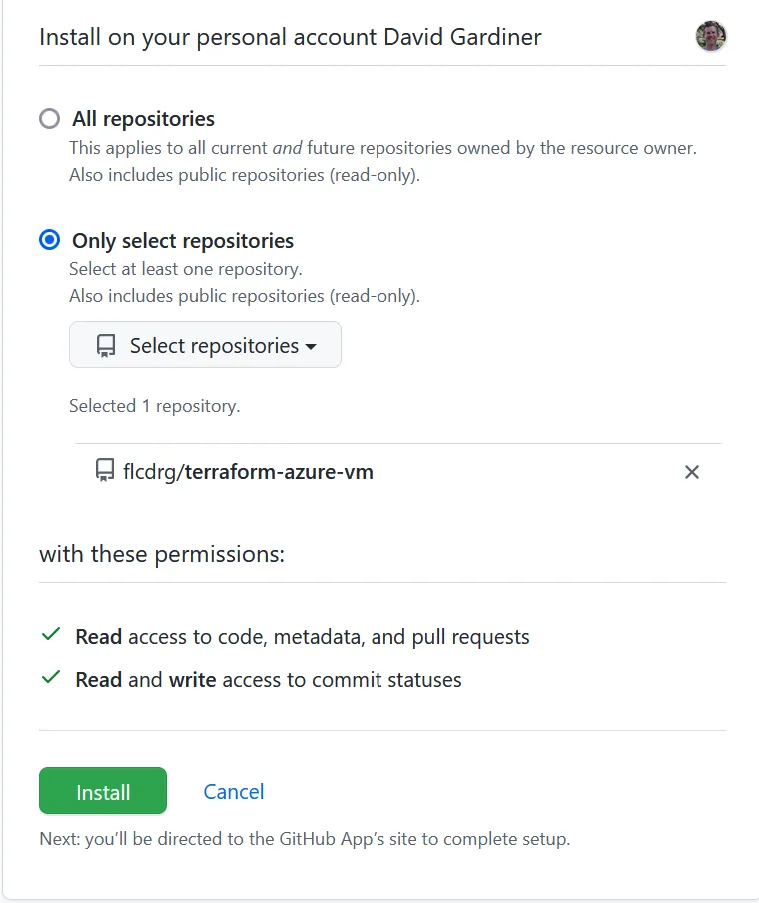
- If you use multi-factor authentication then you’ll need to approve the access.
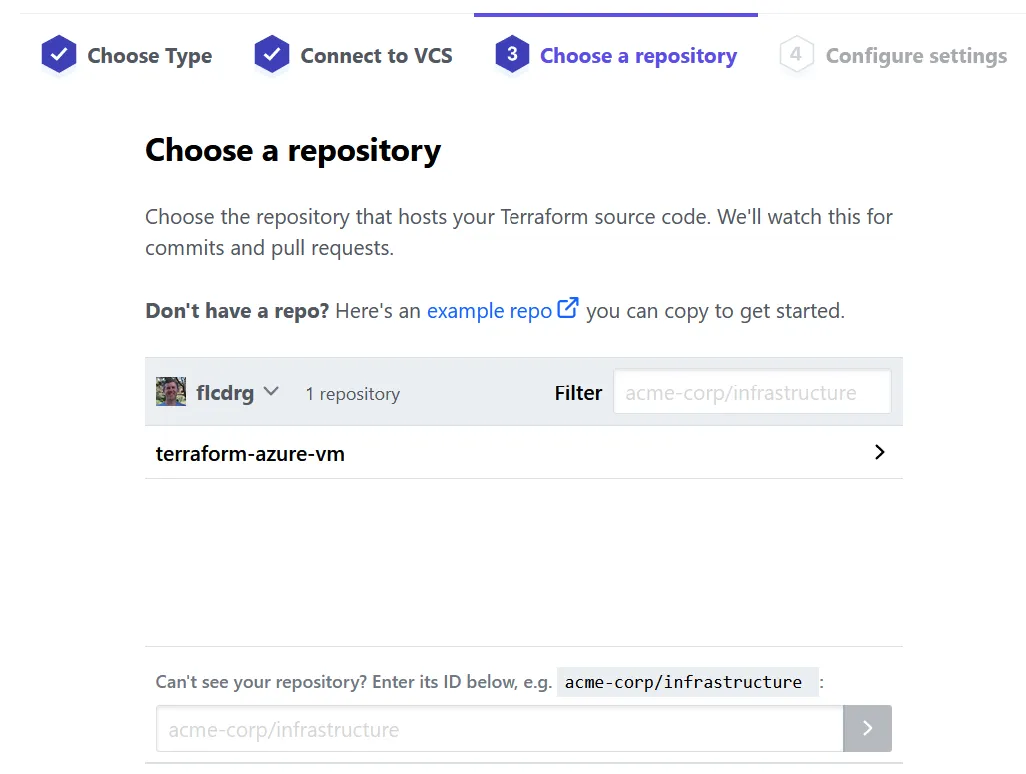
- Now that your GitHub repositories are connected, you need to select the repository that Terraform Cloud will use for this workspace.
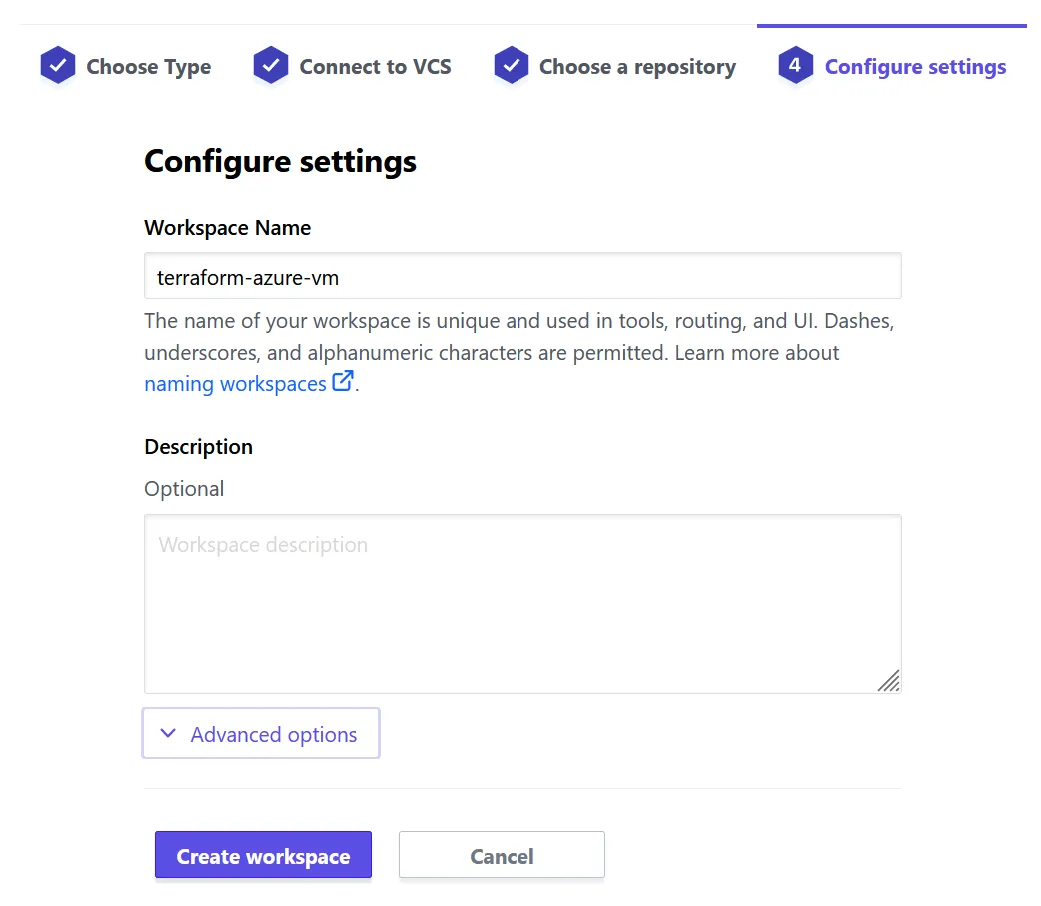
- Enter a workspace name (and optionally a description)
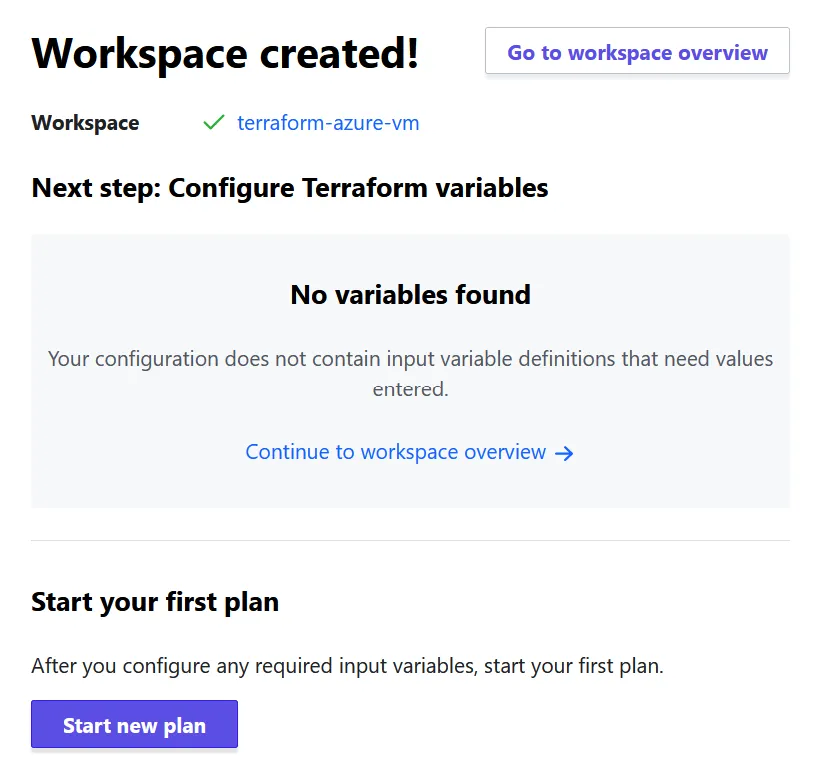
- Now your workspace has been created!
You’re now ready to add Terraform files to your GitHub repository. I like to use the Terraform CLI to validate and format my .tf files before I commit them to version control.
After adding versions.tf file that contains a cloud definition (along with any providers), you can run terraform login
terraform {
cloud {
organization = "flcdrg"
hostname = "app.terraform.io"
workspaces {
name = "terraform-azure-vm"
}
}
required_providers {
azurerm = {
source = "hashicorp/azurerm"
version = "=3.39.1"
}
random = {
source = "hashicorp/random"
version = "3.4.3"
}
}
}
provider "azurerm" {
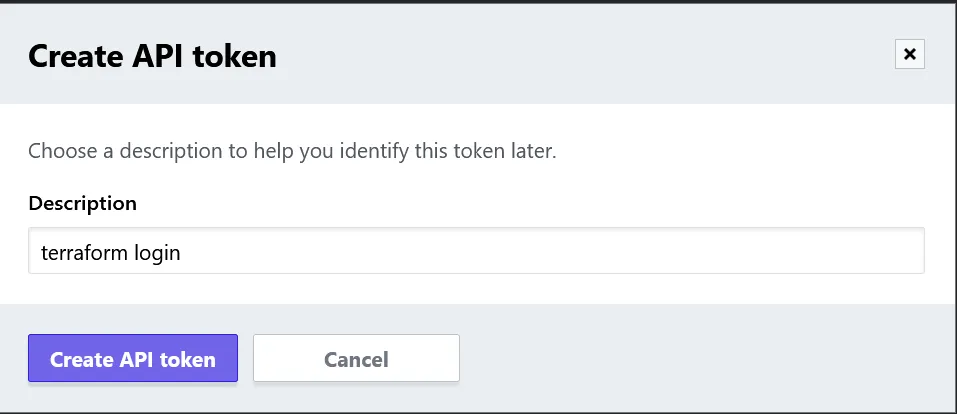
features {}
}A browser window will launch to allow you to create an API token that you can then paste back into the CLI.
The next thing we need to do is create an Azure service principal that Terraform Cloud can use when deploying to Azure.
In my case, I created a resource group and granted the service principal Contributor access to it (assuming that all the resources you want Terraform to create will live within that resource group). You could also allow the service principal access to the whole subscription if you prefer.
az login
az group create --location westus --resource-group MyResourceGroup
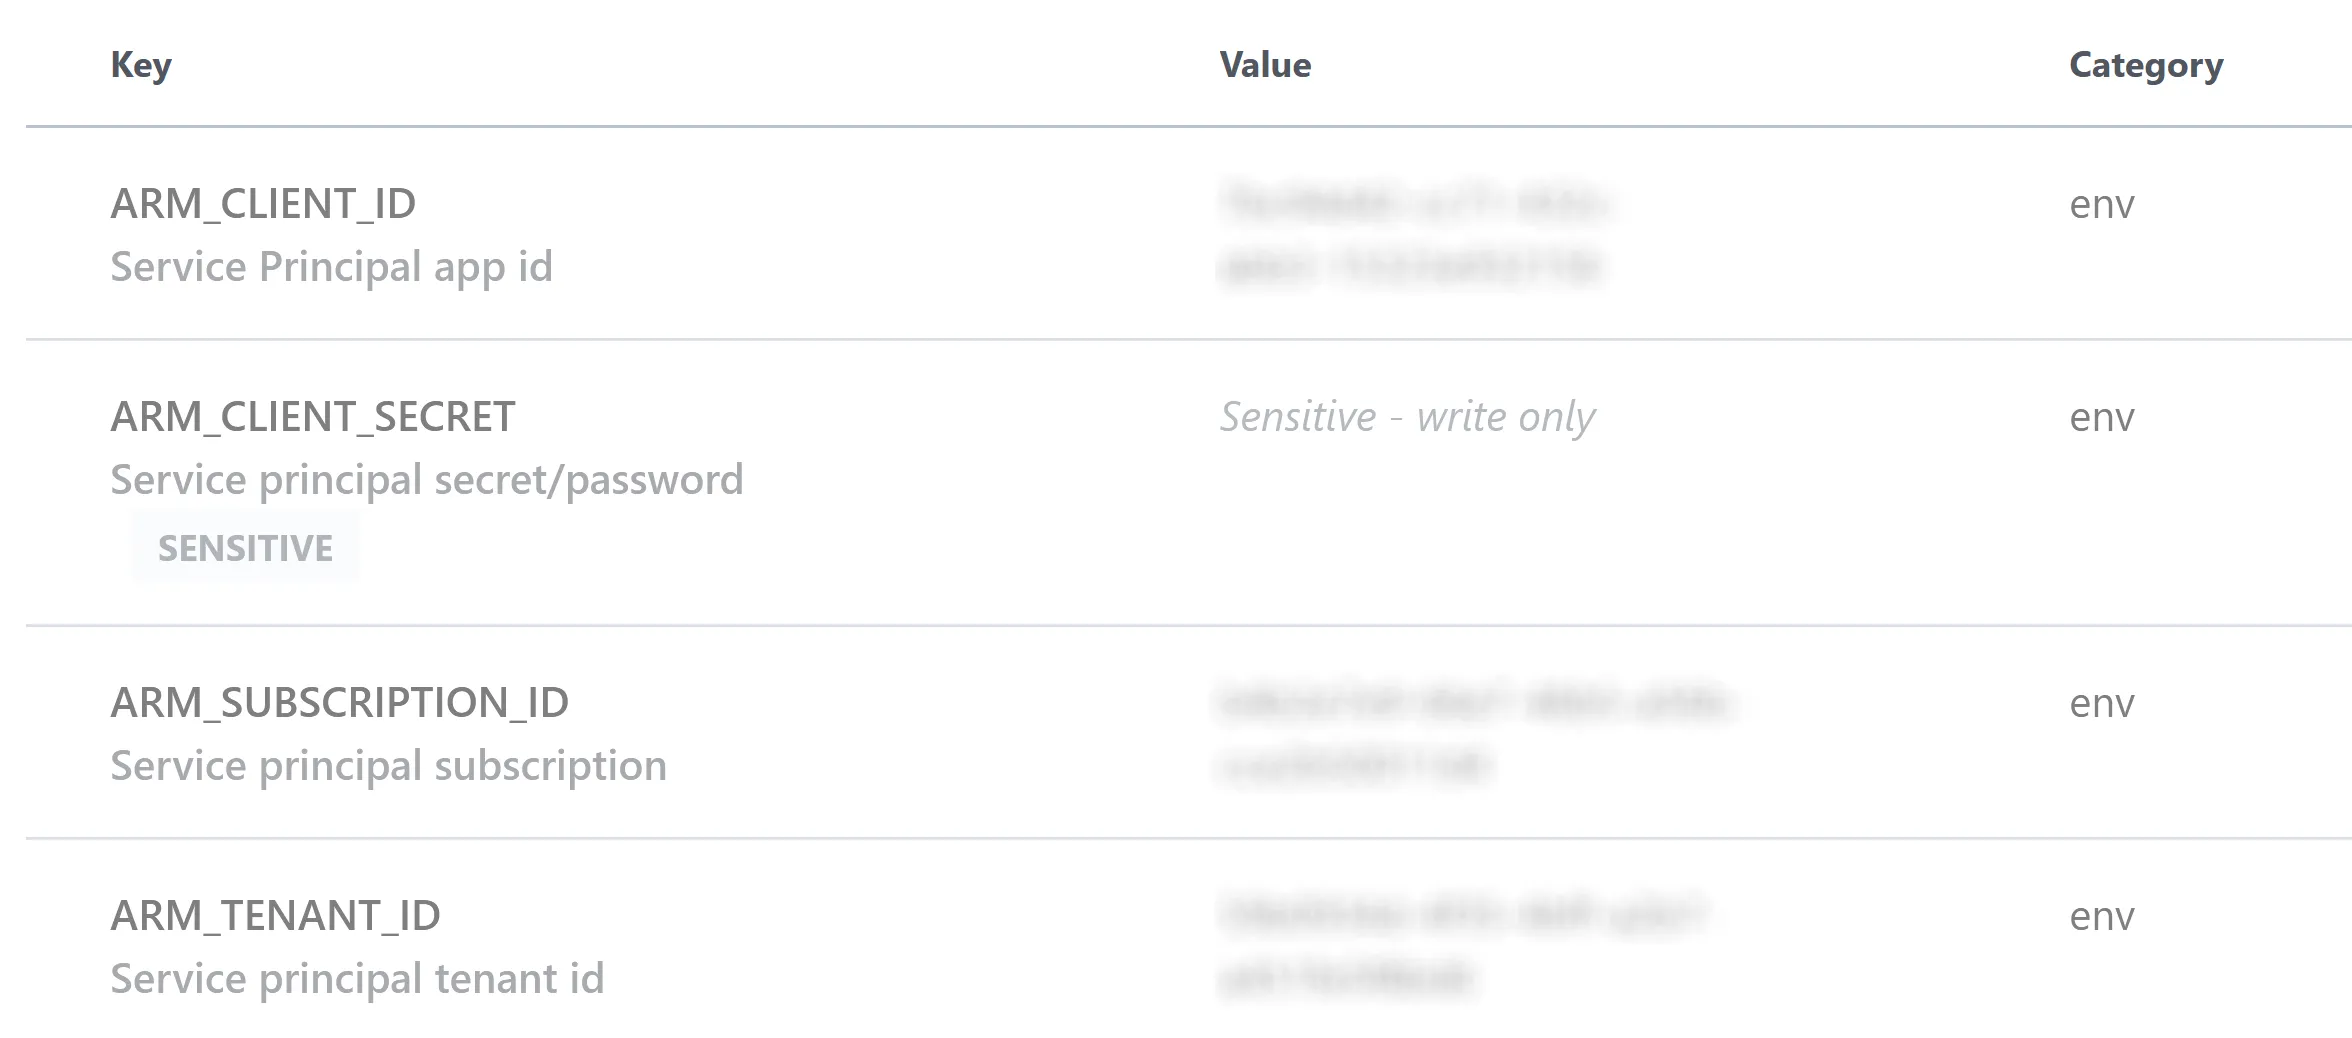
az ad sp create-for-rbac --name <service_principal_name> --role Contributor --scopes /subscriptions/<subscription_id>/resourceGroups/<resourceGroupName>Now go back to Terraform Cloud, and after selecting the newly created workspace, select Variables.
Under Workspace variables, click Add variable, then select Environment variables. Add a variable for each of the following (for ARM_CLIENT_SECRET also check the Sensitive checkbox), for the value copy the appropriate value from the output from creating the service principal:
ARM_CLIENT_ID- appIdARM_CLIENT_SECRET- passwordARM_SUBSCRIPTION_ID- id fromaz account showARM_TENANT_ID
With those variables set, you can now push your Terraform files to the GitHub repository.
The Terraform Cloud workspace is configured to evaluate a plan on pull requests, and on pushes or merges to main it will apply those changes.
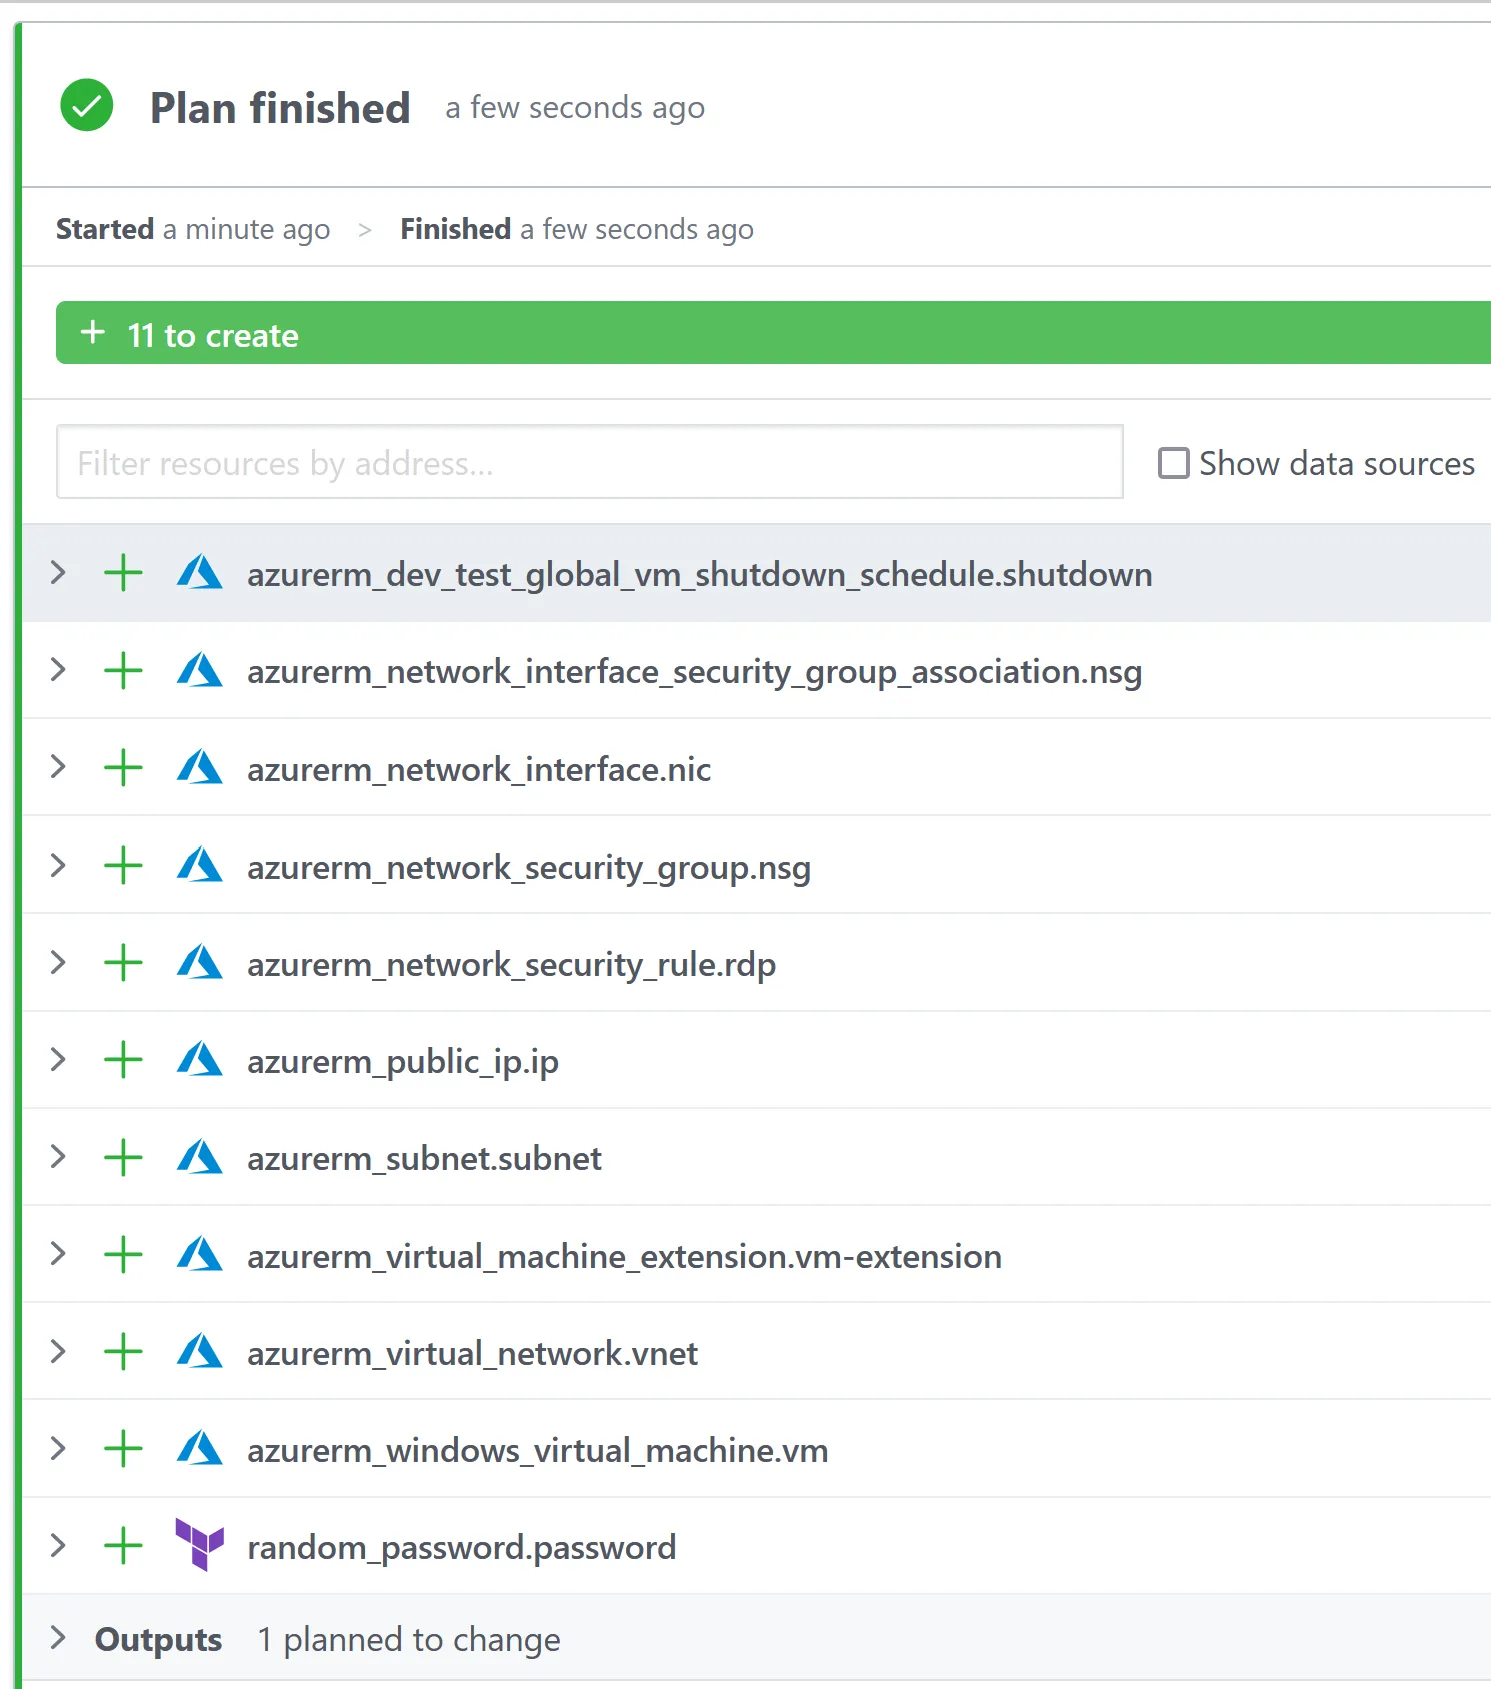
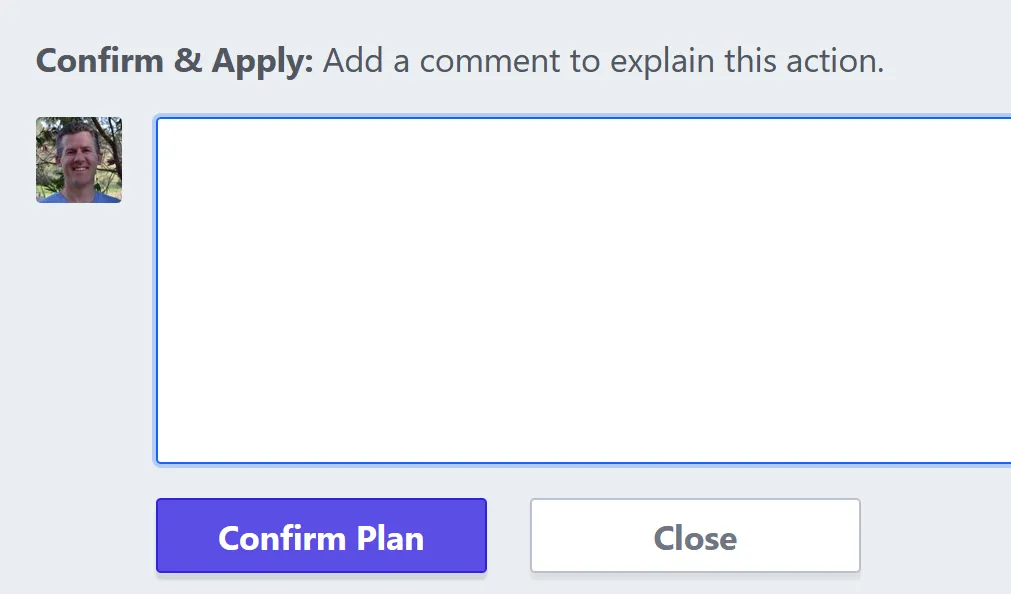
By default, you need to manually confirm before ‘apply’ will run (you can change the workspace to auto-approve to avoid this).
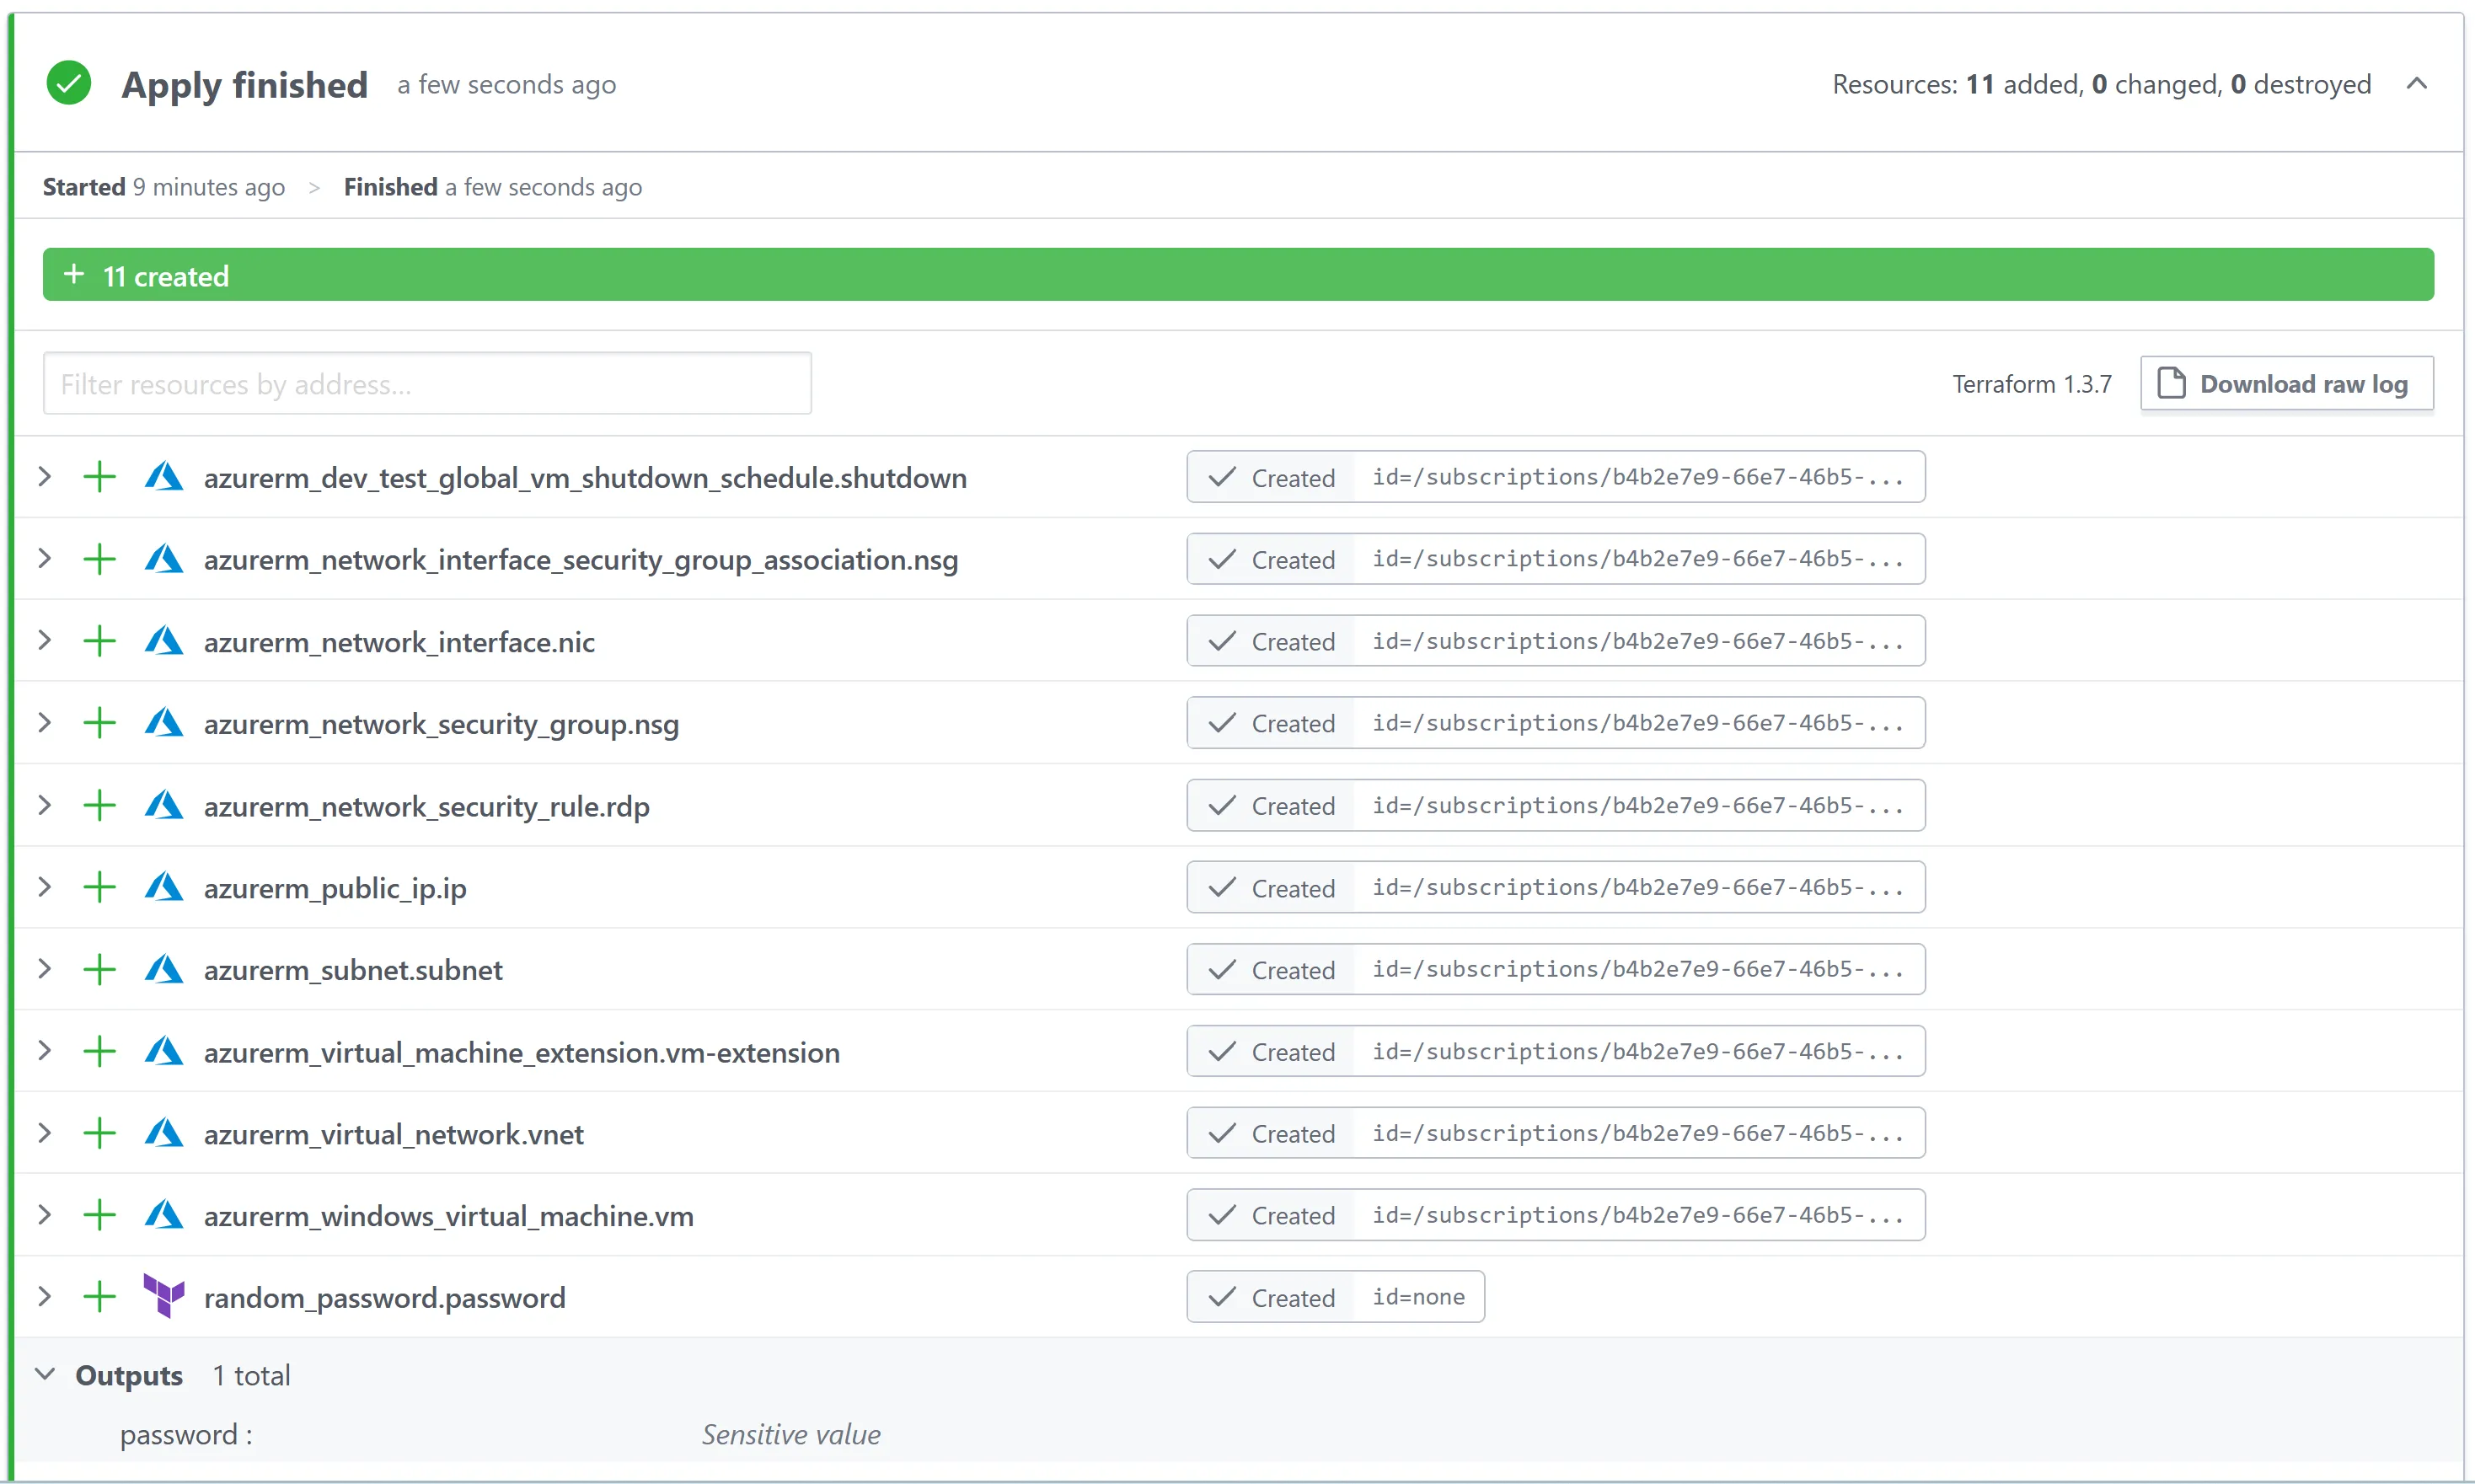
After a short wait, all the Azure resources (including the VM) should have been created and ready to use.
Virtual machine password
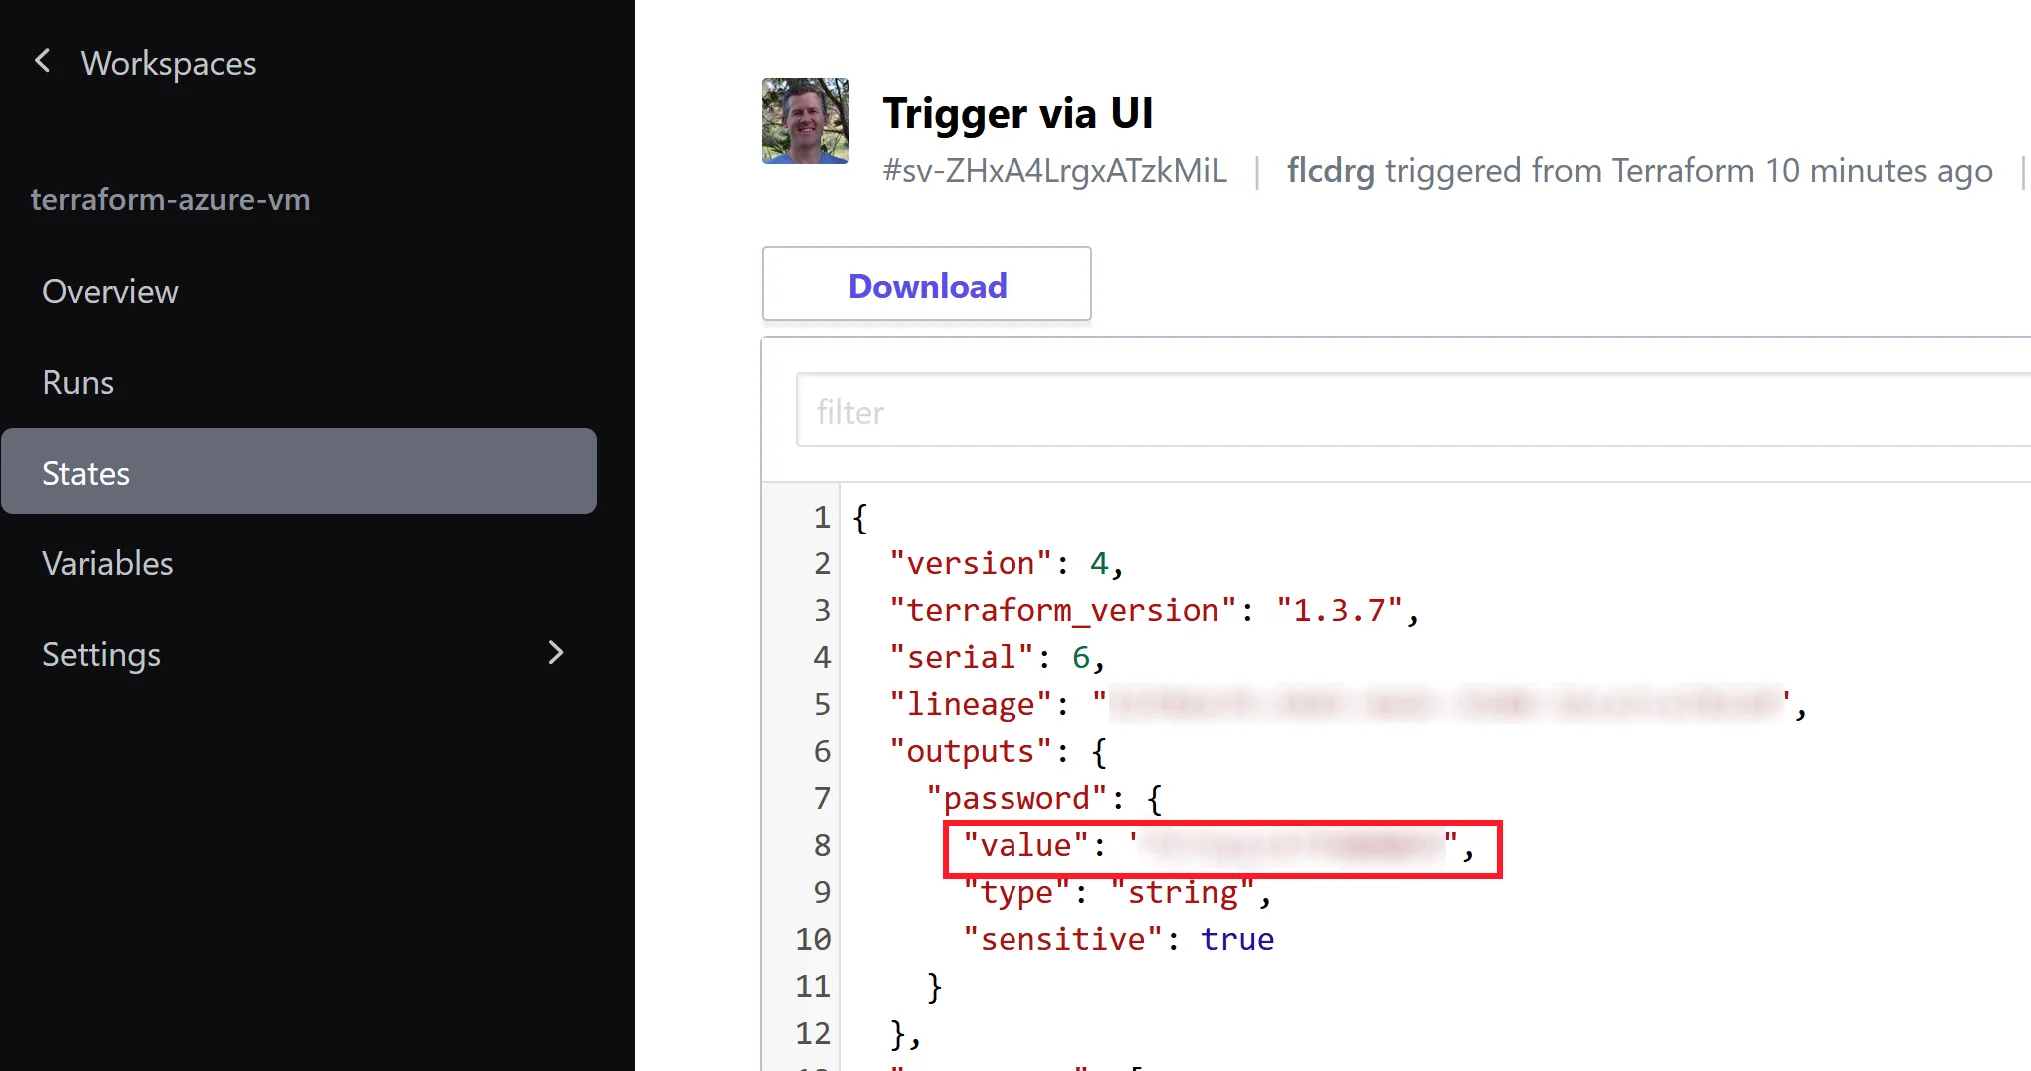
I’m not hardcoding the password for the virtual machine - rather I’m using the Terraform random_password resource to generate a random password. The password is not displayed in the logs as it is marked as ‘sensitive’. But I will actually need to know the password so I can RDP to the VM. It turns out the password value is saved in Terraform state, and you can examine this via the States tab of the workspace.
With that, I’m now able to navigate to the VM resource in the Azure Portal and connect via RDP and do what I need to do.
If you wanted to stick with the CLI, you can also use Azure PowerShell to launch an RDP session.
Extra configuration
If you review the Terraform in the repo, you’ll notice I also make use of the azurerm_virtual_machine_extension resource to run some PowerShell that installs Chocolatey. That just saves me from having to do it manually. If you can automate it, why not!
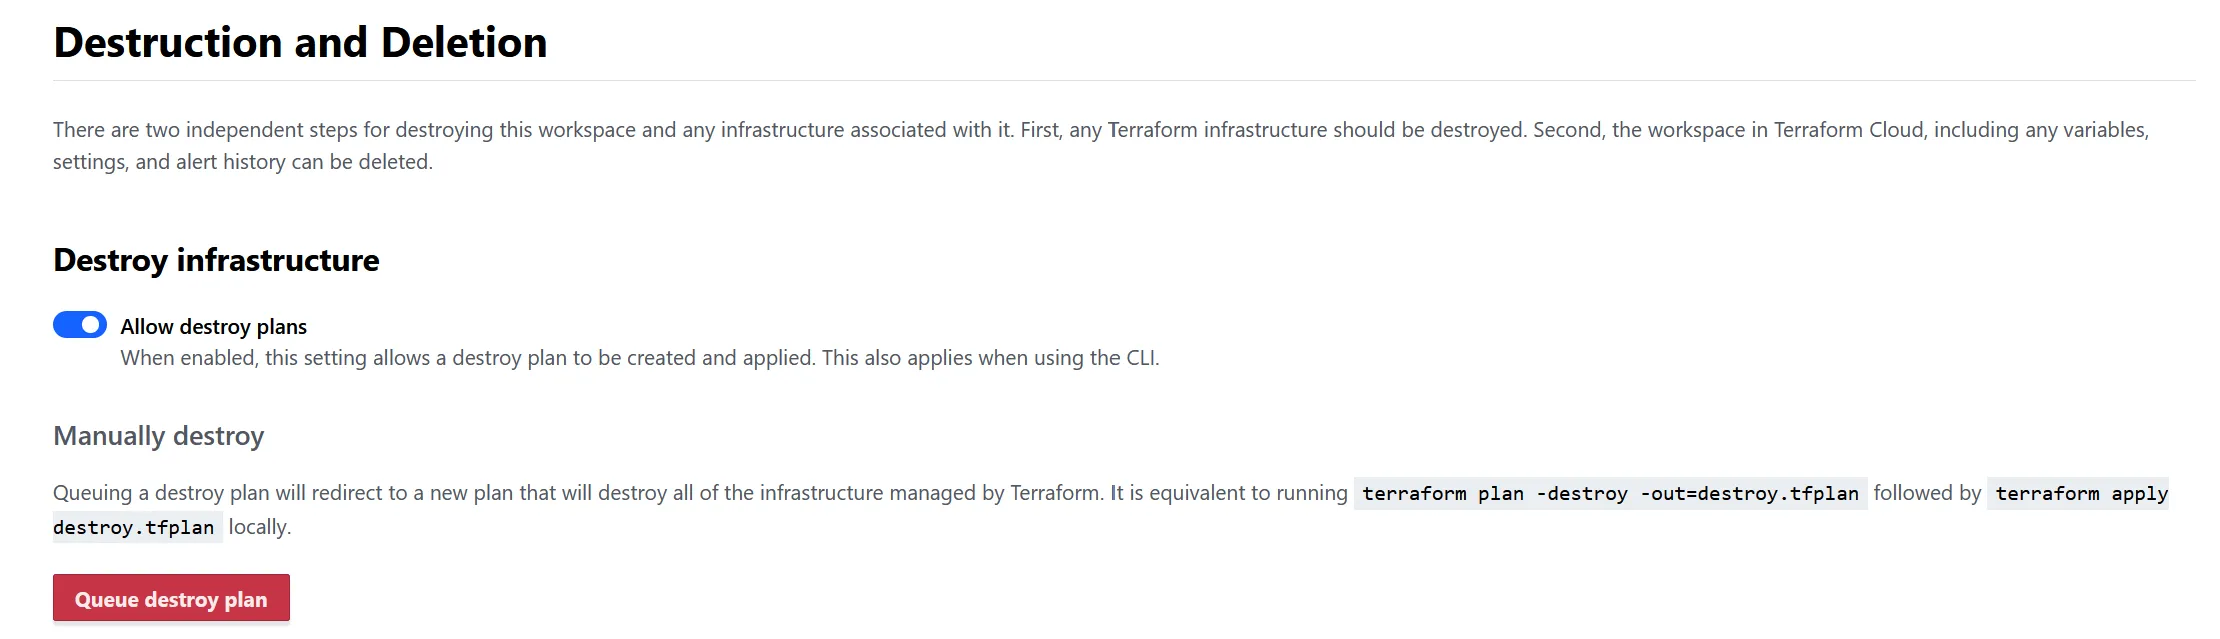
Cleaning up when you’re done
For safety, the virtual machine is set to auto shutdown in the evening, which will reduce any costs. To completely remove the virtual machine and any associated storage you can run a “destroy plan”
From the workspace, go to Settings, then Destruction and deletion, and click Queue destroy plan.