-
STEPtember 2022

For the second year in a row, along with some of my SixPivot colleagues, I'm taking part in STEPtember. STEPtember raises funds for people with and research into Cerebral Palsy. I'll be aiming to walk at least 10,000 steps each day in September.
To sponsor me, head over to https://www.steptember.org.au/s/157783/383539. In Australia, donations of $2 or more are tax deductible.
-
Trigger an Azure Pipeline build from a 'Classic' release pipeline
Azure Pipelines YAML pipelines can have pipeline resource triggers (for triggering a pipeline when another YAML pipeline completes), and 'Classic' build pipelines have build completion triggers to do the same. 'Classic' Release pipelines have release triggers, which trigger every time a new build artifact is available.
But what if you've got a mix of 'classic' release and YAML pipelines? Can you trigger a YAML pipeline from a 'classic' release pipeline? There's nothing built in to do this, but we can make it happen via the Azure DevOps APIs.
- In the Azure DevOps UI, under Pipelines, navigate to the YAML pipeline that you want to trigger.
- Make note of the
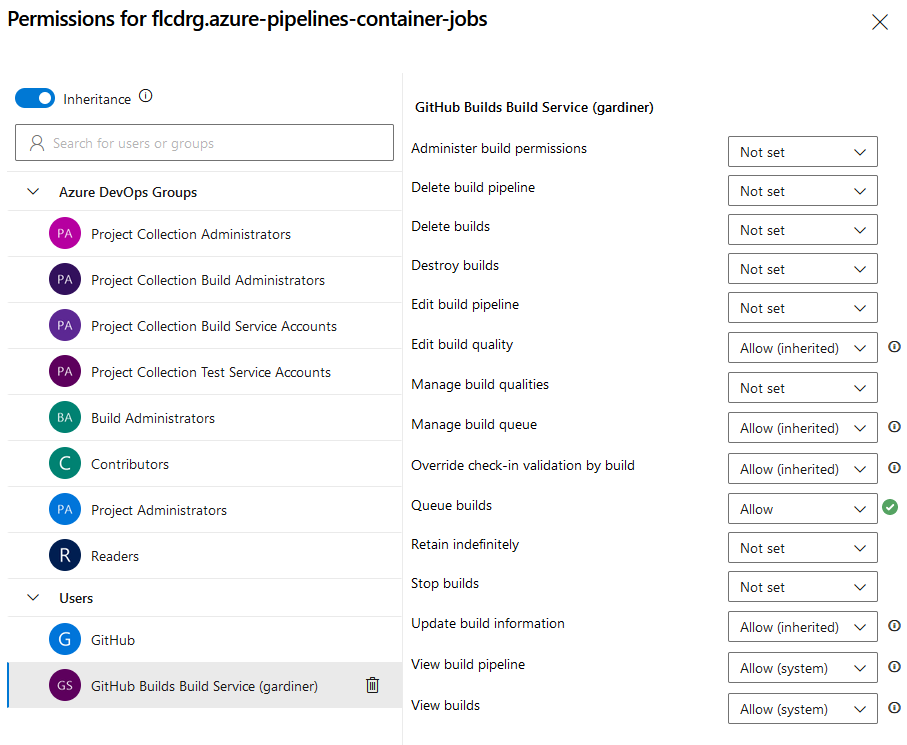
definitionIdin the URL. You'll need this for thePIPELINE_IDvalue later. - Click on the '…' button in the top right and select Manage Security
-
Select the <Project Name> Build Service (<Org Name>) user, and ensure Queue builds option is set to Allow.
Note: You can also set this for all pipelines, rather than for an individual pipeline.
-
In the release pipeline, select the Agent Job, and ensure the Allow scripts to access the OAuth token option is checked (this will allow access to
System.AccessToken)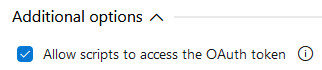
- Add a script task (I'm using the Bash Task, but you could equally use PowerShell though you'd need to adjust the script slightly)
-
Add the following inline script:
PIPELINE_ID="15" url="$(SYSTEM.TEAMFOUNDATIONCOLLECTIONURI)$(SYSTEM.TEAMPROJECTID)/_apis/pipelines/$PIPELINE_ID/runs?api-version=6.0-preview.1" echo $url curl -s --request POST \ -u ":$(System.AccessToken)" \ --header "Content-Type: application/json" \ --data '{ "resources": { "repositories": { "self": { "refName": "refs/heads/main" } } } }' \ $url -
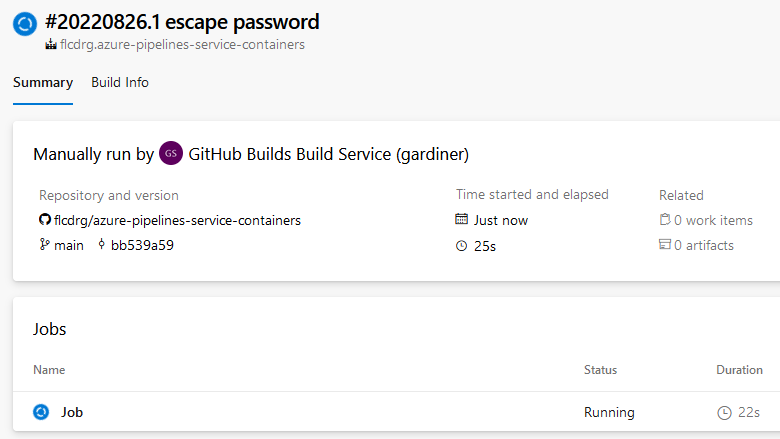
If you now create a new release, once that completes you should see the YAML pipeline build queued to run. Notice that the summary indicates the build was triggered manually by the service account.
Things to note:
- Update the value assigned to
PIPELINE_IDwith the value you noted from thedefinitionIdearlier. - If the repo uses a default branch other than
mainthen you'll need to modify that too. - The script assumes you're triggering in the same project. If you need to trigger a pipeline in a different project you'll need to replace
$(SYSTEM.TEAMPROJECTID)with the project name, or more preferably the project id (GUID) for that project. - Failing to set permission to allow queuing builds won't result in an error, but it will just mean builds aren't queued. If builds aren't being queued, double-check that you have enabled this on the correct pipeline, or it is enabled for all pipelines.
Credits: The curl invocation was inspired by the example at https://cloudaffaire.com/how-to-create-and-execute-azure-pipelines-using-rest-api/.
-
Using script variables in Azure Release Pipelines
Azure Pipeline still has 'classic' Release Pipelines. It has some limitations compared to the newer YAML-based deployment jobs, but sometimes the visualisation it provides for both pipeline design and deployment progress is still preferred.
I recently wanted to make a task in a release pipeline conditional on the value of a variable set in an earlier script task, but I wasn't quite sure how to reference the variable in the conditional expression.
To figure it out, I did a little experiment. I started with a script task that contained this content:
echo "##vso[task.setvariable variable=myJobVar]this is the same job"
echo "##vso[task.setvariable variable=myOutputJobVar;isoutput=true]this is the same job too"
The script sets two variables, the second being an 'output' variable.
In the Output Variables section, the script task also sets the Reference name to
setOutput.
I then created some additional script tasks, and under the Control Options section, change Run this task to
Custom conditions, and then entered one of these expressions in each:and(succeeded(), ne(variables.myVar, '')) and(succeeded(), ne(variables['myOutputJobVar'], '')) and(succeeded(), ne(variables['setOutput.myOutputJobVar'], ''))Note that as we're working with conditions and expressions, we use the runtime expression syntax to reference variables.
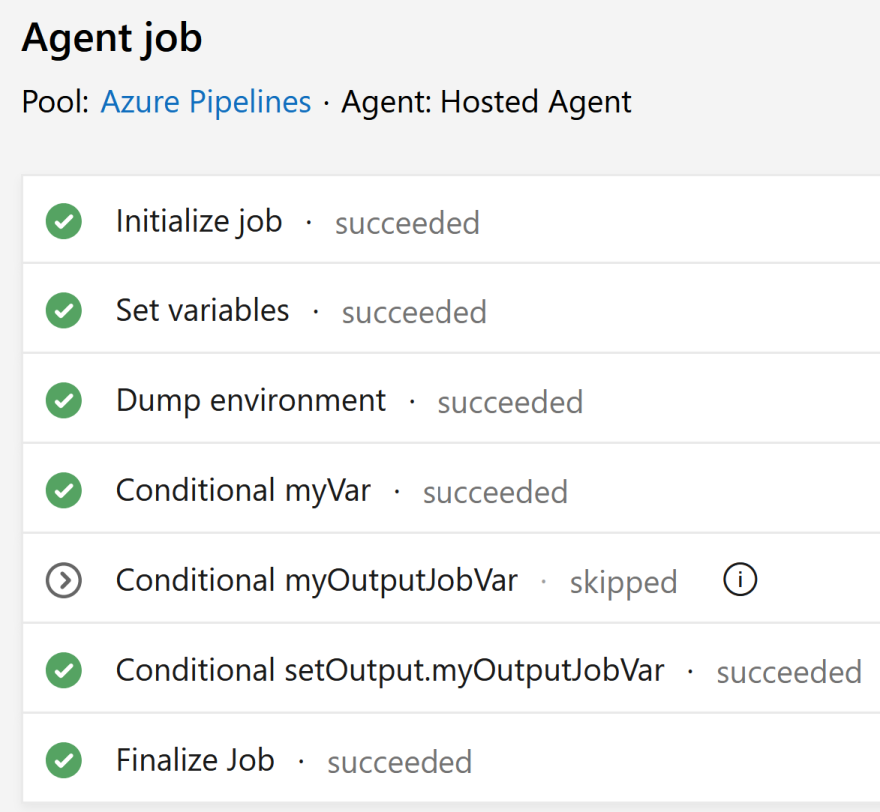
So from this, I can conclude:
- For a regular variable, use
variables.myVar, where the name of the variable wasmyVar - For an output variable, use
variables['setOutput.myOutputJobVar'], where the name of the variable wasmyOutputJobVarand the task had a reference name ofsetOutput.
What about referencing a variable from a subsequent job?
Unfortunately, this is not possible with classic release pipelines.
The closest you can get to this is a hack involving using the Azure DevOps API to update a predefined release definition variable.
Output variables are primarily intended to allow consumption in downstream jobs and stages. Given this is not possible with release pipelines, there's no real advantage to creating output variables in your scripts. To keep things simple just define them as regular variables.
- For a regular variable, use

A blog of software development, .NET and other interesting things