-
Adding a disk to a Synology with DSM 7.1
I recently added another Western Digital hard disk to my Synology DS1621xs+ NAS (as it was warning me that my free disk space was getting low).
I went with another WD Red Plus WD40EFZX 4GB drive. I was pleasantly surprised that the prices had dropped a bit since my last purchase - from $AU163 (July 2021) down to $AU125 (the price does vary from day to day). I did consider buying an 8GB drive, but the extra price was a bit much. Maybe next time!
I could be wrong, but installing the drive felt like an easier process this time. Here's what I did:
- First off, insert the new disk into a free drive caddy in your Synology.
-
Now connect to your Synology via your web browser and open Storage Manager. If you select the HDD/SSD tab, you should see your new disk with a status of "Not Initialized".
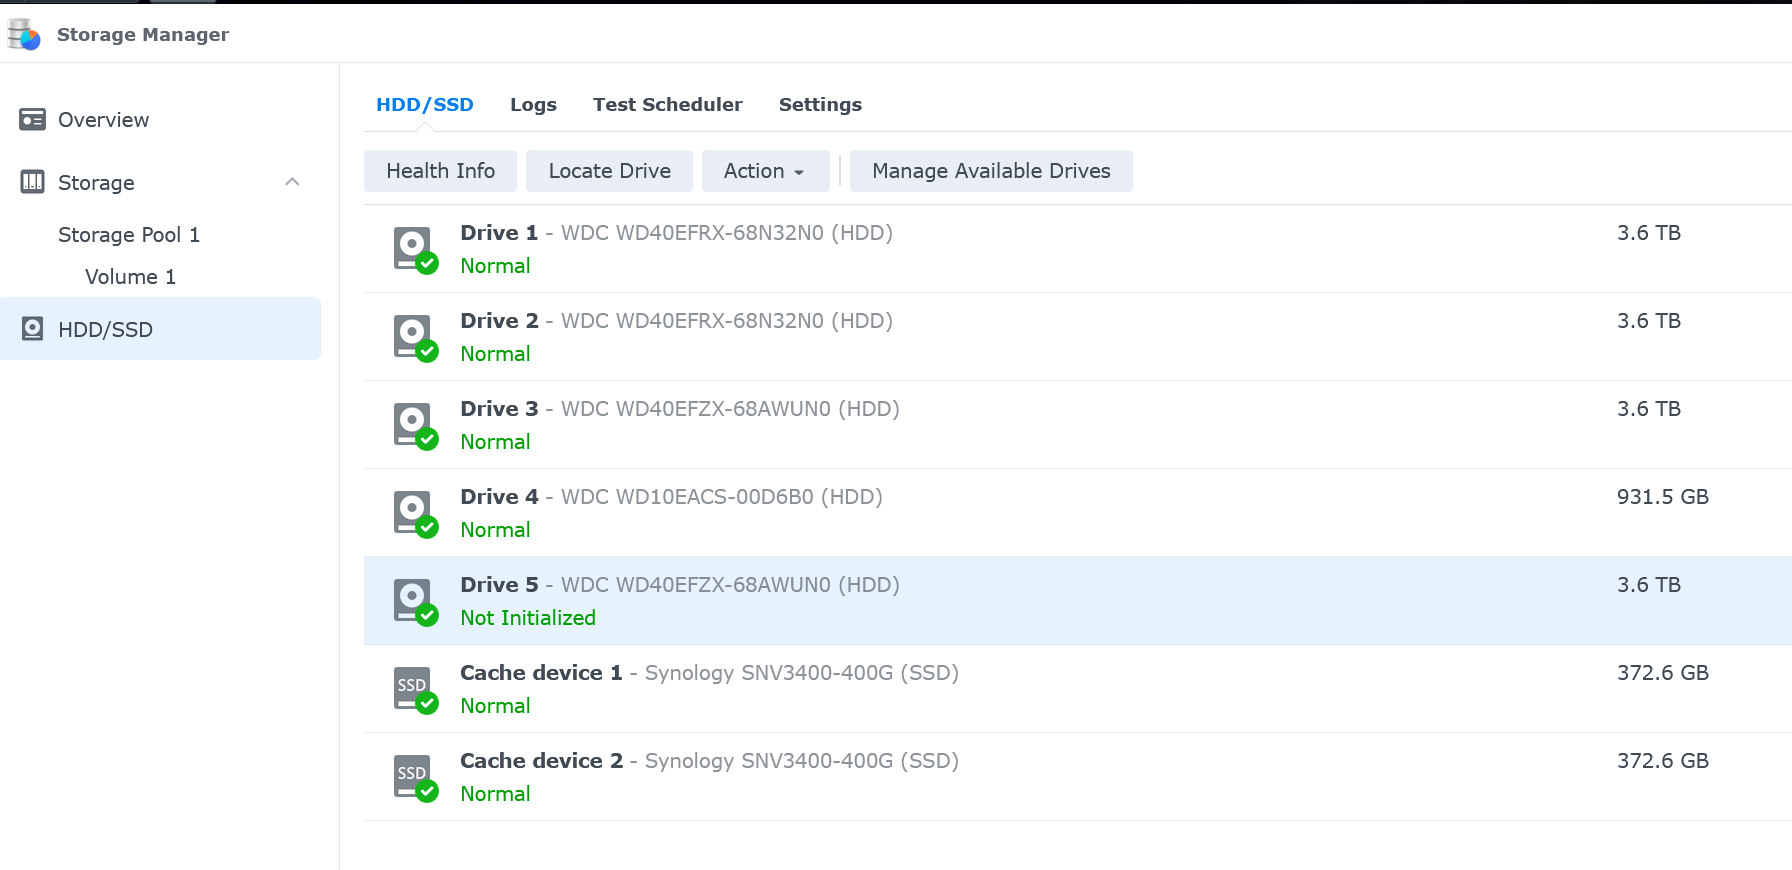
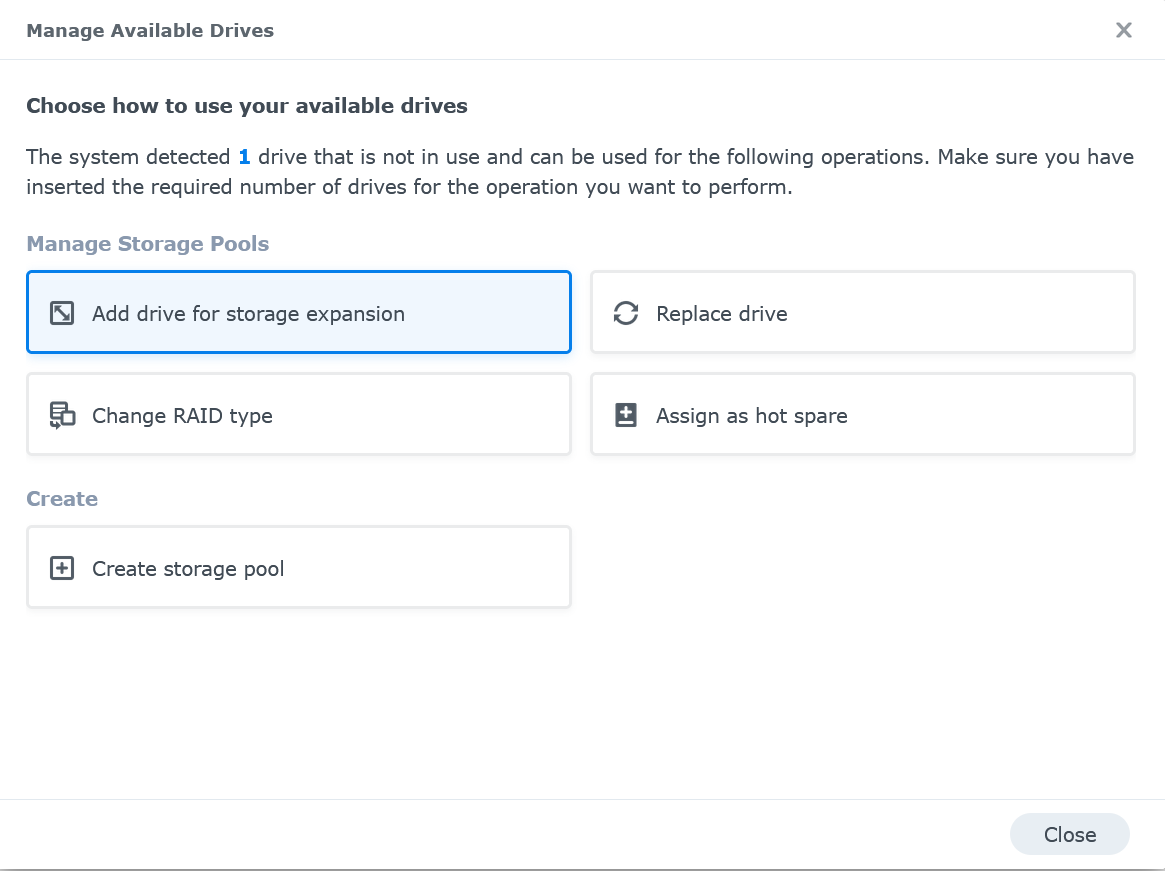
- Select the new drive, then click on Manage available drives to launch the Manage Available Drives dialog.
-
Click on Add drive for storage expansion
-
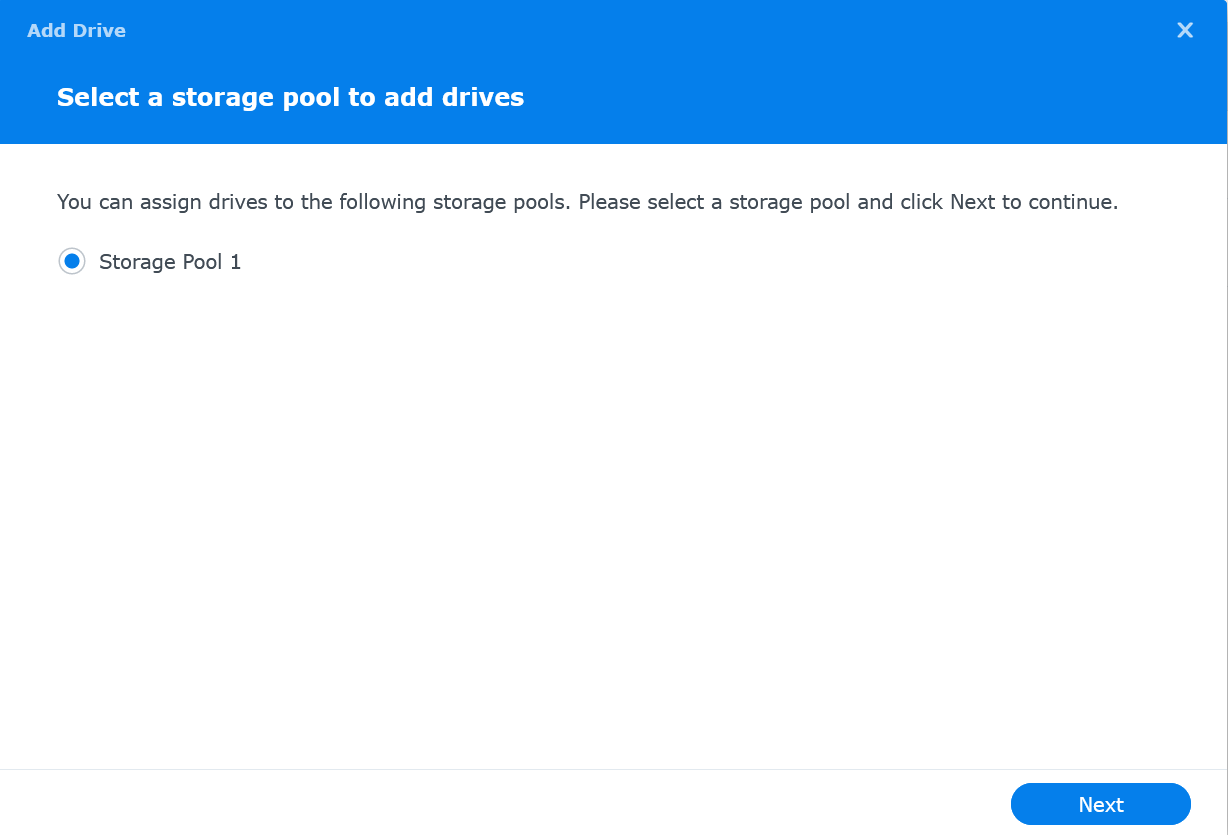
Select "Storage Pool 1" and click on Next
-
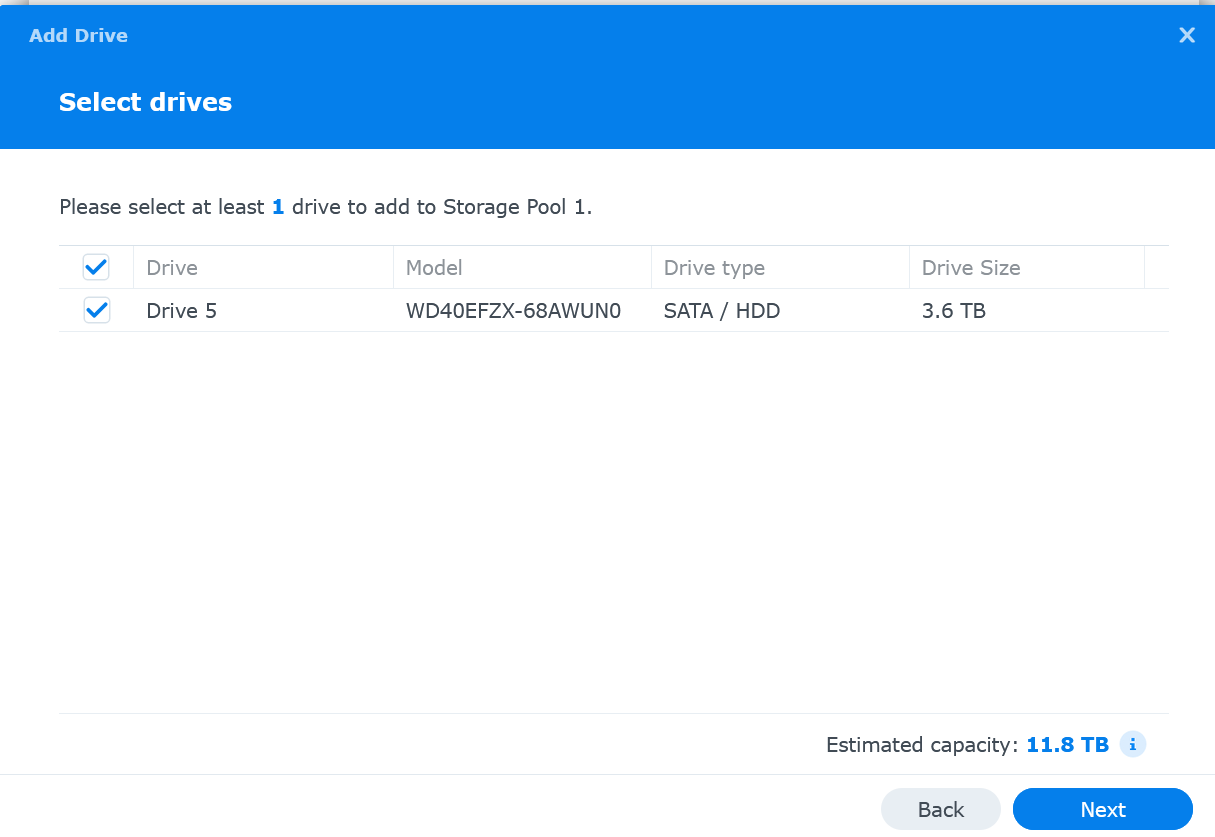
Select the drive(s) and click Next
-
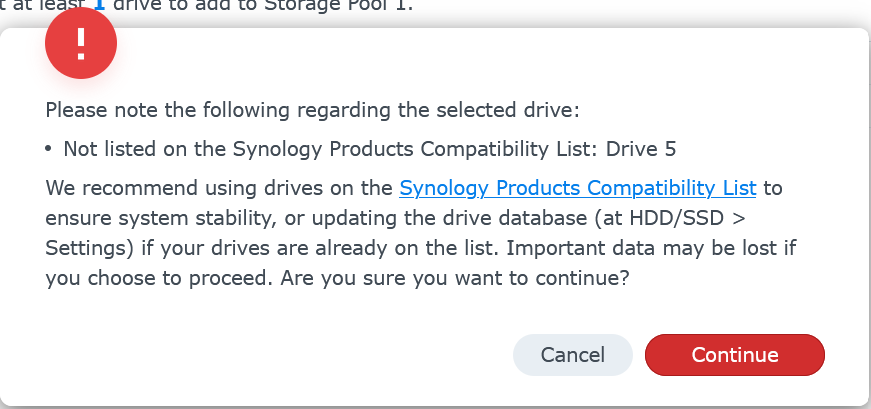
Review any warning about drive compatibility
-
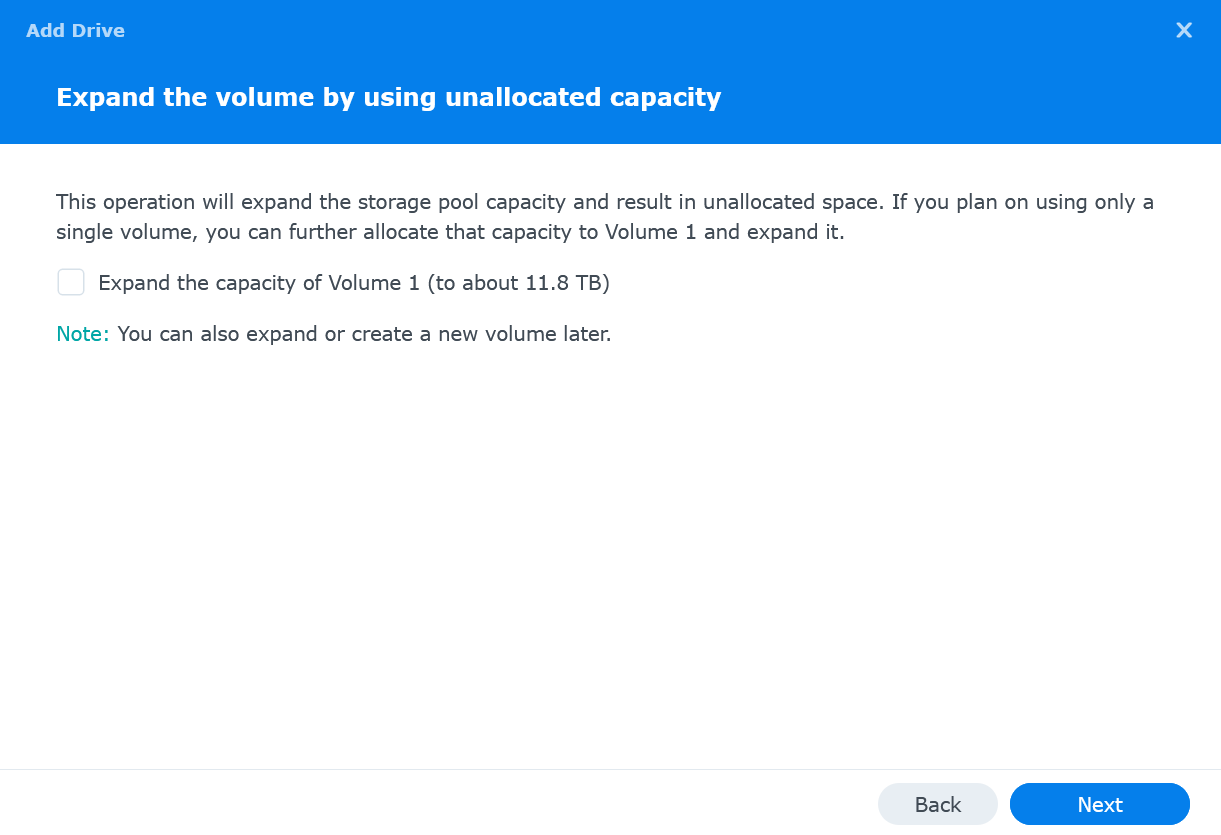
Optionally choose to expand the volume with these disks. Select Expand the capacity of Volume 1 and click Next
-
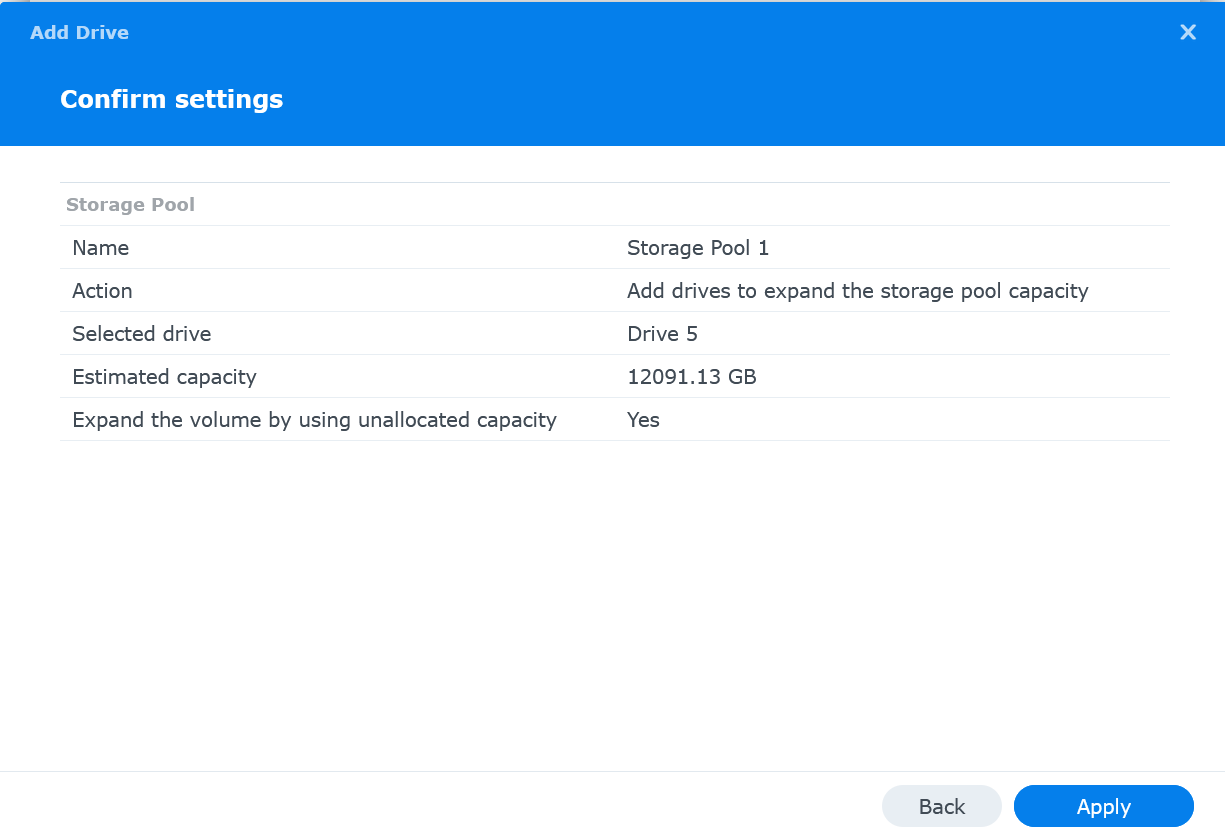
Review settings and then click Apply
-
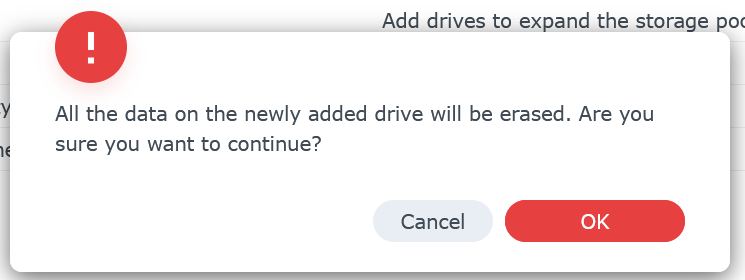
Confirm you are ok to erase the new drive then click OK
Now you'll need to wait a while. Depending on the pool's RAID configuration, it may be a day or longer before the disk is fully added. You can monitor the progress of drive adding by going to the storage pool.
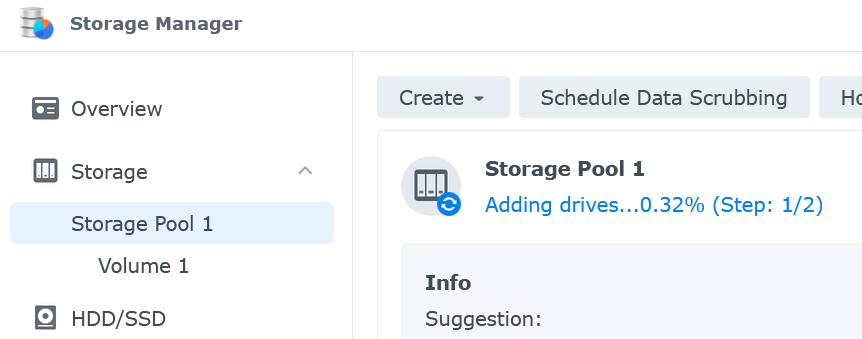
Once the drive has finished being added you'll see the pool status back to 'Healthy' and the capacity will have increased.

Links to Amazon are affiliate links
-
Azure Pipelines Service Containers and ports
Azure Pipelines provides support for containers in several ways. You can build, run or publish Docker images with the Docker task. Container Jobs allow you to use containers to run all the tasks of a pipeline job, isolated from the host agent by the container. Finally, Service Containers provide a way to run additional containers alongside the pipeline job.
You can see some examples of using Service Containers in the documentation, but one thing that confused me was the port mapping options - particularly with, and without Container Jobs. I ended up creating a pipeline with a number of jobs to determine the correct way to address a service container.
You can see the full pipeline at https://github.com/flcdrg/azure-pipelines-service-containers/blob/main/azure-pipelines.yml
I created two container resources. The first maps the container port 1443 to port 1443 on the host, whereas the second assigns a random mapped port on the host.
resources:
  containers:
    - container: mssql
      image: mcr.microsoft.com/mssql/server:2019-latest
      ports:
        - 1433:1433
      env:
        ACCEPT_EULA: Y
        SA_PASSWORD: yourStrong(!)Password

    - container: mssql2
      image: mcr.microsoft.com/mssql/server:2019-latest
      ports:
        - 1433
      env:
        ACCEPT_EULA: Y
        SA_PASSWORD: yourStrong(!)Password
These are mapped as service containers in each job by one of the following:
  services:
    mssqlsvc: mssql
which maps the container to port 1443 on the host, or
  services:
    mssqlsvc: mssql2
which maps to a random port on the host.
I then figured out what was the correct way to connect to the container. In my case (using a SQL Server image) I'm using the
sqlcmdcommand line utility.Here are the results of my experiment:
Regular job, local process
A regular (non-container) Azure pipelines job, relying on
sqlcmdbeing preinstalled on the host.sqlcmd -S localhostRegular job, inline Docker container
We're running a separate Docker container in a script task. To allow this container to be able to connect to our service container, we ensure they're both running on the same network.
network=$(docker network list --filter name=vsts_network -q)
docker run --rm --network $network mcr.microsoft.com/mssql-tools /opt/mssql-tools/bin/sqlcmd -S mssqlsvc
Regular job, local process, random port
The host-mapped port has been randomly selected, so we need to use a special variable to obtain the actual port number. The variable name takes the form
agent.services.<serviceName>.ports.<port>.In our case, the
<serviceName>corresponds to the left-hand name under theservices:section and the<port>corresponds to the port number back up in the- ports:section of the resource container declaration.sqlcmd -S tcp:localhost,$(agent.services.mssqlsvc.ports.1433)Regular job, inline Docker container, random port
The random port can be ignored, as we connect directly to the SQL container, not via the host-mapped port.
network=$(docker network list --filter name=vsts_network -q)
docker run --rm --network $network mcr.microsoft.com/mssql-tools /opt/mssql-tools/bin/sqlcmd -S mssqlsvc
Container job, local process
A Container job means we're already running inside a Docker container. (The image used for the container job has
sqlcmdinstalled in/opt/mssql-tools18/bin)./opt/mssql-tools18/bin/sqlcmd -S mssqlsvcContainer job, inline Docker container
So long as the Docker container created in the script task is on the same network, it's similar
network=$(docker network list --filter name=vsts_network -q)
docker run --rm --network $network mcr.microsoft.com/mssql-tools /opt/mssql-tools/bin/sqlcmd -S mssqlsvc
Container job, local process, random port
Because we're in the container job, we ignore the random port
/opt/mssql-tools18/bin/sqlcmd -S mssqlsvcContainer job, inline Docker container, random port
And the same for an 'inline' container
network=$(docker network list --filter name=vsts_network -q) docker run --rm --network $network mcr.microsoft.com/mssql-tools /opt/mssql-tools/bin/sqlcmd -S mssqlsvc -
Converting Azure Pipelines Variable Groups to YAML
If you've been using Azure Pipelines for a while, you might have made use of the Variable group feature (under the Library tab). These provide a way of defining a group of variables that can be referenced both by 'Classic' Release pipelines and the newer YAML-based pipelines.
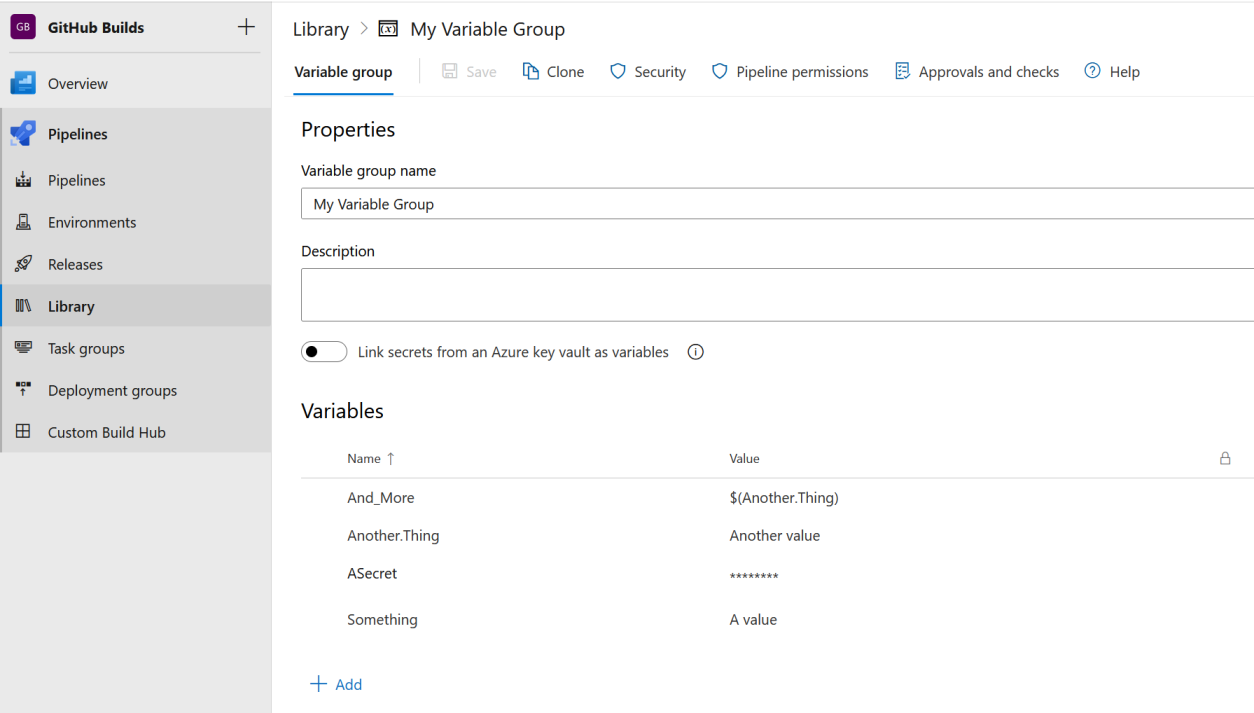
You might get to a point where you realise that a lot of the variables being defined in variable groups would be better off being declared directly in a YAML file. That way you get the benefit of version control history. Obviously, you wouldn't commit any secrets in your source code, but other non-sensitive values should be fine. Secrets are better left in a variable group, or better yet as an Azure Key Vault secret.
I came up with the following PowerShell script that makes use of the Azure CLI commands to convert a variable group into the equivalent YAML syntax.
param (
    [Parameter(Mandatory=$true)]
    [string]
    $GroupName,
    [string]
    $Organisation,
    [string]
    $Project,
    [switch]
    $Array
)

$ErrorActionPreference = 'Stop'

# Find id of group
$groups = (az pipelines variable-group list --organization "https://dev.azure.com/$Organisation" --project "$Project") | ConvertFrom-Json

$groupId = $groups | Where-Object { $_.name -eq $GroupName } | Select-Object -ExpandProperty id -First 1

$group = (az pipelines variable-group show --id $groupId --organization "https://dev.azure.com/$Organisation" --project "$Project") | ConvertFrom-Json

$group.variables | Get-Member -MemberType NoteProperty | ForEach-Object {

    if ($Array.IsPresent) {
        Write-Output "- name: $($_.Name)"
        Write-Output "  value: $($group.variables.$($_.Name).Value)"
    } else {
        Write-Output "  $($_.Name): $($group.variables.$($_.Name).Value)"
    }
}
The script is also in this GitHub Gist.
If I run the script like this:
.\Convert-VariableGroup.ps1 -Organisation gardiner -GroupName "My Variable Group" -Project "GitHub Builds"Then it produces:
And_More: $(Another.Thing)
Another.Thing: Another value
ASecret:
Something: A value
If I add the
-Arrayswitch, then the output changes to:- name: And_More value: $(Another.Thing) - name: Another.Thing value: Another value - name: ASecret value: - name: Something value: A valueNote that the variable which was marked as 'secret' doesn't have a value.