-
C# 12 features: Collection expressions
Part 2 in a series on new language features in C# 12.

Collection expressions
You can now use square brackets
[]to initialise a collection! Usually square brackets indicate an array, but the collection expression can be assigned to other collection types too.You can use them to assign values to fields or in method bodies.
private List<int> numbersList = [1, 2, 3, 4, 5];Like primary constructors, I've also found these quite useful in new .NET 8 projects.
Further reading
Example source
https://github.com/flcdrg/csharp-12/blob/main/02-collection-expressions/CollectionExpressions.cs
-
C# 12 features: Primary constructors
Last month, we had a ".NET 8 Lightning talks" theme for the Adelaide .NET User Group. John covered Blazor, Ryan summarised a bunch of new core library features, and I focused on the 8 new language features added in C# 12. What a great idea for a nice, short blog series!
Primary constructors
C# has had primary constructors for records, but now we can use them for classes and structs!
The parameters can be used anywhere within the class - methods, local functions as well as initialising fields and properties.
A primary constructor guarantees that the named parameters have been supplied when an instance is created. You can optionally add other conventional constructors, but they must all call back to the primary constructor using the
this(...)syntax.public class PrimaryConstructorClass(string name) { private string Name { get; init; } = name; private string Name2 => name; public void Thing() { Console.WriteLine(name); } }I've made regular use of these whenever I've been working on a .NET 8 project. I've found them very useful.
Further reading
Example source
https://github.com/flcdrg/csharp-12/tree/main/01-primary-constructors
-
Which Western Digital Red NAS hard disk should I buy? (2024 update)
Back in 2021, I first reviewed the options for Western Digital Red 4TB NAS hard disks. My Synology DS1621xs+ NAS has recently started warning me that storage space is getting low, so let's review the prices (and also consider the larger capacities) currently available from Western Digital in 2024.
Western Digital differentiates its Red NAS drives into three groups/recommended workloads: Red (lighter SOHO), Red Plus (write-intensive), and Red Pro (highest-intensity).
Model number Product Number Capacity (TB) Internal rate (MB/s) Cache (MB) RPM Recording Technology Approx. Date Spec sheet Price (AUD) Price (USD) Red WD40EFAX 4 180 256 5400 SMR Aug-20 Link 230 n/a Red Plus WD40EFZX 4 175 128 5400 CMR Jan-21 Link 257 111 Red Plus WD40EFPX 4 180 256 5400 CMR Sep-22 Link 202 n/a Red Plus WD60EFPX 6 180 256 5400 CMR Sep-22 Link 289 n/a Red Plus WD80EFZZ 8 185 128 5640 CMR Jan-22 Link 313 n/a Red Plus WD80EFPX 8 215 256 5640 CMR Nov-23 Link 308 179 Red Plus WD101EFBX 10 215 256 7200 CMR Jan-20 Link 398 199 Red Plus WD120EFBX 12 196 256 7200 CMR Jan-21 Link 515 n/a Red Plus WD140EFGX 14 210 512 7200 CMR Jan-20 Link 658 n/a Red Pro WD4003FFBX 4 217 256 7200 CMR Sep-20 Link 212 n/a Red Pro WD6003FFBX 6 238 256 7200 CMR Feb-18 Link 339 204 Red Pro WD8003FFBX 8 235 256 7200 CMR Apr-18 Link 404 229 Red Pro WD102KFBX 10 256 256 7200 CMR Jan-20 Link 465 269 Red Pro WD121KFBX 12 240 256 7200 CMR May-19 Link 491 285 Red Pro WD161KFGX 16 259 256 7200 CMR Sep-20 Link 554 308 Red Pro WD181KFGX 18 272 512 7200 CMR Sep-20 Link 583 342 Red Pro WD221KFGX 22 256 512 7200 CMR Jul-22 Link 849 419 Notes
- Prices listed are from Amazon as of 25th February 2024. Click through the links to get the latest price, they seem to change daily!
- The AUD price links to Amazon Australia and the US price links to Amazon.com. (Amazon links are affiliate links)
- I live in Australia, hence the Amazon AU links, but sometimes the US prices are more competitive - it pays to compare both.
- Dates are from the oldest specification sheets I've found for that model or data listed on the Amazon page.
- Recording technology: SMR - Shingled Magnetic Recording, CMR - Conventional Magnetic Recording. More info
My choice
I've previously bought 4TB drives, but I'm thinking this time I might go for something larger. Because of the RAID configuration I am using, I'll only be effectively using 4TB of the new drive. But this is planning for the future, as when I buy a subsequent larger drive I'll then get access to the full capacity of both drives. The 'Red Plus' models look fine for my purposes. I don't need the extra features offered by the 'Red Pro' line.
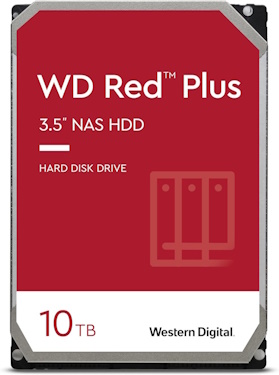
As I write this, the 10G Red Plus WD101EFBX has a discounted price on Amazon US (plus I have some Amazon US gift card credit waiting to be used), so that looks like a good deal. I was originally looking at the 8TB drives, but for only USD20 extra you get another 2TB, so why not?
Table formatting
As a side note, I collated the information in the table above using Excel. Initially, I was going to use a Visual Studio Code extension to paste the Excel content into a Markdown table format, but then formatting the links was not going to be easy. I then realised I could use PowerShell to manage the formatting if I saved the spreadsheet as a .CSV format. PowerShell automation for the win!
eg.
$data = (get-content 'C:\Users\david\OneDrive\Documents\Western Digital Hard disk costs.csv') | ConvertFrom-Csv
$data | ForEach-Object { "| " + $_.'Model number' + " | " + $_.'Product Number' + " | " + $_.'Capacity (TB)' + " | " + $_.'Internal rate (MB/s)' + " | " + $_.'Cache (MB)' + " | " + $_.RPM + " | " + $_.'Recording Technology' + " | " + $_.'Approx. Date' + " | [Link](" + $_.'Spec sheet' + ") | [" + $_.'Price (AUD)' + "](" + $_.'Amazon AU'+ ") | [" + $_.'Price (USD)' + "](" + $_.'Amazon US' + ") |" } | clip

A blog of software development, .NET and other interesting things