-
HashiCorp Certified: Terraform Associate (003)
I've been using Terraform quite a bit recently and noticed that HashiCorp have a Terraform Associate certification. Reviewing the exam objectives it sounded like it seemed to cover most of the things I've already been doing, so I decided to give it a go.

The exam is run by PSI, so was a slightly different experience to those I've taken for Microsoft certifications. The sign-in process was a bit simpler (eg. scanning your ID with your webcam rather than having to upload them from your phone). The exam software required that I turn off a few background processes (OneDrive, a Zoom background process and the Virtual Machine Management Service). Once I'd done that the software was happy to proceed and when the proctor was satisfied with my room and desk setup I was able to start the exam.
I finished the exam in good time and I was pleased to learn that I passed!
The email summary of my results included a breakdown of how I went in each of the areas covered.
Overall Score: 78%
Breakdown by content area:
- Understand infrastructure as code (IaC) concepts: 100%
- Understand the purpose of Terraform (vs other IaC): 100%
- Understand Terraform basics: 87%
- Use Terraform outside the core workflow: 100%
- Interact with Terraform modules: 40%
- Use the core Terraform workflow: 88%
- Implement and maintain state: 72%
- Read, generate, and modify configuration: 63%
- Understand Terraform Cloud capabilities: 100%
So looks like modules are an area I'm not as strong on! That's fair as I haven't made a lot of use of them so far.
If you're using Terraform, then I'd encourage you to go ahead and take the exam. Have a look at the study guide, sample questions and exam review to ensure you're comfortable with all the topics being covered and how questions will be asked. Then register for the exam and give it a go!
-
Azure DevOps API PropertiesCollections
I was looking at some of the Azure DevOps API documentation and noticed that some of the endpoints mention a
propertiesobject of typePropertiesCollection. Unfortunately, the details for that data structure are not particularly helpful, and I couldn't figure out how to use it. Some pages include examples, but none that I could find included an expandedpropertiesobject.To figure out how to use it, I created a simple .NET console application. I added references to the following NuGet packages:
- Microsoft.TeamFoundationServer.Client
- Microsoft.VisualStudio.Services.InteractiveClient
- Microsoft.VisualStudio.Services.Release.Client
using Microsoft.VisualStudio.Services.Common;
using Microsoft.VisualStudio.Services.ReleaseManagement.WebApi.Clients;
using Microsoft.VisualStudio.Services.WebApi;

const string collectionUri = "https://dev.azure.com/organisation";
const string projectName = "MyProject";
const string pat = "YOUR-PAT-HERE";
const int releaseId = 20;

var creds = new VssBasicCredential(string.Empty, pat);

// Connect to Azure DevOps Services
var connection = new VssConnection(new Uri(collectionUri), creds);

using var client = connection.GetClient<ReleaseHttpClient>();

// Get data about a specific release
var release = await client.GetReleaseAsync(projectName, releaseId);

release.Properties.Add("Thing", "hey");

// Send the updated release back to Azure DevOps Services
var result = await client.UpdateReleaseAsync(release!, projectName, releaseId);

Console.WriteLine();
This allowed me to create a property key and value, that I could then examine by querying the item (in this case a 'classic' release), by calling the GET endpoint. eg.
https://vsrm.dev.azure.com/{organization}/{project}/_apis/release/releases/{releaseId}?propertyFilters=Thing&api-version=7.0Note that you need to specify the
propertyFiltersparameter. Otherwise theproperties` object will not be included in the response.And in doing that, we can see the JSON data structure!
    "properties": {
        "Thing": {
            "$type": "System.String",
            "$value": "hey"
        }
    }
So, to add a property, you need to add a new key/value pair to the
propertiesobject, where the key is the name of the property, and the value is an object with two properties:$typeand$value. The$typeproperty is the type of the value, and the$valueproperty is the value itself.The documentation clarifies the types supported:
Values of type Byte[], Int32, Double, DateType and String preserve their type, other primitives are retuned as a String. Byte[] expected as base64 encoded string.
(I think 'DateType' is a typo, and should be 'DateTime')
Now that we know the shape of the data, I can jump back to PowerShell and use that to add a new property:
$uri = "https://vsrm.dev.azure.com/$($organisation)/$($project)/_apis/release/releases/$($releaseId)?api-version=7.0&propertyFilters=Extra" $result = Invoke-RestMethod -Uri $uri -Method Get -Headers $headers if (-not ($result.properties.Extra)) { $result.properties | Add-Member -MemberType NoteProperty -Name "Extra" -Value @{ "`$type" = "System.String" "`$value" = "haaaa" } } $body = $result | ConvertTo-Json -Depth 20 "Updating via PUT" Invoke-RestMethod -Uri $uri -Method Put -Headers $headers -Body $body -ContentType "application/json" -
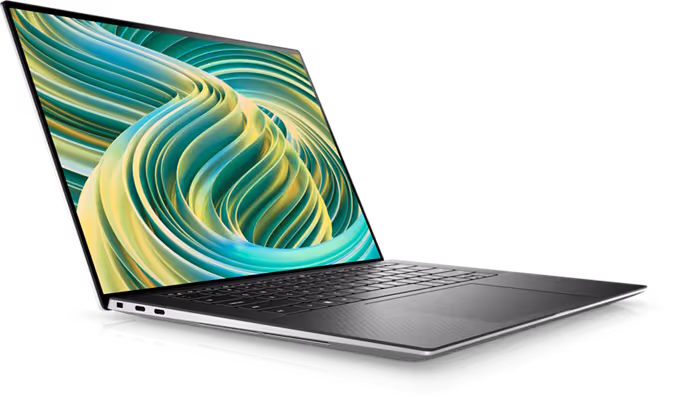
New laptop - Dell XPS 9530
At SixPivot we get a generous laptop allowance (currently $AU4,400!) that we can use every two years. Given I celebrated my 2-year anniversary earlier this year, I was keen to organise an upgrade to the laptop I'd purchased when I first started. Rather than order immediately, I knew that Dell had some new models coming out, so I held off until they became available in Australia before ordering.
 I do agree with the adage "Use the right tool for the job", and as a software developer, I want to use the best computer possible.
The Dell Latitude 14" laptop has done the job, but I wanted to return to a 15" laptop. The convenience of a full-size keyboard, with a little more room in the case to ensure better cooling should hopefully make for a more comfortable and quieter experience.

I selected the new Dell XPS 15 9530 and decked it out with the following options:
- 13th Generation Intel(R) Core(TM) i9-13900H Processor (14-Core, 24MB Cache, up to 5.4 GHz)
- NVIDIA(R) GeForce(R) RTX(TM) 4070 with 8 GB GDDR6
- 64GB DDR5 4800MHz
- 2TB M.2 PCIe NVMe Solid State Drive
- 15.6" OLED 3.5K (3456x2160) InfinityEdge Touch Anti-Reflective 400-Nit Display
The i9 CPU is the fastest they offer (and my first i9), and it's also the latest generation which I preferred. I wanted the higher res display over standard HD - it happens to be a touch display, which is a bonus. I don't use touch a lot (and would have been fine without it), but it can be handy sometimes.
There were higher-capacity SSDs on offer, but I haven't really got close to filling the 2TB drive on the Latitude, so I think that should be fine. Upgrading later is always an option. 64GB of RAM is double what I had previously, but you can never have too much RAM!
Cost
If you head over to the Dell website and select similar options, you may notice the total cost is quite a bit more than my allowance, so how does that work? Well, there are a couple of extra factors working in my favour:
- SixPivot has a business account with Dell, so we get better pricing than regular retail, and
- SixPivot also has a "Good Vibes" points scheme, where we can each award points to our colleagues to show our appreciation for something great they've done. Those points can be spent in our SixPivot Rewards shop, and one thing you can spend them on is portable devices (like laptops). I had accrued enough points to cover the extra amount above the $4,400.
Comparison
It's interesting to see how my new device compares to my previous platforms, and how styles and ports have changed over the years.
(top to bottom, newest to oldest) The XPS 9530, Latitude 7420, XPS 9550 and XPS 1645.

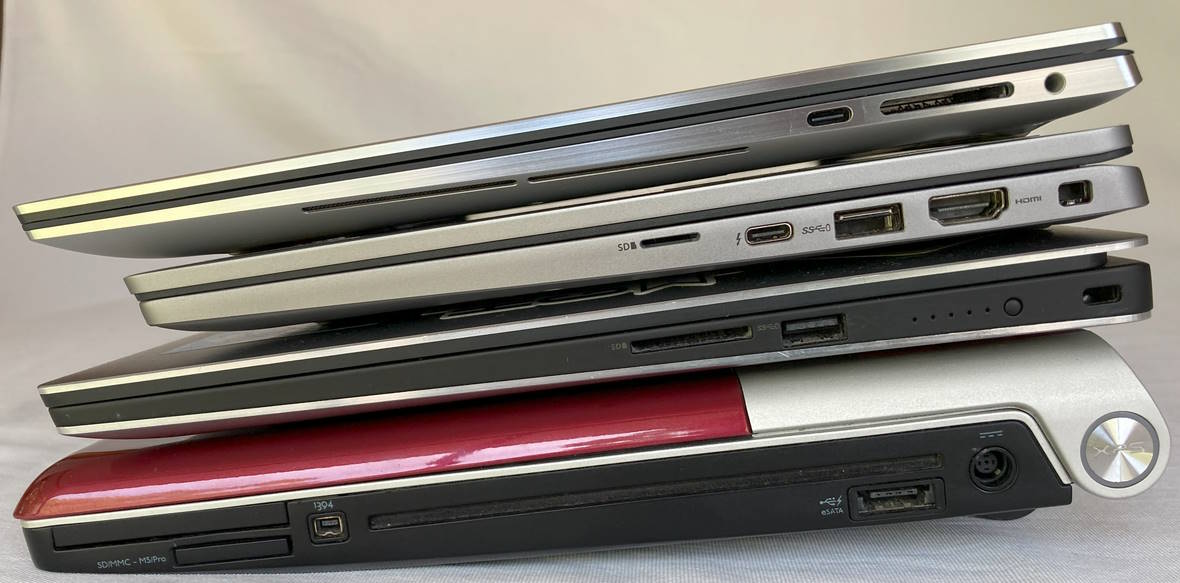
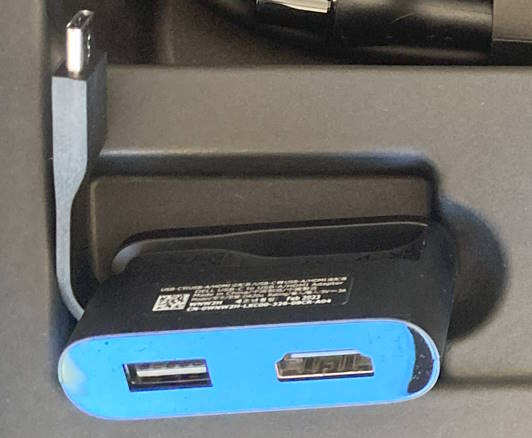
Gone are the USB-A, HDMI, DisplayPort, VGA, eSATA ports and the like. Instead, just 3 USB-C ports, an SD card reader slot, and a 3.5mm audio jack are all you get. It finally feels like USB-C is becoming the de-facto standard for extensibility. If you didn't have an existing dock, Dell does throw in a handy compact USB-C to USB-A and HDMI adapter.
Unlike my last XPS (the 9550), the camera is now located on top of the screen (whatever were they thinking!), and interestingly the 9730 is actually a little bit narrower even though the display is still 15.6".
This is a pretty beefy machine, and I think it should easily see me through the next 2 years!

A blog of software development, .NET and other interesting things