-
What's new in NDepend 2022.1
Is it really 6 years since I last wrote about NDepend? Apparently so!
A lot has changed between v6 and the just-released v2022.1. Seriously, there are the changes listed at https://www.ndepend.com/whatsnew (it’s a long list), but I suspect there’s also even more than that.
NDepend remains the preeminent tool for .NET dependency analysis.
I thought I’d put the v2022.1 release through its paces by seeing what it makes of the .NET Interactive project from GitHub.
I loaded up NDepend and configured it to analyse just the
Microsoft.DotNet.Interactive*assemblies. By default, a HTML summary report is generated: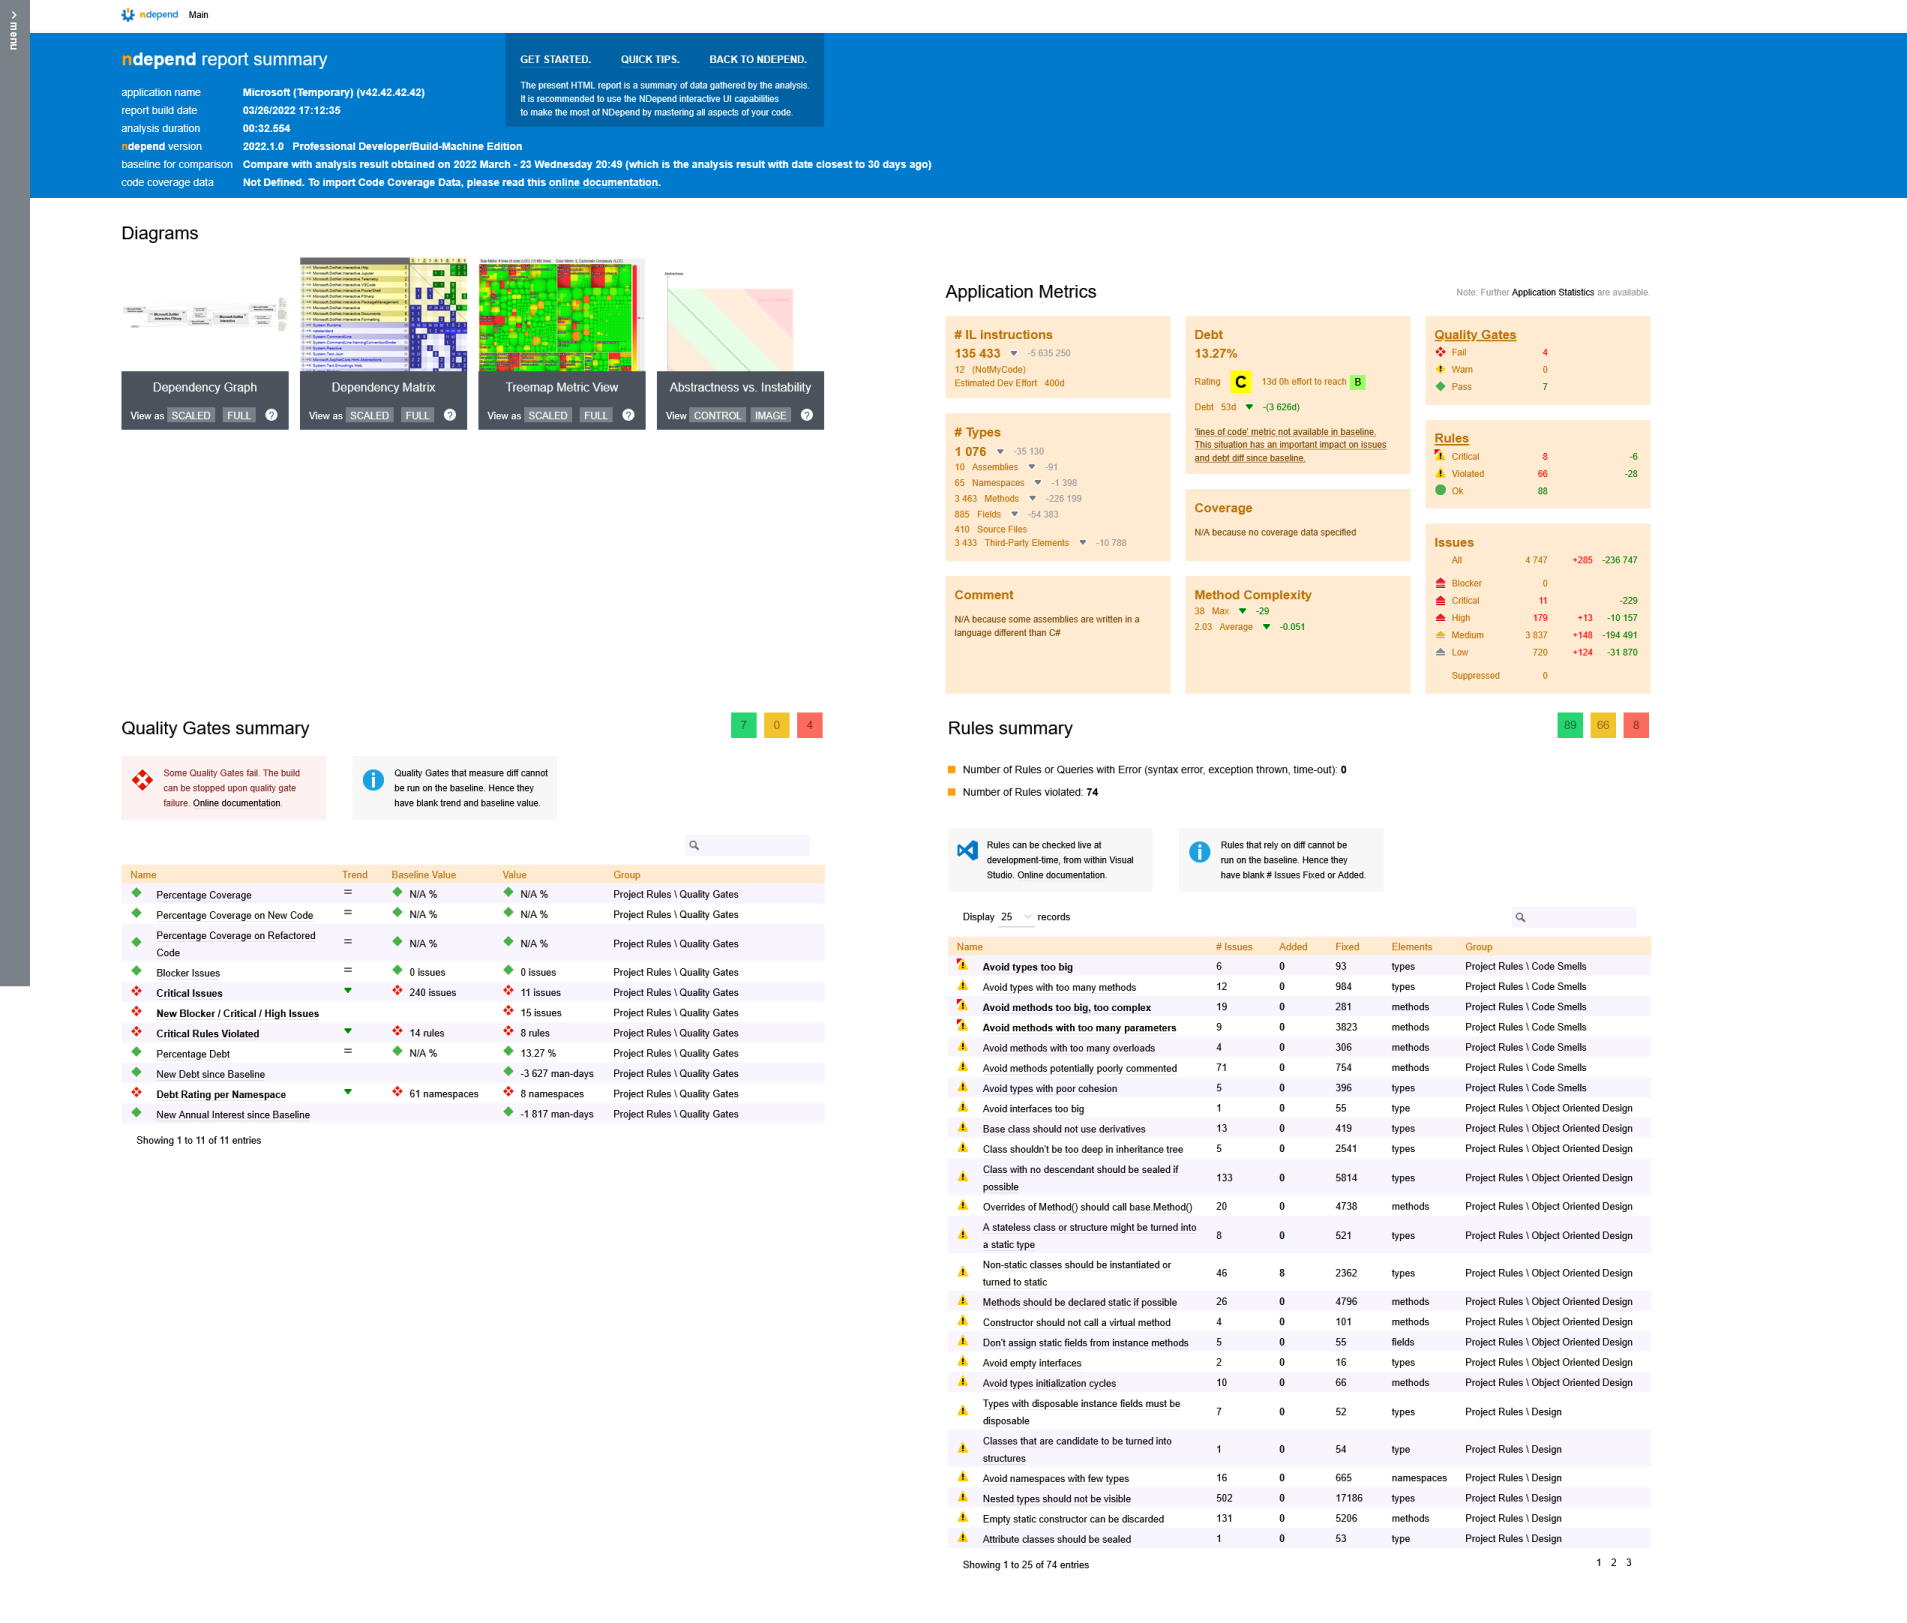
I find the real insights come with using the Visual NDepend application to drill into different parts of the analysis. Here’s the ‘Dashboard’ view for the project.

I tend to look at the Rules summary first. You can click on the number to the right of the rule status (e.g. the ‘8’ next to ‘Critical’), and this will then show the details of the 8 critical rule violations. You can now double-click on a rule to see where in the code this rule has been matched.
Once I’ve had a look at all the critical rule matches, then I’ll continue on to looking at the remaining rule violations.
It’s important to remember, NDepend is just a tool. It’s up to you to decide if a particular rule makes sense for your codebase. You might decide that a rule should be disabled, or you can even customise a rule to change the behaviour so it is more appropriate for your use case.
The new ILSpy integration could be useful for some. Unfortunately, it’s not a tool I use (I have the dotUltimate tools from JetBrains, so I tend to use dotPeek for decompiling).
Another nice enhancement is that analysis is now done out-of-process by default - whether you’re using Visual NDepend, or Visual Studio. This is a good thing, especially for Visual Studio. The more things that run in separate processes, the less chance something adversely affects Visual Studio.
A testament to the improved performance of NDepend is that it was quite tricky to take this screenshot showing the separate analysis process, as it had completed very quickly!

There are also some nice improvements to .NET 6 support, with better handling of top-level statements and record types.
Finally, the ability to export query results to HTML, XML or JSON (in addition to other formats) either through the UI, or through NDepend’s API could be really useful if you want to process the query results outside of NDepend. Maybe generate some custom reports that could be part of your continuous integration build pipeline.
In closing, if you’re wanting to analyse your .NET code and learn more about how it is structured, check out NDepend. I’ll try not to leave it so long until my next post on NDepend!
Disclosure: I received a complementary license for NDepend as a Microsoft MVP award recipient
-
Failed to renew Microsoft Certified: Azure Developer Associate
One of the traps with social media is that people tend to just post nice things. Or everyday things but with a filter applied to make it look better than it really is. But life is not always nice. Things don’t always work out the way you hoped. Some days are successful, other days not so much, and we don’t often hear about the latter.
So allow me to redress the balance on my blog by following up my recent post about passing the Microsoft exam AZ-400, with how I subsequently failed to renew my Microsoft Certified: Azure Developer Associate.
A lot of the newer certifications from Microsoft require an annual renewal. Rather than having to pay Prometric to sit another exam, instead, the renewal is hosted by Microsoft, doesn’t cost anything, has fewer questions and (importantly for me) you can retake the renewal test multiple times until you pass. You’re also still bound by a non-disclosure agreement.
I’d had the notification that my Azure Developer Associate certification needs to be renewed before 18th July (12 months since I first earned the certification).
The information about renewing the Microsoft Certified: Azure Developer Associate includes a summary of what will be tested:
- Create a long-running serverless workflow with Durable Functions
- Execute an Azure Function with triggers
- Choose the appropriate API for Azure Cosmos DB
- Optimize the performance of Azure Cosmos DB by using partitioning and indexing strategies
- Control authentication for your APIs with Azure API Management
To be honest, I kind of skimmed over that and just jumped straight in. Hey, I’d passed AZ-204 last year, so this should be easy, right?
I quickly discovered that I’d forgotten a lot of the things that were being asked. And in the end, not surprisingly, I failed.
In hindsight, looking back at that list of skills being measured, I think the problem is I haven’t actually been working with all of those technologies recently. Yes, I’ve been using Azure Functions, but not Durable Functions. I’ve been working with Cosmos DB, but just one aspect of it. Likewise, I haven’t done anything with API Management recently.
So yeah, that was disappointing. But if the point of the assessment is to validate my knowledge of the skills listed above, then a ‘fail’ is unfortunately accurate.
The good news in all this is that I can take the test again.
But also, as part of the screen shown at the end of the test, you’re provided with a customised list of learning material that you could review, based on how you went in each of the skill areas. So I’ve got some homework to do, then I’ll have another go.
Sometimes things don’t work out the way you’d hoped. Sometimes there’s nothing you can do to change that. But sometimes, you do get a second (or third) chance.
-
Passed AZ-400
I’m pleased to report that today I passed Microsoft exam AZ-400: Designing and Implementing Microsoft DevOps Solutions, which combined with AZ-201 that I took last year, now qualifies me for the Microsoft Certified: DevOps Engineer Expert certification.

View my verified achievement from Microsoft
The exam is quite broad in the content it covers:
- Develop an instrumentation strategy (5-10%)
- Develop a Site Reliability Engineering (SRE) strategy (5-10%)
- Develop a security and compliance plan (10-15%)
- Manage source control (10-15%)
- Facilitate communication and collaboration (10-15%)
- Define and implement continuous integration (20-25%)
- Define and implement a continuous delivery and release management strategy (10-15%)
Some areas I’d been working with for quite a few years, but others were new to me. To help prepare I used a couple of resources:
Nice to get that one dusted.

A blog of software development, .NET and other interesting things