-
Azure Functions - Enable specific functions for debugging

I’ve been using Azure Functions quite a bit. Indeed I’ve been recently speaking about them and the new support for .NET 5 and soon .NET 6!
Today I wanted to debug an Azure Function application, but I didn’t want all of the functions in the application to run (as some of them access resources that I don’t have locally). I discovered that you can add a
functionsproperty to yourhost.jsonfile to list the specific functions that should run.eg.
{
  "version": "2.0",
  "functions": [
    "function1",
    "function2"
  ]
}
But I really would prefer not to edit
host.jsonas that file is under source control and I’d then need to remember to not commit those changes. I’d much prefer not to have to remember too many things!There’s a section in the documentation that describes how you can also set these values in your
local.settings.json(which isn’t usually under source control). But the examples given are for simple boolean properties. How do you enter the array value?To find out, I temporarily set the values in
host.jsonand used theIConfigurationRoot.GetDebugView()extension method to dump out all the configuration to see how they were represented.Here’s the answer:
{
    "Values": {
        "AzureFunctionsJobHost__functions__0": "function1",
        "AzureFunctionsJobHost__functions__1": "function2"
    }
}
The
__0and__1represent each element in the array. With that in place when I run the Azure Function locally, onlyfunctionandfunction2will run. All others will be ignored. Just add additional properties (incrementing the number) to enable more functions. -
GitHub Action build not running on main/master
Maybe I could call this ‘The case of the Grumpy GitHub Action’?
I recently added the Auto-merge on a pull request workflow to my https://github.com/flcdrg/dependabot-lockfiles repository.
The idea being that when Dependabot creates a pull request to update a component, if you’ve set the Allow auto-merge option in the repository settings, then the pull request can be merged automatically assuming all requirements are met.
But I’d noticed after making that change, while builds were running correctly for pull requests, the merge commit didn’t have a corresponding build!
My first thought was had I made a mistake in one of the workflows? But they were working for pull requests. If there was a typo it should have shown up there.
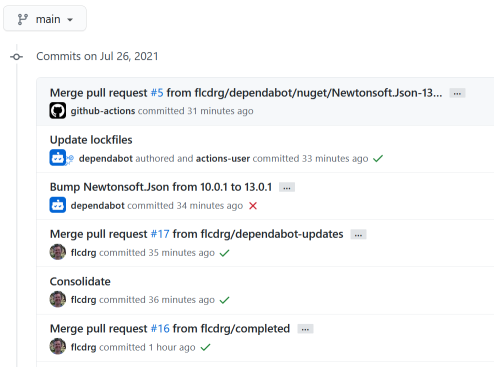
I then took a closer look at the builds that were working. Looking at the screenshot above, I’m expecting to see a green tick next to each merge commit (the commits labelled ‘Merged pull request’).
There’s ones for the two pull requests that I created myself (my GitHub username is ‘flcdrg’), but none for the most recent commit. And interestingly that merge commit says it’s committed by ‘github-actions’. Hmm.. I wonder if that’s significant?
It reminded me of something I’d read previously.
When you use the repository’s GITHUB_TOKEN to perform tasks on behalf of the GitHub Actions app, events triggered by the GITHUB_TOKEN will not create a new workflow run.
I began to form a hypothesis. The auto-merge is set by that workflow looks like this:
      - name: Enable auto-merge for Dependabot PRs
        run: gh pr merge --auto --merge "$PR_URL"
        env:
          PR_URL: ${{github.event.pull_request.html_url}}
          GITHUB_TOKEN: ${{secrets.GITHUB_TOKEN}}
It’s using the GitHub CLI to configure the pull request to enable auto-merge. What I did notice is that it’s passing through
GITHUB_TOKENas an environment variable. On reflection, that kind of makes sense as if you recall the merge commit was ‘committed’ by ‘github-actions’. I guess that’s the username that is associated with GITHUB_TOKEN.I wondered whether changing the token might help.
I have a personal access token that I’d previously created with repository access. I added it as a secret named
PAT_REPO_FULLto this repository and updated the workflow to use${{secrets.PAT_REPO_FULL}}.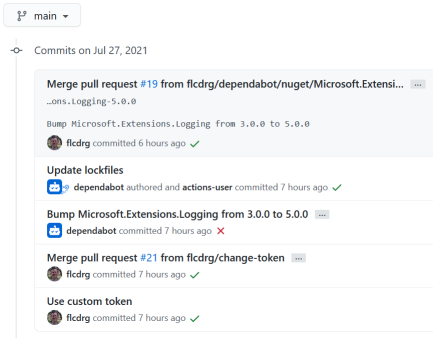
The next Dependabot pull request then gets merged and this time it shows the committer as me (as the token was for my account), and success, the build now runs correctly!
-
UniFi Controller on a Synology
I’ve been using Ubiquiti’s UniFi wireless access points for a few years around home. Until now I’ve only used the UniFi Controller application on an as-need basis (when setting the configuration or installing updates). But having the Synology DS1621xs on hand gives me an opportunity to try out its Docker support and in particular being able to run UniFi Controller continuously in a Docker container on the Synology.
I say ‘UniFi Controller’ but I gather that as of version 6.2 they’ve renamed it to ‘UniFi Network Application’. Same software, just an updated name.
Installing Docker on the Synology
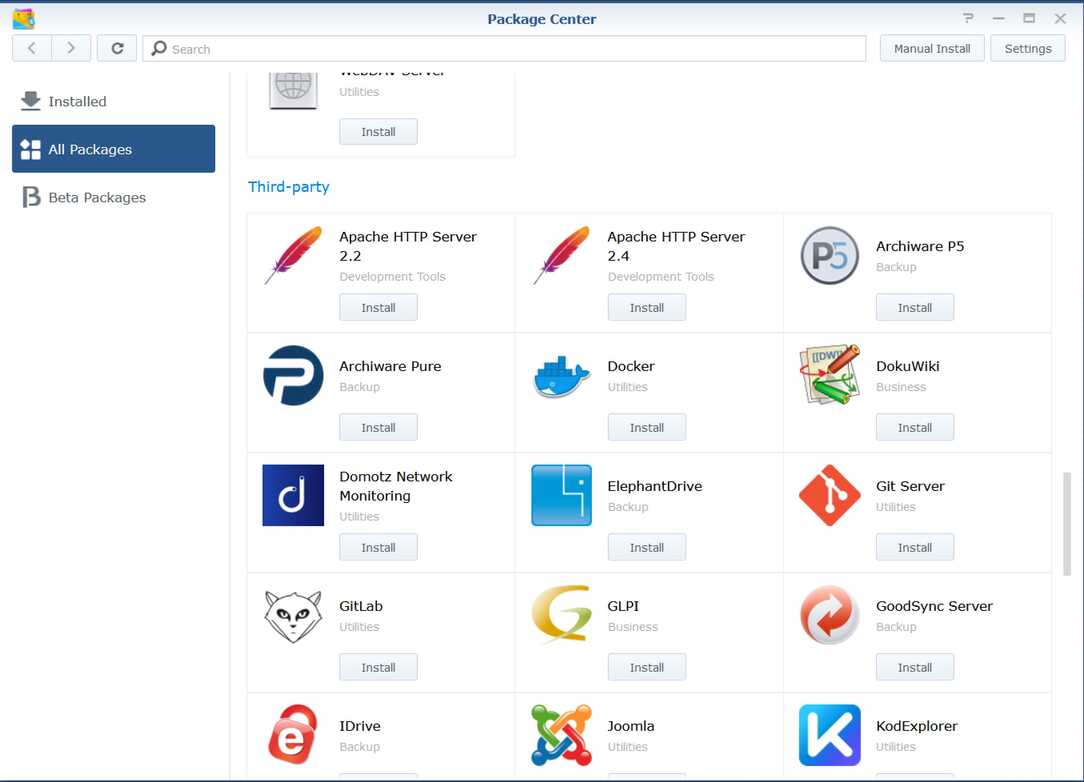
- Open the Package Center
- Select All Packages and scroll down to the Third-party section
-
In the ‘Docker’ package click Install
- When installation has completed, the button changes to Open. Click on it to open the Docker UI.
- The first time you open Docker a welcome screen message is displayed. Select Don’t show this again and close the message.
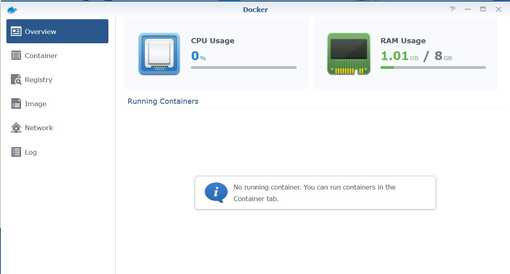
- Docker is now running on your Synology
Installing UniFi Controller
-
Select the Registry page.
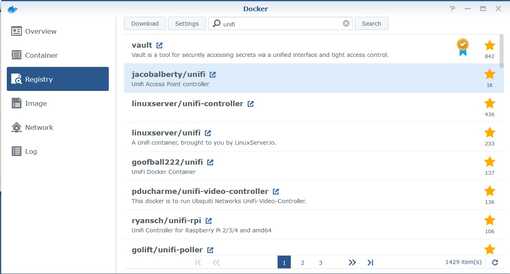
- In the search bar enter
unifiand click Search. -
Double-click on the jacobalberty/unifi image.
- You now need to select a tag. Review the options to understand what the different tag values mean. (Choose latest to go with the latest stable version).
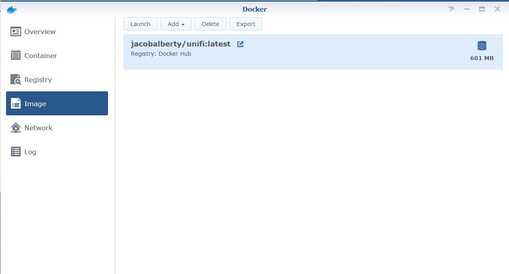
- The image is now being downloaded.
- Go to the Image page.
- When the download has completed, the Launch button will be enabled. Click on Launch.
-
If desired, you can customise the Container Name.
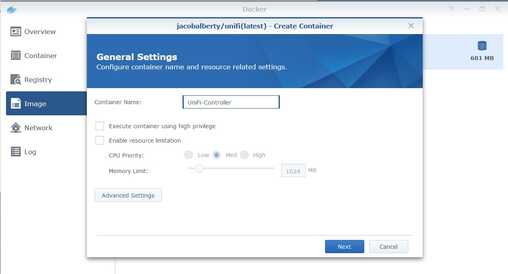
- Select Enable resource limitation.
- Click on Advanced Settings.
-
Select Enable auto-restart.
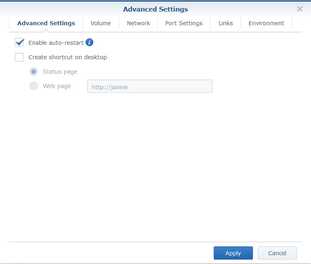
- Select Volume tab and click Add Folder.
- Select the docker folder and then click on Create Folder.
- Enter
unifiand click OK. - Click Select.
-
In the Mount path column, enter
/unifi. (See Volumes for volumes used by this image).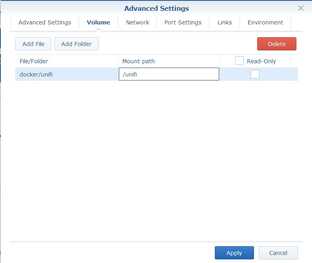
-
Select Network tab and select use the same network as Docker Host.

- It is recommended to not run this image as root. Go to the Environment tab.
- Change the value of RUNAS_UID0 to
false. -
As we will be binding to a port > 1024, we can also set the value of BIND_PRIV to
false.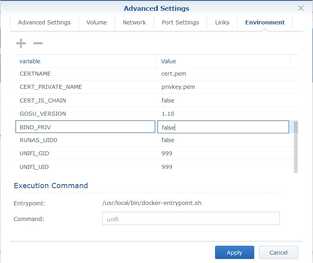
- Click Apply.
- Click Next.
-
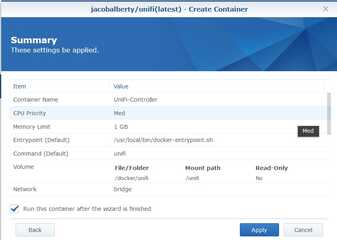
Review the Summary details, then if they look correct click Apply.
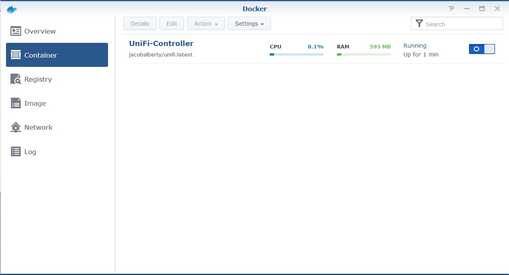
- Select the Container page.
-
You can see the UniFi image is now running in a container.
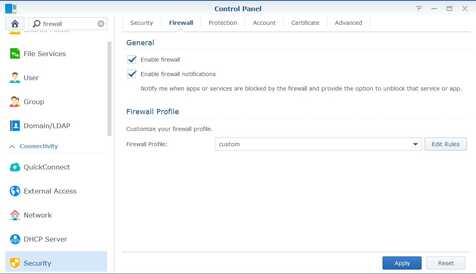
If you have the Synology Firewall enabled, you will need to allow access to the application, the port needs to be opened in the Synology Firewall. In my case because I hadn’t exposed the Synology directly to the Internet, the firewall was disabled. I figured it was probably a good idea to enable the firewall.
From the Ports documentation there are a number of TCP and UDP ports to select.
- Go to the Synology main menu and select Control Panel.
- Select Advanced Mode and click on Security.
-
In the Firewall tab, select the custom profile and click Edit Rules.
- Click Create and under Ports select Custom and then click on Custom.
- Ensure Protocol is set to TCP.
-
In the Ports field enter
8080,8443,8843,8880,6789.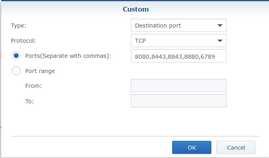
- Click OK, and OK
- Click Create and under Ports select Custom and then click on Custom.
- In Protocol select UDP.
-
In the Ports field enter
3478.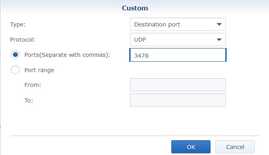
- Click OK, and OK
- Click OK to save the firewall profile changes.
- If it is highlighted, click Apply to save firewall changes.
Accessing UniFi Controller
- Navigate to https://your-synology-box:8443/ (replacing
your-synology-boxwith the DNS name of your Synology). - As the UniFi Controller comes with a self-signed TLS certificate you’ll need to tell your browser to trust the certificate.
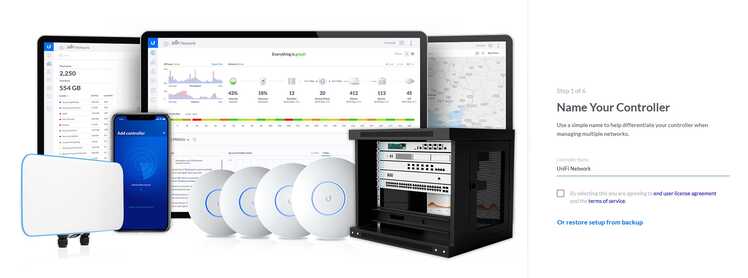
- After this you should see the UniFi start-up wizard. If this is the first time you’ve used the software, proceed through the wizard following the steps. Alternatively (like me) if you’re migrating from another installation you can click the or restore setup from backup to upload a back from the old system.
And with that you should be good to go!
Final thoughts
The ability to run Docker containers on a Synology is a great advantage. The UI is easy to use but flexible enough to allow you to run useful Docker images. Do check out my review of the DS1621xs, and check it out on amazon.com or amazon.com.au
Acknowledgements
- There are quite a few different Docker images for running UniFi. Thanks to Simon Waight for the suggestion of https://github.com/jacobalberty/unifi-docker.
- Ruud’s instructions which formed the basis of the steps I followed here.

A blog of software development, .NET and other interesting things